


368
Chapter 33:
Adding Cutlines to Artwork
"white." In some cases, a background area of an image that appears white to the eye may
actually be gray or off-white, so you might get a cut line or clipping path around that area. The
White Threshold allows you to control the balance between "white" and "non-white" colors.
To add a cut line, clipping path, or both to an image
1
In Composer, select an image with either the Selection or Color Selection pointer.
2
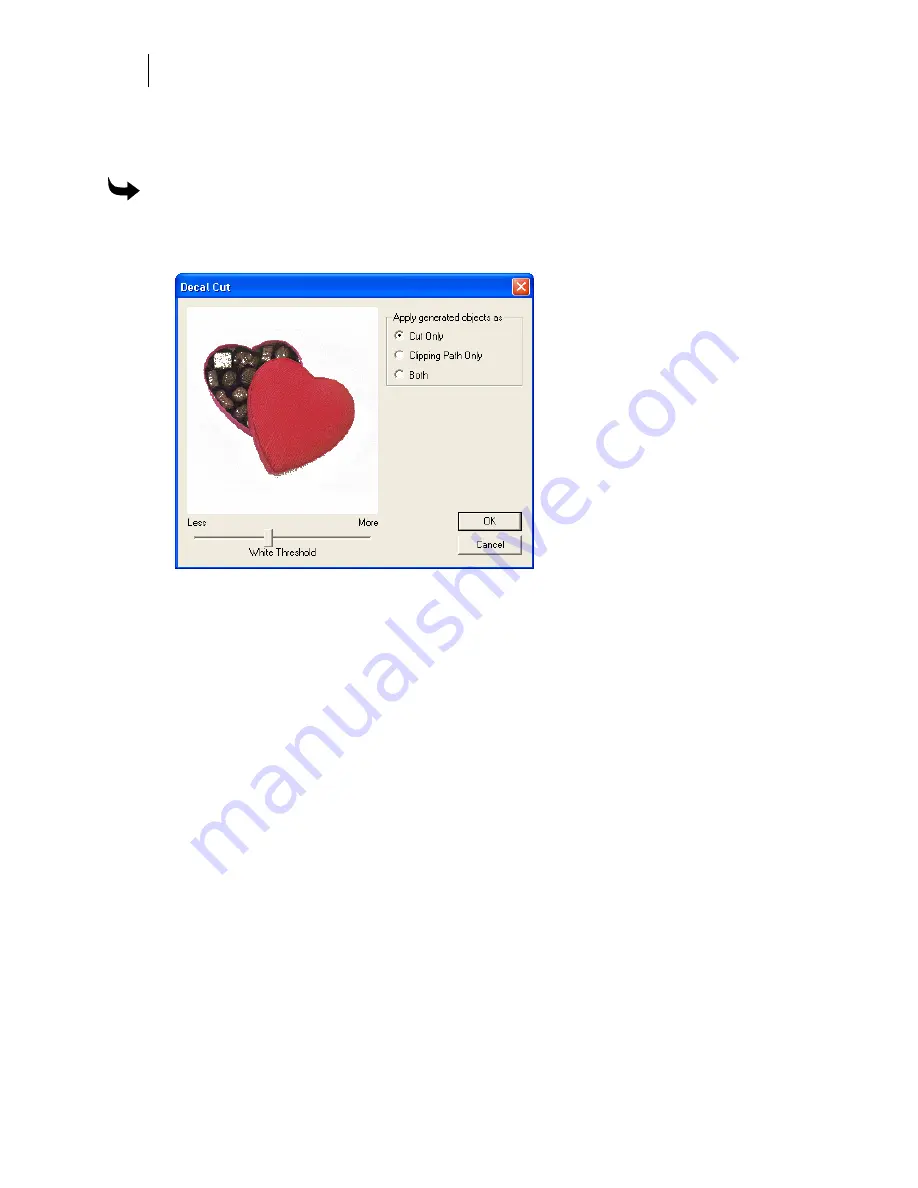
Click Tools > Generate Decal Cut to open the Decal Cut dialog box.
3
Choose Cut Only, Clipping Path Only, or Both.
4
Adjust the White Threshold to set how many colors are interpreted as "white" or "non-
white."
5
Click OK. The decal cut results are placed directly on top of the originals as cut only,
clipping path, or both a clipping path and a cut shape. The decal cut results are
grouped, making it easier to isolate them.
6
Once decal cut results are generated, you can:
♦
Delete the results, adjust the White Threshold setting, and regenerate a decal cut
or clipping path.
♦
Use the Detail Edit Smooth tool or use Shape > Thin to reduce the points and
make the decal cut results less jagged.
♦
Remove any extraneous cut lines or clipping paths using Ctrl+click to select
individual shapes and delete them.
♦
Use Tools > Outline with a positive offset value and Keep Originals off to create
a gap between the print objects and decal cut.
♦
Use Tools > Outline with a negative offset value and Keep Originals off to create
a cut line that is slightly smaller than the print objects to reduce print to cut
registration gaps between the print objects and decal cut results.
Summary of Contents for OMEGA CP
Page 16: ......
Page 20: ......
Page 36: ......
Page 42: ...28 Chapter 4 Saving Files...
Page 44: ......
Page 68: ......
Page 92: ......
Page 96: ...82 Chapter 7 Selecting Elements of the Design...
Page 98: ......
Page 132: ......
Page 146: ......
Page 154: ......
Page 162: ......
Page 182: ......
Page 188: ......
Page 204: ......
Page 234: ......
Page 238: ......
Page 244: ......
Page 254: ...240 Chapter 22 Strokes Adding Print Thickness to the Outline of Objects...
Page 256: ......
Page 282: ......
Page 320: ......
Page 346: ......
Page 358: ......
Page 380: ......
Page 386: ......
Page 418: ......
Page 422: ......
Page 452: ......
Page 462: ......
Page 476: ......
Page 512: ...498 Chapter 44 Creating Special Effects...
Page 514: ......
Page 520: ......
Page 530: ......
Page 540: ......
Page 552: ......
Page 564: ......
Page 606: ......
Page 614: ...600 Chapter 51 Sending the Job to a Plotter or Printer...
Page 694: ......
Page 700: ......
Page 734: ......
Page 748: ......
Page 760: ...746...
Page 776: ......
Page 786: ......
Page 790: ......


