


32
Chapter 5:
Setting Up Composer's Work Surface
Displaying information
In Composer, you have the choice to display or hide the status bar, the rulers, and warnings.
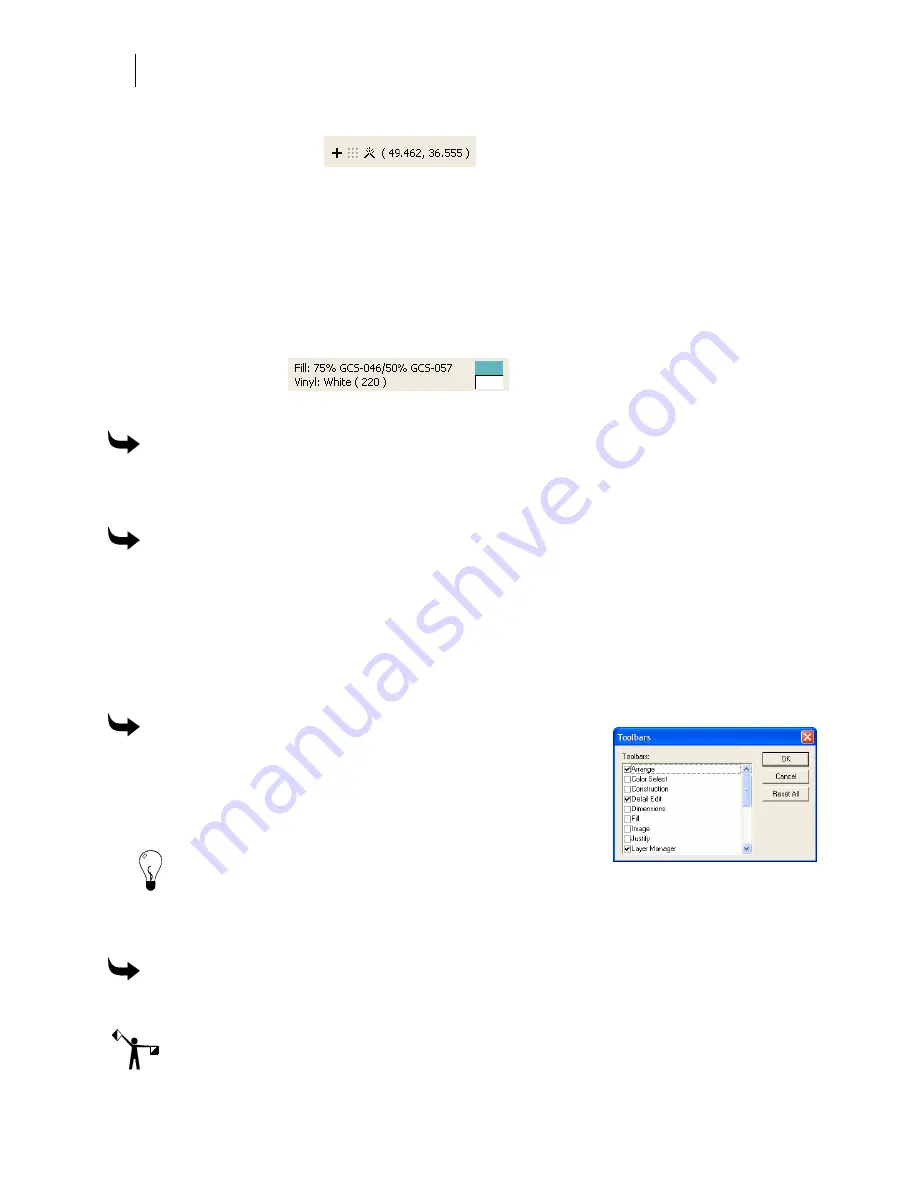
In most cases, you will want to see the status bar information which includes:
♦
X and Y coordinates of the pointer
♦
The tool being used
♦
Icons for constraints that are turned on (On Axis, Grid, and Snap to Guidelines shown
left to right in the illustration)
♦
Measurements related to the tool being used
♦
Current style
Set the display of this information in Tools > Options.
To display the status bar and/or rulers
1
Click Tools > Options > View.
2
Turn on the Status Bar and/or Rulers check boxes.
To display warning message boxes
1
Click Tools > Options > General.
2
Turn on the Display Warning Message Boxes check box.
Opening, displaying, and moving toolbars
Toolbars are flyouts, dockable, and moveable. To set the preference of toolbars you want to
display when Composer opens, click Tools > Options > View and turn on the toolbars.
To open and display toolbars
1
Click View > Toolbars to open the Toolbars dialog box.
2
Turn on the toolbars to display.
3
Click OK.
Tip: If the Toolbox toolbar is open, click and hold on the icon or
click the triangle in the lower right corner of the icon to open the flyout toolbar.
Tip: You can also open the Toolbars dialog box by right-clicking in an empty area of a toolbar
and selecting View Toolbars.
To move a toolbar
Click the toolbar and drag it to a new location.
Note: Toolbars do not resize when they are moved. If a toolbar is dragged to a location that
does not have room for it, the end of the toolbar may be off the screen.
Summary of Contents for OMEGA CP
Page 16: ......
Page 20: ......
Page 36: ......
Page 42: ...28 Chapter 4 Saving Files...
Page 44: ......
Page 68: ......
Page 92: ......
Page 96: ...82 Chapter 7 Selecting Elements of the Design...
Page 98: ......
Page 132: ......
Page 146: ......
Page 154: ......
Page 162: ......
Page 182: ......
Page 188: ......
Page 204: ......
Page 234: ......
Page 238: ......
Page 244: ......
Page 254: ...240 Chapter 22 Strokes Adding Print Thickness to the Outline of Objects...
Page 256: ......
Page 282: ......
Page 320: ......
Page 346: ......
Page 358: ......
Page 380: ......
Page 386: ......
Page 418: ......
Page 422: ......
Page 452: ......
Page 462: ......
Page 476: ......
Page 512: ...498 Chapter 44 Creating Special Effects...
Page 514: ......
Page 520: ......
Page 530: ......
Page 540: ......
Page 552: ......
Page 564: ......
Page 606: ......
Page 614: ...600 Chapter 51 Sending the Job to a Plotter or Printer...
Page 694: ......
Page 700: ......
Page 734: ......
Page 748: ......
Page 760: ...746...
Page 776: ......
Page 786: ......
Page 790: ......


