396
Chapter 36:
Digitizing Artwork
5
When prompted digitize the design’s lower left corner using button 1. Be sure the
point is outside the bottom and leftmost points of the design.
6
At the next message prompt digitize the design’s upper right corner using button 1. Be
sure the point is outside the top and rightmost points of the design.
Note: After you digitize the upper right corner, the digitizing marks will disappear
from the Composer workspace.
Now that the baseline and frame of the design are digitized, you can begin digitizing shapes.
Digitizing the fleur-de-lis
The procedures and diagrams that follow show points marked for digitizing and include the
puck instructions for each point. On your design, mark the shape points with button numbers
as shown before you begin to digitize.
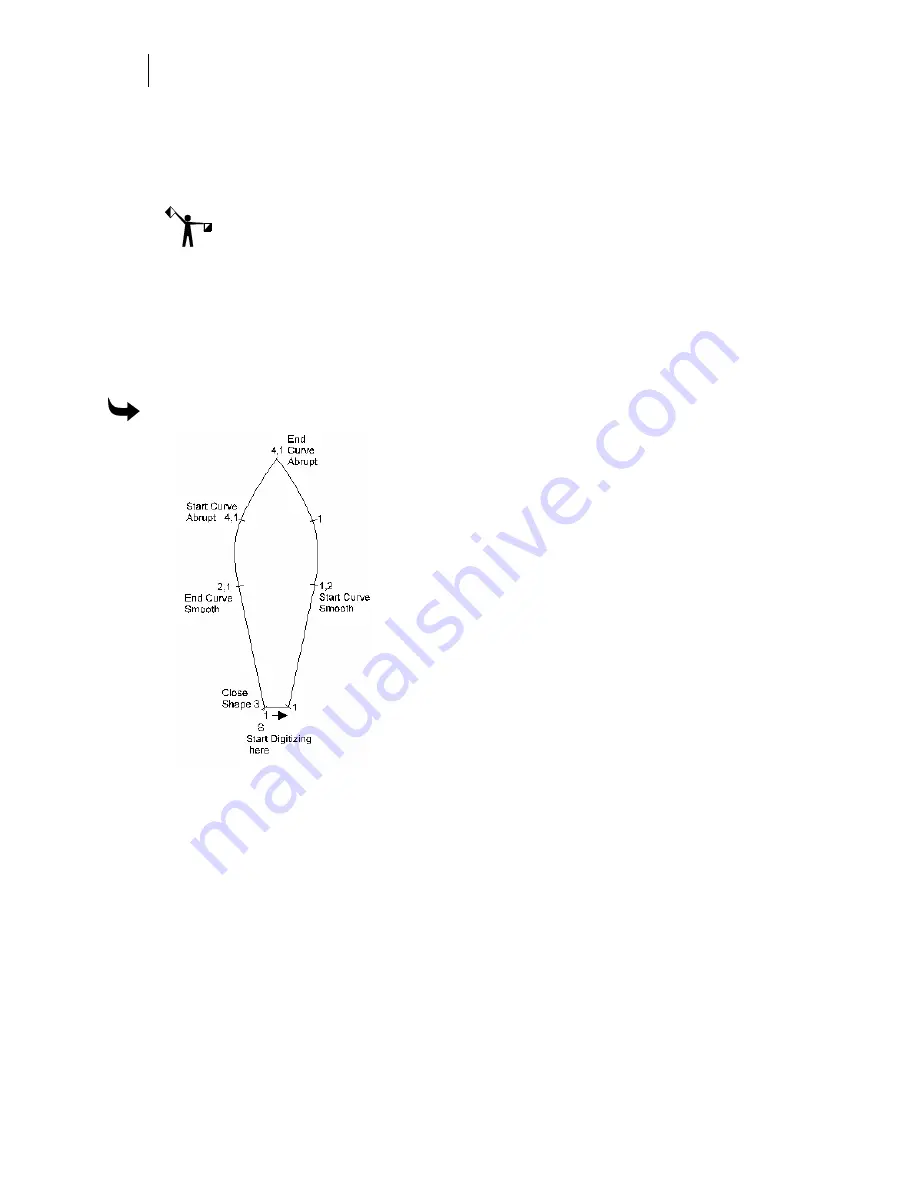
To digitize the center petal
Center Petal
1
Position the puck over the point of the shape labeled with the S and digitize the first
point with button 1.
2
Move the puck to the next point in the direction indicated by the arrow and click
button 1.
3
To make the next straight line segment click button 1 again.
4
The next point marks the beginning of a smooth curve. Turn on the Start Curve
Smooth by clicking button 2 (F11) and digitize the point on the curve by clicking
button 1.
5
Digitize the points along the curve segment with button 1 until reaching the point at
the top of the shape. Click button 4, End Curve Abrupt (F12), and then digitize the
point at the top of the shape with button 1.
Summary of Contents for OMEGA CP
Page 16: ......
Page 20: ......
Page 36: ......
Page 42: ...28 Chapter 4 Saving Files...
Page 44: ......
Page 68: ......
Page 92: ......
Page 96: ...82 Chapter 7 Selecting Elements of the Design...
Page 98: ......
Page 132: ......
Page 146: ......
Page 154: ......
Page 162: ......
Page 182: ......
Page 188: ......
Page 204: ......
Page 234: ......
Page 238: ......
Page 244: ......
Page 254: ...240 Chapter 22 Strokes Adding Print Thickness to the Outline of Objects...
Page 256: ......
Page 282: ......
Page 320: ......
Page 346: ......
Page 358: ......
Page 380: ......
Page 386: ......
Page 418: ......
Page 422: ......
Page 452: ......
Page 462: ......
Page 476: ......
Page 512: ...498 Chapter 44 Creating Special Effects...
Page 514: ......
Page 520: ......
Page 530: ......
Page 540: ......
Page 552: ......
Page 564: ......
Page 606: ......
Page 614: ...600 Chapter 51 Sending the Job to a Plotter or Printer...
Page 694: ......
Page 700: ......
Page 734: ......
Page 748: ......
Page 760: ...746...
Page 776: ......
Page 786: ......
Page 790: ......


