


374
Chapter 34:
Using Clipping Paths
♦
Any shape, text, small text or image can be clipped.
♦
Any single object can be clipped by only one clipping path container.
♦
Any shape, text, small text or image can be part of a clipping path container. For small
text, the outlines (glyphs) of the characters are used to define the container; for images,
the cropping rectangle is used.
♦
Only the path of an object is used to define a clipping path container. All other
attributes (such as fill or stroke) are ignored.
♦
To add a cut line to a clipping path you must assign a cut to the object being clipped
rather than the clipping path container. After Make Clipping Path, the cut will be
assigned to clipped object.
♦
A single member of a group or combine cannot be used in a clipping path set. It must
first be ungrouped or uncombined.
Rules for working with clipping paths
After creating a clipping path the following rules apply:
♦
Clipping paths can be edited using Detail Edit tools.
♦
You can select and move the clipping path container or clipped object after the
clipping path is created. Group the clipping path set to maintain position.
♦
You can Repeat or Merge a clipping path.
♦
You can rotate, slant and flip clipping paths, but if the clipping path set contains an
image, only the non-image objects are affected.
♦
You can not use Outline, Distortion, Warp, Shadow, or Effects on clipping paths.
♦
You can easily select the clipping path container or clipped object using the Layer
Manager.
♦
Release the clipping path by selecting it and using Shape > Release Clipping Path.
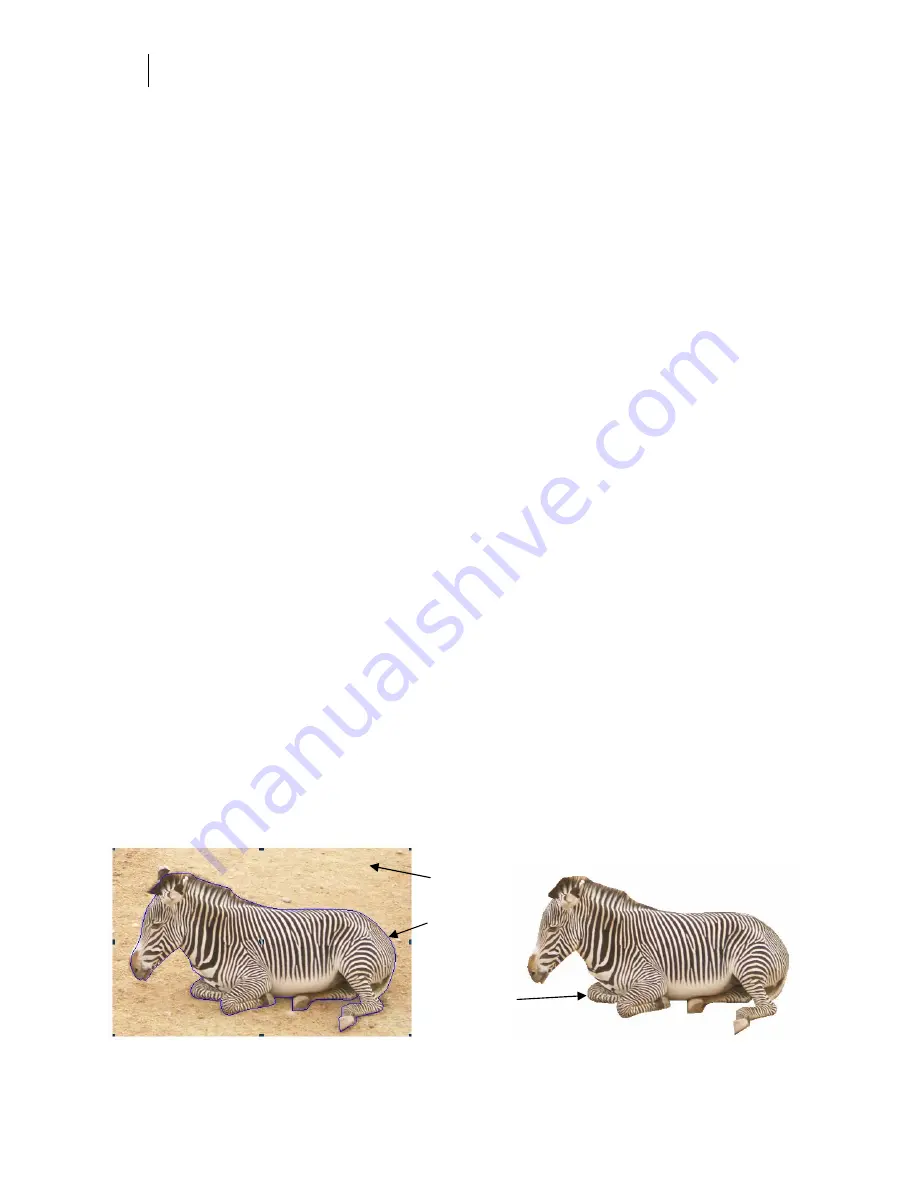
Images and clipping paths
You can use an image as the object to be clipped or as the clipping path. When an image is used
as a clipping path container, the cropping rectangle defines the path.
Image to be
clipped
Clipping path
container (in
this example, a
vector object)
Clipped object
After making a clipping path you can layer the clipped object on an image or other object.
Summary of Contents for OMEGA CP
Page 16: ......
Page 20: ......
Page 36: ......
Page 42: ...28 Chapter 4 Saving Files...
Page 44: ......
Page 68: ......
Page 92: ......
Page 96: ...82 Chapter 7 Selecting Elements of the Design...
Page 98: ......
Page 132: ......
Page 146: ......
Page 154: ......
Page 162: ......
Page 182: ......
Page 188: ......
Page 204: ......
Page 234: ......
Page 238: ......
Page 244: ......
Page 254: ...240 Chapter 22 Strokes Adding Print Thickness to the Outline of Objects...
Page 256: ......
Page 282: ......
Page 320: ......
Page 346: ......
Page 358: ......
Page 380: ......
Page 386: ......
Page 418: ......
Page 422: ......
Page 452: ......
Page 462: ......
Page 476: ......
Page 512: ...498 Chapter 44 Creating Special Effects...
Page 514: ......
Page 520: ......
Page 530: ......
Page 540: ......
Page 552: ......
Page 564: ......
Page 606: ......
Page 614: ...600 Chapter 51 Sending the Job to a Plotter or Printer...
Page 694: ......
Page 700: ......
Page 734: ......
Page 748: ......
Page 760: ...746...
Page 776: ......
Page 786: ......
Page 790: ......


