


467
Tip: You can access the Warp command from the Tools menu, on the Tools toolbar, or by
selecting an object and right-clicking to display the context menu.
3
Click No to open the GSP Warp dialog box.
4
Choose a standard envelope from the toolbar.
5
Use the handles to warp the object.
6
The object appears warped, but the envelope is not displayed. To display the envelope
in Warp as well as on the work surface, click on the envelope in the toolbar.
7
Click OK to return the warp to the work surface. To remove the warp, Smart Edit and
click Warp Off.
Detail editing a warp
Regardless of whether you create a warp in a custom envelope or a standard envelope, you can
detail edit the warp to create an infinite number of warps.
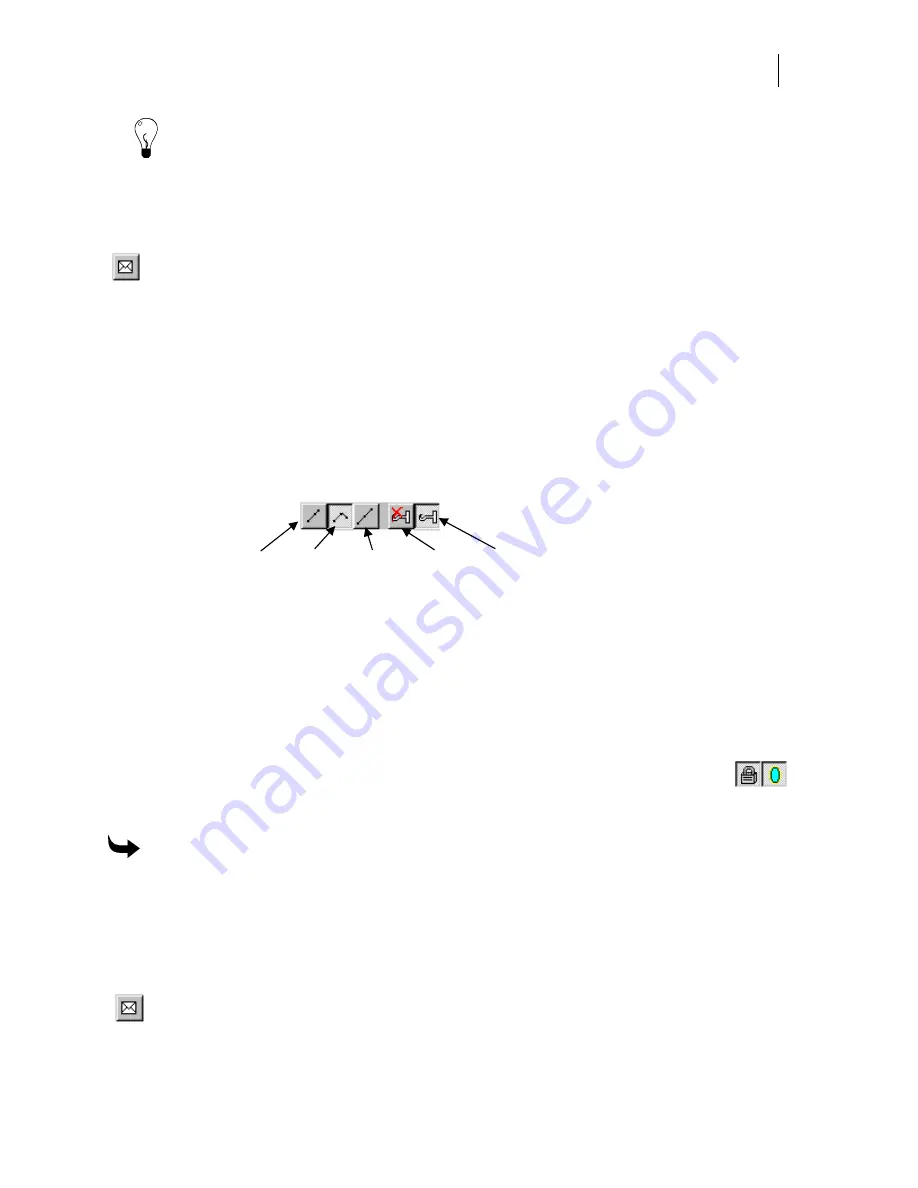
To open the detail editing tools for a custom envelope, click on the Move Point hook tool. This
makes the detail editing tools available.
Smooth Sharp Symmetrical Turn
off Move
Curves Curves Curves
Editing
Point
♦
Smooth
curves provide a smooth transition between curves.
♦
Sharp
curves provide a sharp transition between curve segments.
♦
Symmetric
curves provide equal handle movement on either side of an editing point.
To open the detailed editing tools for a standard envelope, just choose a standard envelope
(other than slide corner point, horizontal slant, vertical slant, or draw). The Lock Points and
Mirror Points tools are available. Because these tools act differently depending on the envelope,
you should experiment to achieve the effect that you want.
♦
Lock Points
restricts some detail edit points depending on the envelope.
♦
Mirror Points
moves an opposite point the same distance and direction
as the point you are moving.
Lock Mirror
Points Points
To detail edit a warp
1
Open the Warp dialog box.
2
Choose a standard envelope or click Move Point.
3
Detail edit the warp.
4
Click Turn Off Envelope Editing (next to Move Point hook tool).
5
The object appears warped, but the envelope is not displayed. To display the envelope
in Warp as well as on the work surface, click on the envelope in the toolbar.
Summary of Contents for OMEGA CP
Page 16: ......
Page 20: ......
Page 36: ......
Page 42: ...28 Chapter 4 Saving Files...
Page 44: ......
Page 68: ......
Page 92: ......
Page 96: ...82 Chapter 7 Selecting Elements of the Design...
Page 98: ......
Page 132: ......
Page 146: ......
Page 154: ......
Page 162: ......
Page 182: ......
Page 188: ......
Page 204: ......
Page 234: ......
Page 238: ......
Page 244: ......
Page 254: ...240 Chapter 22 Strokes Adding Print Thickness to the Outline of Objects...
Page 256: ......
Page 282: ......
Page 320: ......
Page 346: ......
Page 358: ......
Page 380: ......
Page 386: ......
Page 418: ......
Page 422: ......
Page 452: ......
Page 462: ......
Page 476: ......
Page 512: ...498 Chapter 44 Creating Special Effects...
Page 514: ......
Page 520: ......
Page 530: ......
Page 540: ......
Page 552: ......
Page 564: ......
Page 606: ......
Page 614: ...600 Chapter 51 Sending the Job to a Plotter or Printer...
Page 694: ......
Page 700: ......
Page 734: ......
Page 748: ......
Page 760: ...746...
Page 776: ......
Page 786: ......
Page 790: ......


