


AR-BC320 PRINTER CONTROLLER SECTION 14 - 10
6) Default paper type for bypass tray
This program is used to set the default paper type for paper
loaded in the bypass tray in printer mode.
"NONE" (a default paper type is not selected), "PLAIN", "HEAVY
PAPER", or ''TRANSPARENCY" can be selected. If "HEAVY
PAPER" is selected, select "HEAVY PAPER 1" or "HEAVY
PAPER 2". If "TRANSPARENCY" is selected, select "SPEED
MODE" or "QUALITY MODE".
The factory default setting is "NONE".
7) Job queuing
This program is used to allow new print jobs to be received while a
print job is in progress. Normally the program is enabled so that
new print jobs can be received.
If the checkmark is removed from the [JOB QUEUING] checkbox,
new print jobs are not received while a print job is in progress.
Enable or disable this program to suit your needs.
b. Interface settings
These programs are used to control data transmitted to the paral-
lel port or network port of this printer.
1) Port switching method
The machine can use the three ports shown below for printing.
This program is used to select when switching between ports will
take place. "SWITCH AT END OF JOB" or "SWITCH AFTER I/O
TIMEOUT" can be selected. When "SWITCH AT END OF JOB" is
selected, the port will be automatically selected after each print job
is completed. When "SWITCH AFTER I/O TIMEOUT" is selected,
the port will be automatically selected if the time set in the I/O Tim-
eout program elapses.
• Parallel port
• USB port
• Network port
2) Enable parallel port
This program is used to enable or disable printing from the parallel
port.
Default setting: Enable
3) Enable USB port
This program is used to enable or disable printing from the USB
port.
Default setting: Enable
4) Enable network port
This program is used to enable or disable printing from the net-
work port.
Default setting: Enable
5) I/O timeout
This program is used to set the length of time to wait for an I/O to
complete a job on the parallel port or the network port. If the data
stream to the port does not transmit data for a length of time
exceeding the timeout, the job will cancel and the next job will start
processing.
The I/O timeout setting is used to set the amount of time after
which an I/O timeout will occur when waiting for print data.
Default setting: 20 seconds
NOTE: The allowable range of the time is 1 to 999 seconds.
c. Network settings
These programs are set when this product is used as a network
printer.
After you complete the setting for one program, you must exit the
key operator programs, turn off the main switch, wait briefly, and
then turn on the main switch again before any other programs can
be set. The program that was set will be effective after the power
is turned on.
NOTE: For setting and modification of "Network settings", be sure
to consult with the network administrator.
1) IP address setting
When using this product in a network that uses the TCP/IP proto-
col, use this program to set the IP address (IP address, IP subnet
mask, and IP gateway) of this product. The program is set to
ENABLE DHCP by factory default setting, which obtains the IP
address setting automatically. When using this product on a TCP/
IP network, be sure to turn on the "Enable TCP/IP" program
below.
2) Enable TCP/IP
When using this product in a network that uses the TCP/IP proto-
col, set this program. Also set the IP address using the program
"IP address setting" above.
Default setting: Enable
3) Enable NetWare
When using this product in a network that uses the NetWare proto-
col, set this program.
Default setting: Enable
4) Enable NetBEUI
When using this product in a network that uses the NetBEUI proto-
col, set this program.
Default setting: Enable
5) Reset the NIC
This program is used to reset all setting items of NIC (Network
Interface Card, namely Print Server Card) of this product to the
factory default settings.
NOTE: If any of the [NETWORK SETTINGS] were changed prior
to execution of this program, you must turn off the main
switch after exiting the key operator program, wait briefly,
and then turn on the main switch to make the factory
default settings take effect.
d. Color adjustments
This program is used to automatically adjust the color tone of each
color (cyan, magenta, yellow, and black).
1) Auto color calibration
The Auto Color Calibration program enables automatic color gra-
dation correction when the color is off.
NOTE: The color gradation may not be sufficiently corrected after
one correction cycle. If so, execute the program again.
When the [AUTO COLOR CALIBRATION] key is touched, the fol-
lowing display will appear.
After the [EXECUTE] key is touched and a test patch printed, a
message appears asking you to begin automatic adjustment.
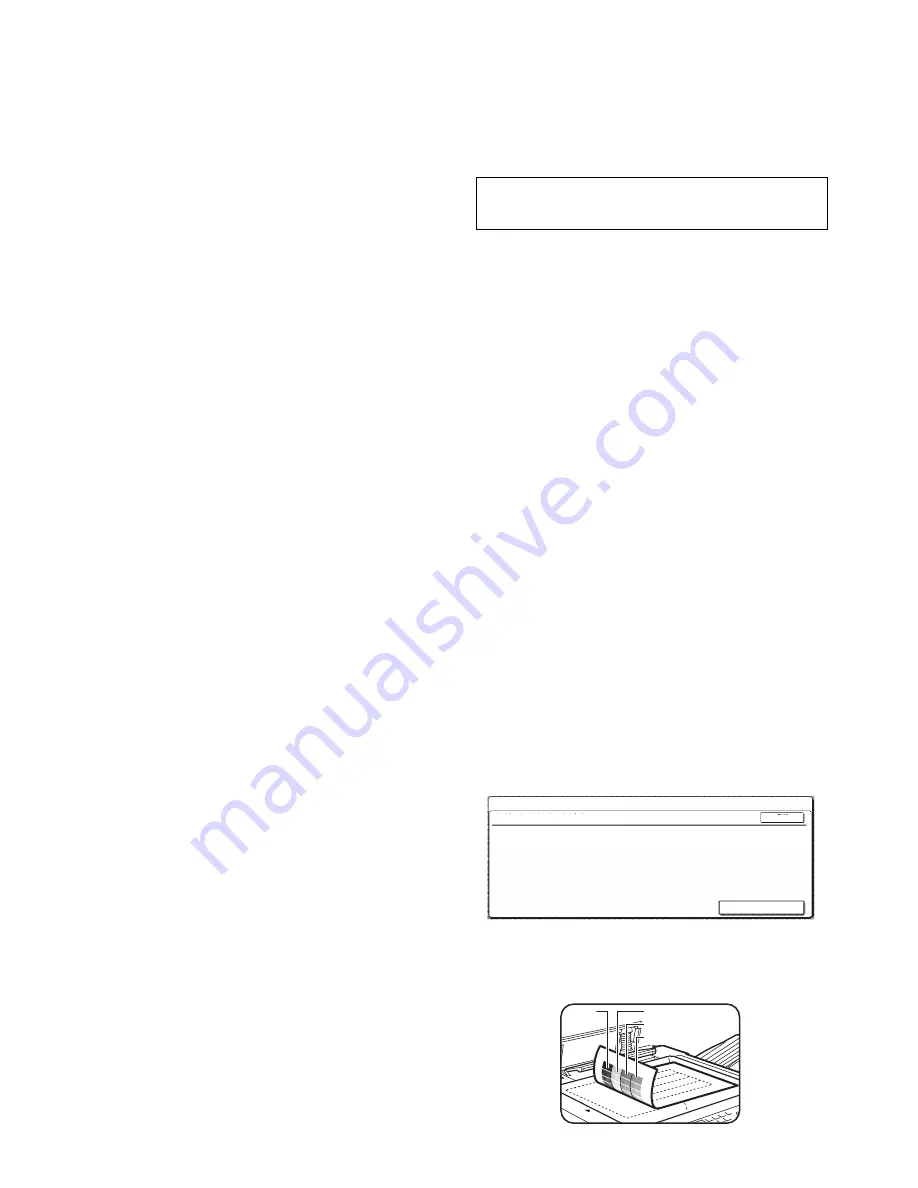
Place the test patch on the document glass as shown below and
touch the [EXECUTE] key.
If DHCP is used, the IP address assigned to the machine may
be changed automatically on occasion.
If this happens, printing will not be possible.
KEY OPERATOR PROGRAMS
OK
AUTO COLOR CALIBRATION
USE 11"X17" OR A3 PAPER FOR THIS ADJUSTMENT.
PRESS [EXECUTE] TO PRINT THE TEST PATCH.
EXECUTE
Cyan
Magenta
Yellow
Black
Summary of Contents for AR-BC320
Page 340: ...Memo ...
Page 341: ...Memo ...