Chapter 9
Page no. 1108
JC-DR-A-142.fm
GE Healthcare
Senographe DS
Revision 1
Service Information and Procedures Class A 2385072-16-8EN
Job Card D/R A142 - Detector Power Supply
6
PROCEDURE
6-1
Disassembly of Power Supply
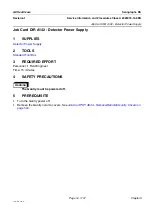
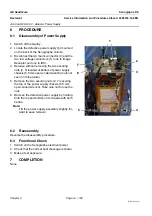
1. Switch off the Gantry.
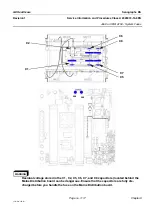
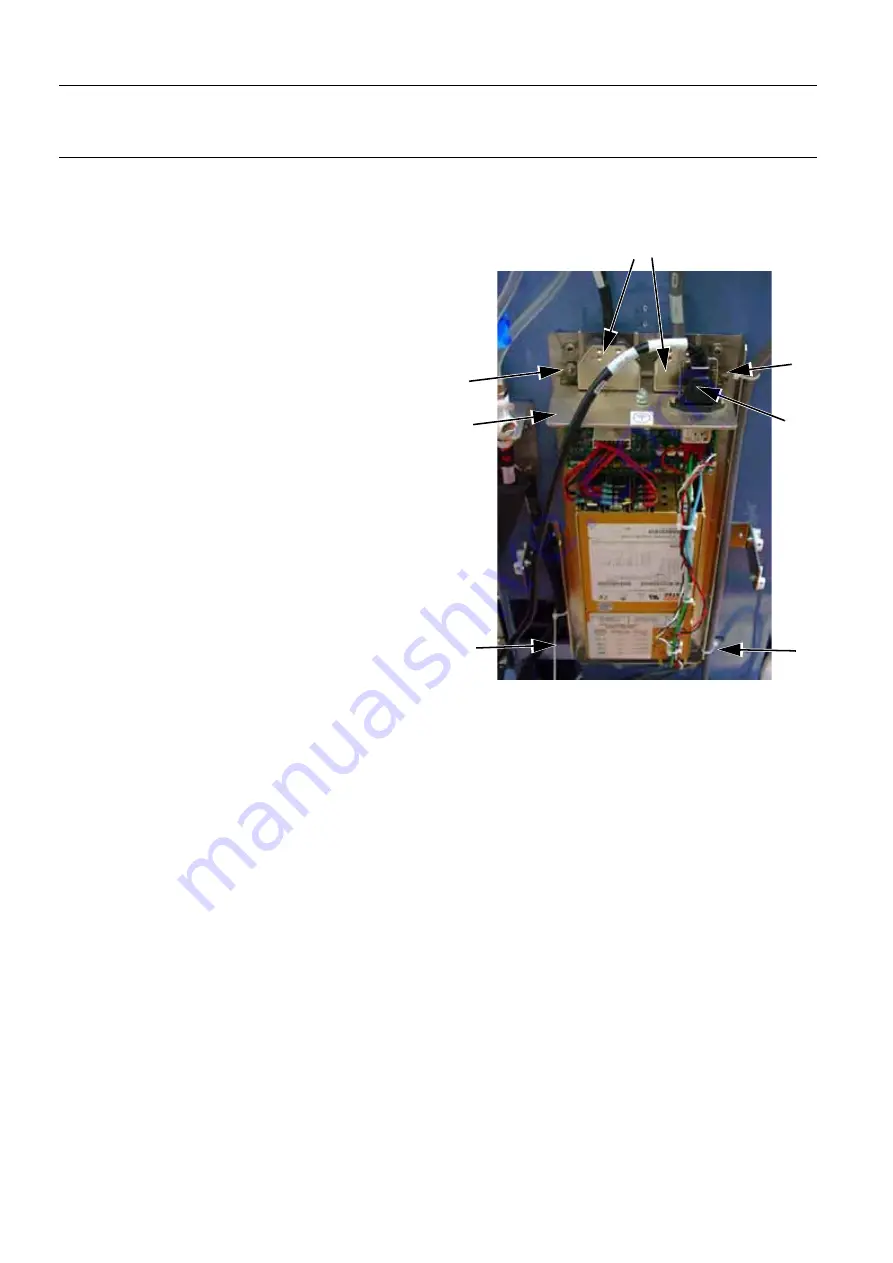
2. Locate the defective power supply (6) mounted
on the back of the Senographe column.
3. Disconnect the AC mains connector (3) and the
two low voltage connectors (1) (one to Image
Receptor and one to IDC).
4. Release without removing the two securing
nuts (4, 5) located at bottom of power supply
chassis (5.5 mm open-ended wrench) (nuts not
seen on this picture).
5. Remove the two securing nuts (2, 7) securing
the top of the power supply chassis (5.5 mm
open-ended wrench). Take care not to lose the
nuts.
6. Remove the defective power supply by holding
both the top and bottom of its chassis with both
hands.
Note:
Tilt the power supply assembly slightly for-
ward to ease removal.
6-2
Reassembly
Reverse the disassembly procedure.
6-3
Functional Check
1. Switch on the Senographe electrical power.
2. Check that the normal boot message is shown.
3. Make a test exposure.
7
COMPLETION
None
1
2
3
4
5
7
6

