Setting Up
26
I
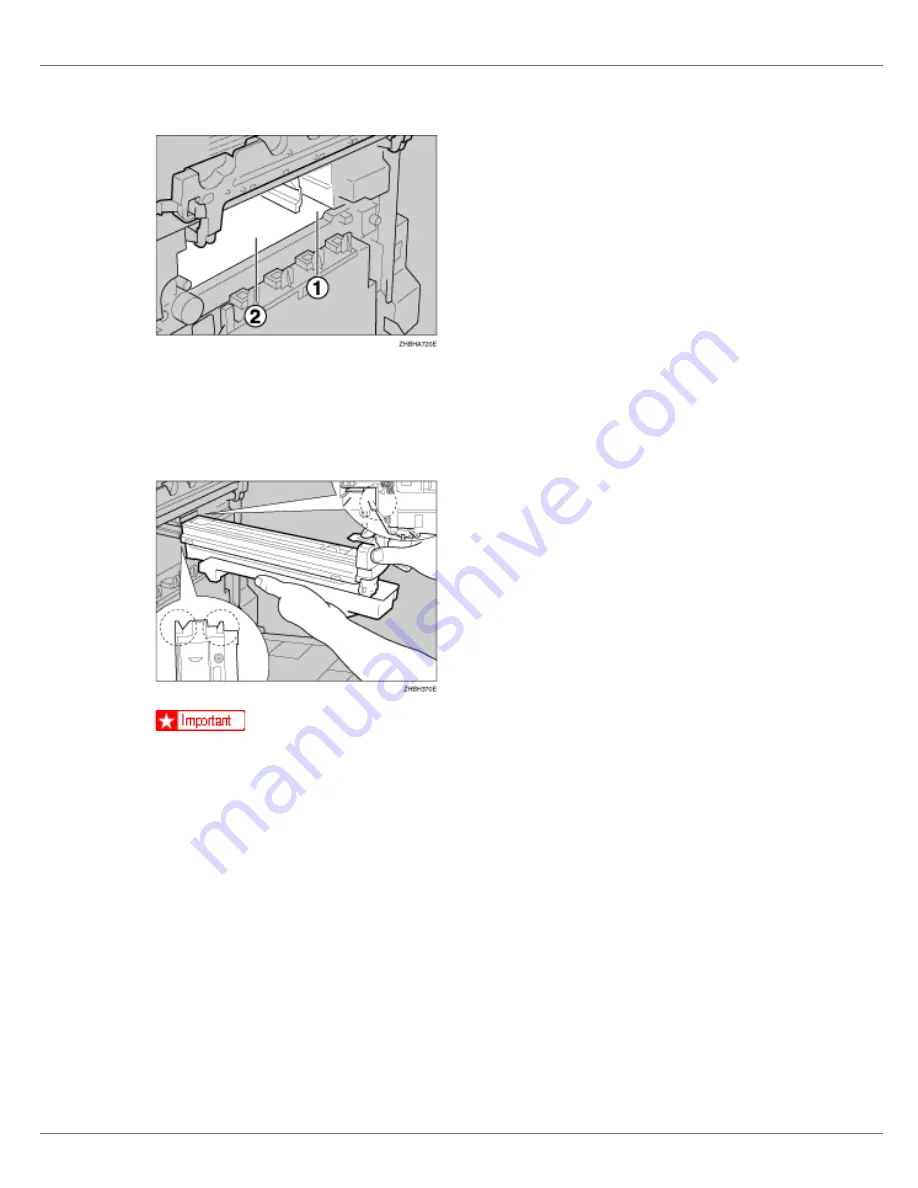
Check the locations for each Photo Conductor Unit.
A
Photo Conductor Unit (Black)
B
Photo Conductor Unit (Color)
J
Align the green arrow at the tip of the photo conductor unit with the rail
inside the printer.
❒
Make sure the green arrow fits securely to the rail before proceeding to the
next step.
❒
If you do not securely attach the green arrow of the photo conductor unit to
the rail, you may damage the photo conductor unit.
Summary of Contents for LP222cn
Page 66: ...Installing Options 54 For details about printing the configuration page see p 40 Test Printing...
Page 112: ...Configuration 100 For details about printing the configuration page see p 40 Test Printing...
Page 229: ...Other Print Operations 110 The initial screen appears...
Page 285: ...Monitoring and Configuring the Printer 166 E Click Apply...
Page 518: ...Removing Misfed Paper 98 F Close the front cover carefully...
Page 525: ...Removing Misfed Paper 105 C Remove any misfed paper D Close the front cover carefully...


