Troubleshooting
87
Other Printing Problems
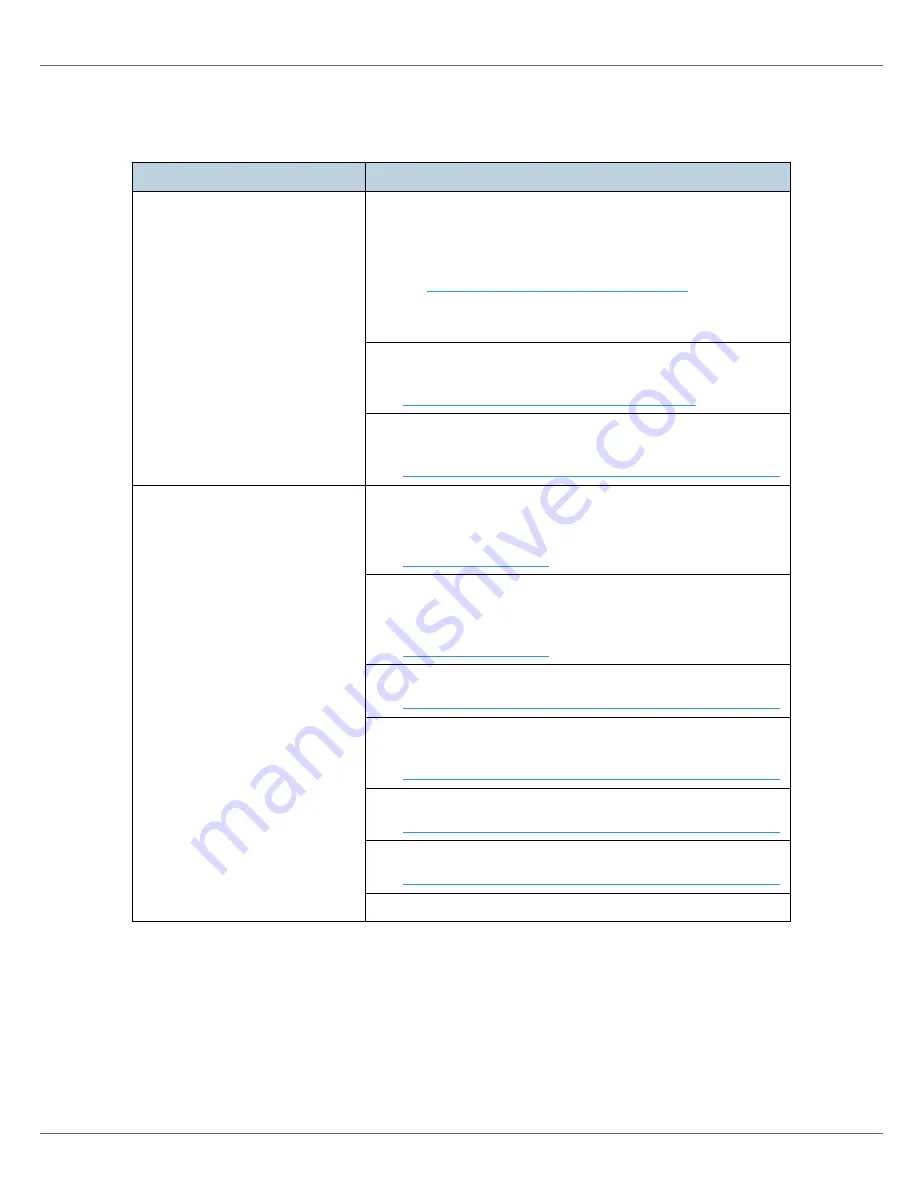
Status
Possible Causes, Descriptions, and Solutions
Toner smears appear on the
print side of the page.
The paper setting may not be correct. For example, although
you are using thick paper, the setting for thick paper may not
be set.
•
Check the paper settings.
See
p.9 “Types of Paper and Other Media”
.
•
Check the printer driver's paper settings.
See the printer driver Help.
When
[
Replace Black PCU
]
or
[
Replace Color PCU
]
appears on
the display, replace the photo conductor unit.
See
p.35 “Replacing the Photo Conductor Unit”
.
Confirm that the paper is not curled or bent. Envelopes can
be curled easily. Flatten paper before loading.
See
p.5 “Paper and Other Media Supported by This Printer”
.
Paper jams occur frequently.
Number of paper set in the tray exceeds the limit. Confirm
that the top of the stack is not higher than the limit mark inside
the tray.
See
p.15 “Loading Paper”
.
There may be a gap between the rear guide and the paper,
or between the side guides and the paper in the paper tray.
Make sure there are no gaps.
See
p.15 “Loading Paper”
.
Paper is either too thick or too thin.
See
p.5 “Paper and Other Media Supported by This Printer”
.
Paper is bent or wrinkled. Use paper that have no bents or
wrinkles.
See
p.5 “Paper and Other Media Supported by This Printer”
.
Paper has already been printed on.
See
p.5 “Paper and Other Media Supported by This Printer”
.
Paper is damp. Use paper that has been stored properly.
See
p.5 “Paper and Other Media Supported by This Printer”
.
When loading paper, separate paper from each other.
Summary of Contents for LP222cn
Page 66: ...Installing Options 54 For details about printing the configuration page see p 40 Test Printing...
Page 112: ...Configuration 100 For details about printing the configuration page see p 40 Test Printing...
Page 229: ...Other Print Operations 110 The initial screen appears...
Page 285: ...Monitoring and Configuring the Printer 166 E Click Apply...
Page 518: ...Removing Misfed Paper 98 F Close the front cover carefully...
Page 525: ...Removing Misfed Paper 105 C Remove any misfed paper D Close the front cover carefully...


