Installing Options
58
I
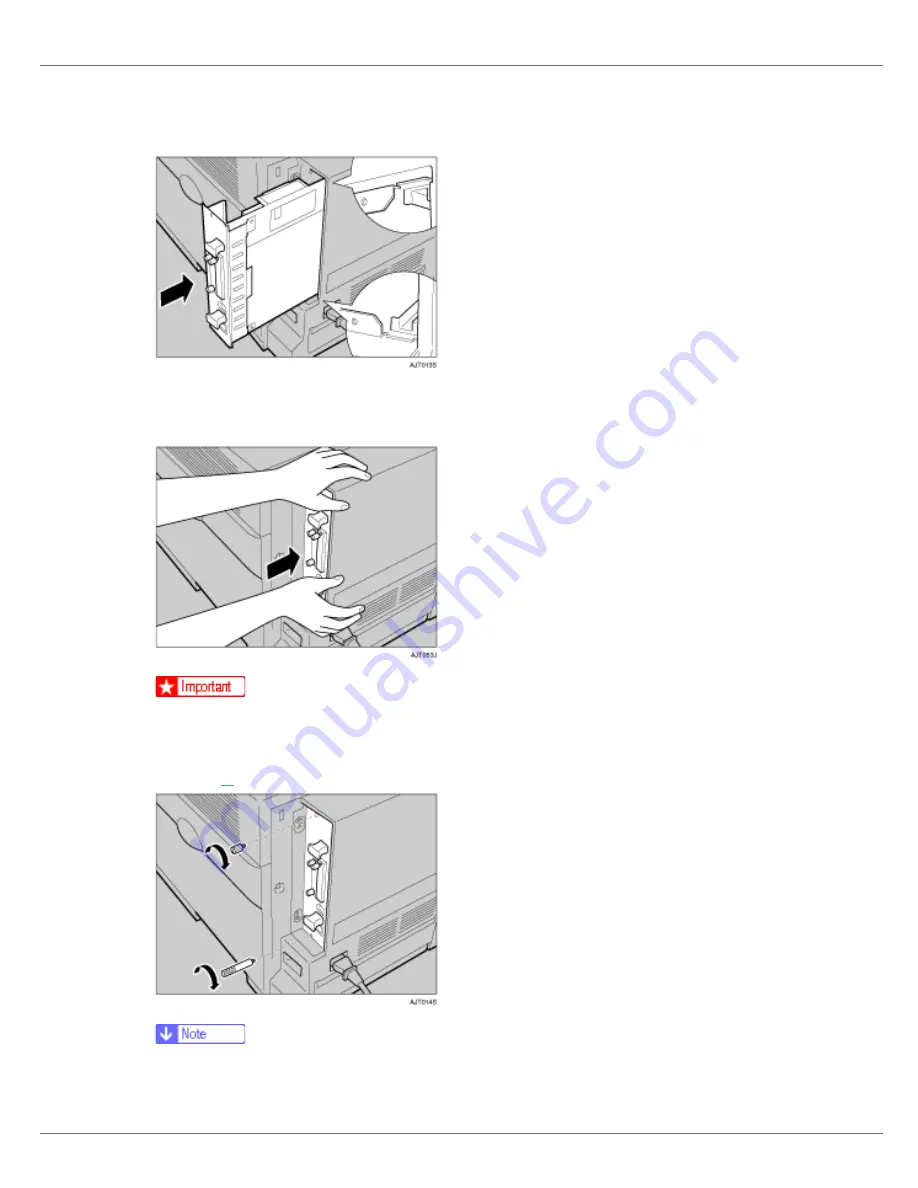
Align the controller board with the top and bottom rails, and then push
it carefully in until it stops.
J
Hold the machine with one hand, and then push the lower handle of the
controller board with the palm of your other hand, until it stops.
❒
Malfunctions can occur if the controller board is not set properly.
K
Secure the controller board to the printer using the two screws removed
in step
B
.
❒
After finishing installation, check the memory unit is installed properly: print
the configuration page from the “List/Test Print” menu. If it is installed prop-
erly, you will see the memory capacity for “Total Memory”.
Summary of Contents for LP222cn
Page 66: ...Installing Options 54 For details about printing the configuration page see p 40 Test Printing...
Page 112: ...Configuration 100 For details about printing the configuration page see p 40 Test Printing...
Page 229: ...Other Print Operations 110 The initial screen appears...
Page 285: ...Monitoring and Configuring the Printer 166 E Click Apply...
Page 518: ...Removing Misfed Paper 98 F Close the front cover carefully...
Page 525: ...Removing Misfed Paper 105 C Remove any misfed paper D Close the front cover carefully...


