Inspection and Maintenance — GEK 107048
Hot Gas Path Inspection — Reassembly Procedures
HGP-R-14
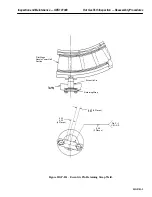
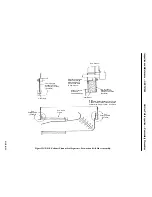
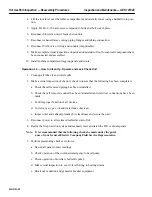
9. With the overhead crane move the turbine casing axially aft and rig the trolley hoist to the center
lug on the spreader bar. With the trolley hoist take up on the rigging so as to transfer the load to
the trolley hoist. Remove the overhead crane rigging. See Figure HGP-R.6.
10. Inspect the lower half turbine casing to assure all items are secure and for foreign objects.
11. Position the upper half turbine casing directly over the lower half turbine casing with the trolley
hoist.
CAUTION
Do not allow the turbine casing to swing and hit the turbine
buckets while it is being lowered into position.
12. Lower the turbine casing utilizing the guide pins provided, making sure the horizontal joint seal-
ing strips at the second and third stage joints are in position.
Note:
Make certain that the upper and lower half turbine nozzle segments are
loaded in the same direction to avoid mismatch at the horizontal joint
seals.
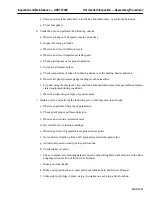
13. Coat the top eccentric pin with anti-seize compound and insert it into the casing. Do not force the
pin in. Refer to Reassembly Operation 1 if the eccentric pin needs to be reset.
14. Assemble the eccentric pin locking bar bolts to the casing and secure them with locking tabs.
15. Install all bolts hand-tight, including body-bound bolts. Tighten the horizontal joint bolts, starting
at the mid-point and working alternately left and right forward and aft until all bolts are tightened.
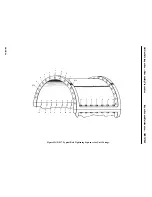
16. Alternately tighten all the vertical bolts, working down each side from the top vertical centerline
to the horizontal joint. See Figure HGP-R.7.
Note:
Work both the aft and forward vertical flanges simultaneously.
17. It may be necessary to remove the horizontal joint bolts next to the vertical joint, so the vertical
joint bolts can be tightened. Replace the horizontal joint bolts and tighten.
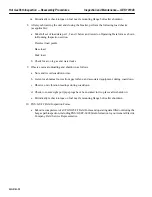
18. Using chainfall or comealong, rig to the rail beam and trolley hoist inside the exhaust transition
duct. Remove the bolting from the rail beam and slide the rail and trolley out of the duct and rig
the rail to the overhead crane. Remove rail and hoist clear of the unit. Install all removed mounting
hardware onto the beam (hand tight) for safe keeping.
Operation 10 — How to Install Wheelspace Thermocouple Wiring and Conduit
1. Reinstall conduit for wheelspace thermocouple wiring in same location from which it was re-
moved. Use anti-seize compound on threaded conduit fittings and covers.
2. Check thermocouple identification lead tags and reconnect leads and tape up with glass tape.
Summary of Contents for MS6001B
Page 2: ...Gas Turbine Inspection and Maintenance GEK 107048 I 2 THIS PAGE INTENTIONALLY LEFT BLANK ...
Page 4: ...Inspection and Maintenance Note THIS PAGE INTENTIONALLY LEFT BLANK ...
Page 13: ...INSERT TAB INTRODUCTION ...
Page 14: ......
Page 25: ...INSERT TAB STANDARD PRACTICES ...
Page 26: ......
Page 87: ...INSERT TAB AUXILIARY CONTROLS SYSTEMS MAINTENANCE ...
Page 88: ......
Page 133: ...INSERT TAB SCHEDULED TURBINE MAINTENACE ...
Page 134: ......
Page 157: ...INSERT TAB COMBUSTION INSPECTION ...
Page 158: ......
Page 239: ...INSERT TAB HOT GAS PATH INSPECTION ...
Page 240: ......
Page 313: ...INSERT TAB MAJOR INSPECTION ...
Page 314: ......
Page 316: ...Inspection and Maintenance GEK 107048 Major Inspection 2 THIS PAGE INTENTIONALLY LEFT BLANK ...
Page 363: ...INSERT TAB MAINTENANCE FORMS ...
Page 364: ......


