Inspection and Maintenance — GEK 107048
Combustion Inspection — Reassembly Procedures
CI-R-4
Note:
Torquing procedure; to minimize variations in clamping force of bolt
for given torque values, bolts must be torqued backed off, then
retorqued.
4. Torque the support clamp (bullhorn) bolts to 33–37 lb. ft. then loosen and remove bolts and lock-
plates from the support clamp.
5. Slide number four (4) transition piece over the positioning pin to support the transition piece. In-
sert the floating seals into their respective slots in the first stage nozzle. Assemble the support
clamp to the transition piece forward mounting bracket slots. Install the support clamp lockplates,
and bolts. Bolt the support clamp to the compressor discharge casing. Do not tighten bolts or bend
lockplates at this time.
6. Install the aft bracket bolts and lockplates and tighten to the first stage nozzle retaining ring. Prior
to torquing the bolts, check for proper floating seal engagement to the first stage nozzle segment
slots. Torquing aft bracket bolts with floating seals out of their slots will result in damage to seal.
Torque aft bracket bolts to 75–85 lb. ft. Do not bend lockplate tabs at this time.
7. Torque the support clamp bolts to 33–37 lb. ft. then loosen and remove bolts and lockplates from
the support clamp.
8. Repeat steps 5, 6 and 7 for number six (6) transition piece.
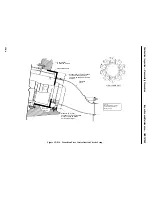
9. Starting with number five (5) transition piece, check the spacing between four and five, five and
six transition pieces at the transition piece side seal slot. The spacing should be between
0.36–0.53 in. To align the number five (5) transition piece the aft bracket bolts on number four
(4), five (5) and six (6) transition pieces may have to be loosened. After alignment is achieved
on number five (5) transition piece, retorque the aft bracket bolts to 75–85 lb. ft. See Figure
CI-R.3.
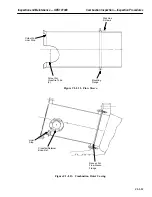
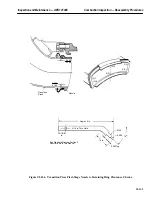
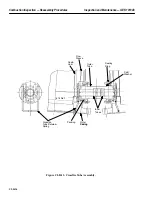
10. Measure the radial and circumferential displacement of the transition piece with respect to the
compressor discharge casing. Using a carpenters square or two scales (rulers), measure the con-
centricity of the transition piece to the compressor discharge casing at four (4) points (radial out-
side position and every 90
°
from that point). If displacement does not exceed 0.100 in. radially
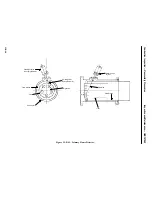
or circumferentially, proceed to step 11. See Figure CI-R.4.
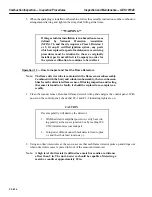
CAUTION
If measured displacement exceeds 0.100 in. further as-
sembly should not be attempted. Contact your General
Electric Company Field Service Representative for cor-
rective action.
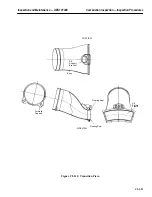
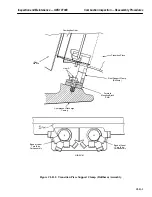
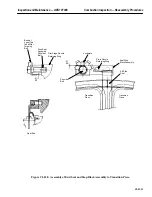
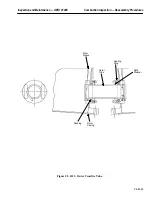
11. The support clamp bolts may be torqued after the #5 transition piece has been aligned per step
10 above, and correct contact at the support clamp has been achieved (see Figure CI-R.5.). The
support clamp contact must be maintained after the bolts are torqued.
Note:
Nominal shim thickness for the support clamp is 0.0 in. A maximum of
three (3) shims for a thickness of 0.100 in. may be used if required to
achieve proper loading of the support clamp.
Summary of Contents for MS6001B
Page 2: ...Gas Turbine Inspection and Maintenance GEK 107048 I 2 THIS PAGE INTENTIONALLY LEFT BLANK ...
Page 4: ...Inspection and Maintenance Note THIS PAGE INTENTIONALLY LEFT BLANK ...
Page 13: ...INSERT TAB INTRODUCTION ...
Page 14: ......
Page 25: ...INSERT TAB STANDARD PRACTICES ...
Page 26: ......
Page 87: ...INSERT TAB AUXILIARY CONTROLS SYSTEMS MAINTENANCE ...
Page 88: ......
Page 133: ...INSERT TAB SCHEDULED TURBINE MAINTENACE ...
Page 134: ......
Page 157: ...INSERT TAB COMBUSTION INSPECTION ...
Page 158: ......
Page 239: ...INSERT TAB HOT GAS PATH INSPECTION ...
Page 240: ......
Page 313: ...INSERT TAB MAJOR INSPECTION ...
Page 314: ......
Page 316: ...Inspection and Maintenance GEK 107048 Major Inspection 2 THIS PAGE INTENTIONALLY LEFT BLANK ...
Page 363: ...INSERT TAB MAINTENANCE FORMS ...
Page 364: ......

