Hot Gas Path Inspection — Disassembly Procedures
Inspection and Maintenance — GEK 107048
HGP-D-3
Note:
It may be necessary to use the hydraulic ratchet to position a random
blade tip below the probe holes for the 13th and 17th stage compressor
and 1st stage turbine for rotor positioning checks.
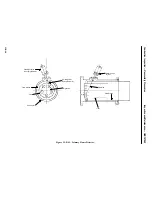
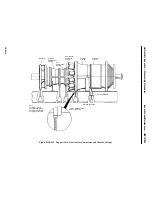
2. The 13th stage compressor holes (4 total) are located 7.46 in. aft from the forward face of the com-
pressor discharge casing forward flange.
3. The 17th stage compressor probe holes (4 total) are located 19.96 in. aft from the forward face
of the compressor discharge casing forward flange.
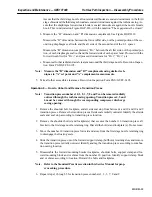
4. The first-stage turbine probe holes (4 total) are located 27.44 in. aft from the forward face of the
turbine casing forward flange.
5. Compressor tip clearances at the 13th and 17th stages are taken by removing the plugs located
ten (10) degrees off top and bottom vertical centerline and sixteen (16) degrees above each hori-
zontal joint. A stamped number next to the plug counterbores indicates the thickness of the casing
from the bottom of the counterbore to the inside diameter of the casing. Record clearances on
PGS/GT-FF-6094 Inspection Form.
6. Turbine casing probe holes exist (4 total) so that the turbine bucket tip clearances can be taken
on the first-stage turbine buckets. Record the turbine tip clearances on Inspection Form PGS/
GT-FF-6094. Turbine rotor tip clearance readings are taken as follows:
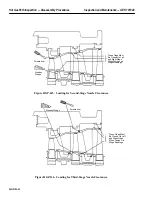
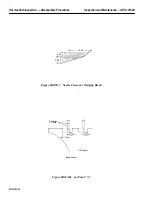
a. Remove plug and place an adapter into the machined counterbore of the casing. The adapter
will allow the base of the depth micrometer to rest squarely on the casing, thereby allowing
the micrometer rod to penetrate the probe hole accurately.
Note:
The adapter can be made from a piece of 0.075 in. diameter pipe ap-
proximately two inches long. The ends of the pipe faces should be within
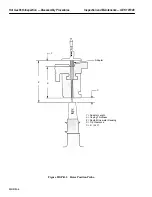
0.0005 in. See Figure HGP-D.1.
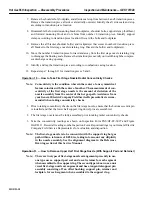
Take the depth micrometer and measure to the tip of the blade. This
measurement will be the distance from the blade tip to the top of the
adapter. Add the adapter length to the thickness stamped on the tur-
bine casing. Subtract this measurement from the depth micrometer
measurement reading. The result is tip clearance. See Figure HGP-D.1.
CAUTION
Do not rotate the rotor while in the process of taking tip
clearances.
Operation 4 — How to Disconnect Wiring and Conduit in Turbine Compartment Area
(Remove only if it will interfere with turbine area work)
1. Disconnect the electrical leads for the AC/DC lighting at the pullbox above turbine casing.
2. Pull wiring from conduit and tag for identification.
3. Tag and remove sections of conduit as needed to provide access to turbine work.
Summary of Contents for MS6001B
Page 2: ...Gas Turbine Inspection and Maintenance GEK 107048 I 2 THIS PAGE INTENTIONALLY LEFT BLANK ...
Page 4: ...Inspection and Maintenance Note THIS PAGE INTENTIONALLY LEFT BLANK ...
Page 13: ...INSERT TAB INTRODUCTION ...
Page 14: ......
Page 25: ...INSERT TAB STANDARD PRACTICES ...
Page 26: ......
Page 87: ...INSERT TAB AUXILIARY CONTROLS SYSTEMS MAINTENANCE ...
Page 88: ......
Page 133: ...INSERT TAB SCHEDULED TURBINE MAINTENACE ...
Page 134: ......
Page 157: ...INSERT TAB COMBUSTION INSPECTION ...
Page 158: ......
Page 239: ...INSERT TAB HOT GAS PATH INSPECTION ...
Page 240: ......
Page 313: ...INSERT TAB MAJOR INSPECTION ...
Page 314: ......
Page 316: ...Inspection and Maintenance GEK 107048 Major Inspection 2 THIS PAGE INTENTIONALLY LEFT BLANK ...
Page 363: ...INSERT TAB MAINTENANCE FORMS ...
Page 364: ......


