Inspection and Maintenance — GEK 107048
Combustion Inspection — Reassembly Procedures
CI-R-8
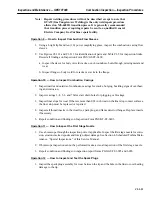
CAUTION
If the spacing between adjacent transition pieces or the
support clamp loading requirements cannot be achieved
further assembly should not be attempted until the cause
is resolved. It is recommended that your General Electric
Company Field Service Representative be consulted for
recommended action to resolve the problem.
12. Reinstall forward support clamp bolts and lockplates. Torque the forward support clamp bolts on
number five (5) transition piece to 33–37 lb. ft.
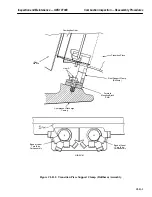
13. Check to assure that the gap between number five (5), four (4) and six (6) transition pieces and
face of the first stage nozzle is a minimum of 0.090 in. and not to exceed 0.160 in. Make checks
at six (6) points. Record these measurements on Form PGS/GT-FF-6408. A special go – no/go
gauge is available for this gap measurement. Contact your General Electric Company Field Ser-
vice Representative if these clearances cannot be attained. See Figure CI-R.6.
14. Bend the lockplate tabs on the transition piece aft bracket mounting bolt and the forward support
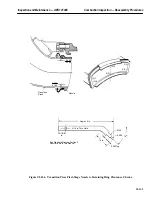
clamp bolts to secure the bolts in place. See Figures CI-R.2 and CI-R.7.
15. Repeat steps 5 through 7 and 9 through 14 for all other transition piece positions in the sequence
specified.
16. Install aft side seals between adjacent transition pieces, e.g.; the aft side seal between position
five (5) and four (4) transition pieces is installed after position five (5) and four (4) transition
pieces are correctly assembled and between five (5) and six (6) transition piece six (6) is properly
assembled, etc.
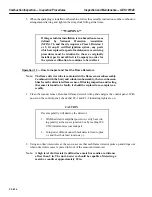
CAUTION
Aft side seals should be installed by hand force only. Do
not attempt further assembly if greater than hand force is
required.
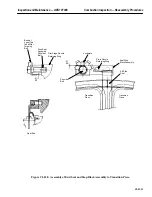
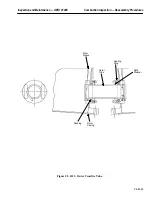
17. Install aft side seal and stop seal assembly, bolt and lockplate. Torque aft side seal stop assembly
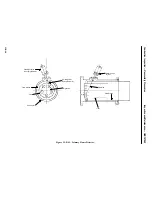
bolt to 45–55 lb. ft. and bend lockplate tabs to secure stop seal bolt in place. See Figure CI-R.8.
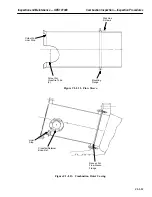
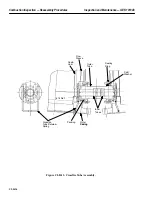
Operation 3 — How to Install the Outer Combustion Casings and Flow Sleeves
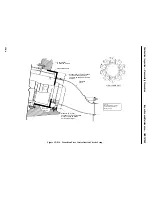
See Figures CI-R.9 and CI-R.10.
1. Insert the correct flow sleeve into each outer casing as defined on the Casing Arrangement (ML
0719). The flow sleeves are secured with four machine screws through the flow sleeve flange into
the tapped holes in the aft casing flange.
2. Install a new gasket in the groove in the aft flange of each combustion outer casing.
Summary of Contents for MS6001B
Page 2: ...Gas Turbine Inspection and Maintenance GEK 107048 I 2 THIS PAGE INTENTIONALLY LEFT BLANK ...
Page 4: ...Inspection and Maintenance Note THIS PAGE INTENTIONALLY LEFT BLANK ...
Page 13: ...INSERT TAB INTRODUCTION ...
Page 14: ......
Page 25: ...INSERT TAB STANDARD PRACTICES ...
Page 26: ......
Page 87: ...INSERT TAB AUXILIARY CONTROLS SYSTEMS MAINTENANCE ...
Page 88: ......
Page 133: ...INSERT TAB SCHEDULED TURBINE MAINTENACE ...
Page 134: ......
Page 157: ...INSERT TAB COMBUSTION INSPECTION ...
Page 158: ......
Page 239: ...INSERT TAB HOT GAS PATH INSPECTION ...
Page 240: ......
Page 313: ...INSERT TAB MAJOR INSPECTION ...
Page 314: ......
Page 316: ...Inspection and Maintenance GEK 107048 Major Inspection 2 THIS PAGE INTENTIONALLY LEFT BLANK ...
Page 363: ...INSERT TAB MAINTENANCE FORMS ...
Page 364: ......


