Inspection and Maintenance — GEK 107048
Hot Gas Path Inspection — Disassembly Procedures
HGP-D-12
Rotor Float (Thrust Clearance)
1. The maximum total fore and aft movement of the rotor without distorting any of the rotor or bear-
ing mounts is usually 14 to 20 mils.
Note:
The rotor should be against the active thrust bearing but not loaded to
deflect the bearing or casings when the indicator is read.
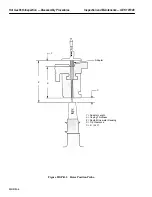
2. The rotor float is measured by mounting a dial indicator from the No. 1 bearing housing and indi-
cating on the accessory coupling hub. This can be accomplished with the accessory coupling and
guard in place. Rotor float is referenced to the No. 1 bearing housing.
3. The rotor is moved from the load gear turbine coupling. Remove the upper half of the load cou-
pling guard. A small hydraulic jack and wood blocking can be placed between the forward load
gear bearing housing and the coupling flange to push the rotor forward. The rotor will move
“all-at-once” with a solid “bump.” Release the jack loading before reading the dial indicator. Re-
position the jack and blocking to push the rotor aft from the No. 2 turbine bearing housing. The
rotor will “bump,” release the jack and read the indicator. Repeat three times to assure repeatabil-
ity. Record thrust clearances on PGS/GT-FF-6117 Inspection Report.
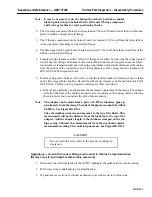
CAUTION
Do not jack against the exhaust plenum.
Turbine Rotor Clearances
1. The rotor must be positioned upstream against the active thrust bearing but not loaded. Any pres-
sure applied in moving the rotor forward for the float check should be released at this time.
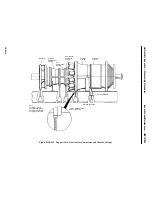
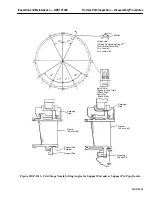
2. Prepare for and take clearances around the first stage nozzle.
a. Apply a downstream load not to exceed 2000 pounds on the first stage nozzle outer sidewall,
both sides, to assure that the nozzle is seated downstream against the first stage shrouds, and
the first stage shrouds are seated downstream against the turbine casing.
Note:
1. Do not wedge other nozzles simultaneously with first stage nozzle.
2. Unload each stage after clearances are taken on that stage.
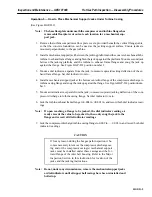
CAUTION
Use a hard wood block to transmit load to the nozzle outer
sidewall and jack between the nozzle and discharge casing
horizontal joint at left and right side.
b. Take all clearances around the first stage nozzle. Refer to Inspection Form PGS/GT-FF-6105.
Summary of Contents for MS6001B
Page 2: ...Gas Turbine Inspection and Maintenance GEK 107048 I 2 THIS PAGE INTENTIONALLY LEFT BLANK ...
Page 4: ...Inspection and Maintenance Note THIS PAGE INTENTIONALLY LEFT BLANK ...
Page 13: ...INSERT TAB INTRODUCTION ...
Page 14: ......
Page 25: ...INSERT TAB STANDARD PRACTICES ...
Page 26: ......
Page 87: ...INSERT TAB AUXILIARY CONTROLS SYSTEMS MAINTENANCE ...
Page 88: ......
Page 133: ...INSERT TAB SCHEDULED TURBINE MAINTENACE ...
Page 134: ......
Page 157: ...INSERT TAB COMBUSTION INSPECTION ...
Page 158: ......
Page 239: ...INSERT TAB HOT GAS PATH INSPECTION ...
Page 240: ......
Page 313: ...INSERT TAB MAJOR INSPECTION ...
Page 314: ......
Page 316: ...Inspection and Maintenance GEK 107048 Major Inspection 2 THIS PAGE INTENTIONALLY LEFT BLANK ...
Page 363: ...INSERT TAB MAINTENANCE FORMS ...
Page 364: ......


