Inspection and Maintenance — GEK 107048
Hot Gas Path Inspection — Disassembly Procedures
HGP-D-10
8. Eight 1.75 in.-eight thread jack bolts will be required. Four bolts are to be used for jacking and
four to plug the lower half holes. Care must be taken to avoid the bolts crossing the horizontal
joint.
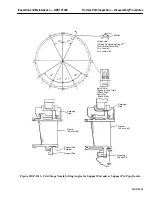
9. Using wire rope slings, rig the two aft lower lugs of the spreader bar to the aft lugs of the turbine
casing. Using chainfalls or comealongs and wire rope slings rig the forward lower set of lugs on
the spreader bar to the forward lugs on the turbine casing. Position the spreader bar as close to
the casing as a safe lifting angle will allow. Rigging should be such that when the wire rope slings
are taut, the bottom of the spreader bar should be fairly close to the highest section of the turbine
casing.
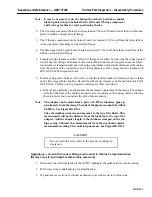
Note:
The upper half turbine casing weight with the second and third stage
nozzle segments and shrouds is approximately 7300 pounds.
10. Using the jackbolts, jack the upper half casing as far as the jackbolts will permit. Keep casing
level at all times while jacking.
11. Take up all slack on the wire rope slings and proceed to lift the turbine casing with the trolley hoist
until the turbine casing clears the aft vertical flange of the compressor discharge casing.
CAUTION
Make absolutely sure the casing is lifted vertically and
level at all times. Adjust chainfalls or comealongs as need-
ed to locate center of gravity and to level off the casing.
12. Move the trolley hoist to the forward “Stop” on the lifting beam.
13. Using an overhead crane centered precisely with the turbine axis, rig cables to the upper lugs of
the spreader bar. Carefully lift the spreader bar with the overhead crane. Until the rigging between
the trolley hoist and spreader bar can be removed.
14. Keeping the spreader bar arrangement level, move the turbine casing axially to clear the lifting
beam overhang.
15. Lift the spreader bar and turbine casing clear of the unit and set the casing on suitable cribbing
to protect the flanges.
16. Remove the spreader bar and rigging from the turbine casing.
17. Using overhead crane, rerig the turbine casing with comealongs or chainfalls to the forward lugs
on the casing and wire slings on the aft lugs.
18. Pickup the casing enough to clear the cribbing and by raising on the aft lugs and lowering with
the chainfall or comealong on the forward lugs, position the turbine casing on its forward vertical
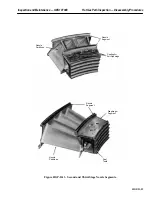
flange for later inspection and or removal of second and third stage nozzle segments.
Summary of Contents for MS6001B
Page 2: ...Gas Turbine Inspection and Maintenance GEK 107048 I 2 THIS PAGE INTENTIONALLY LEFT BLANK ...
Page 4: ...Inspection and Maintenance Note THIS PAGE INTENTIONALLY LEFT BLANK ...
Page 13: ...INSERT TAB INTRODUCTION ...
Page 14: ......
Page 25: ...INSERT TAB STANDARD PRACTICES ...
Page 26: ......
Page 87: ...INSERT TAB AUXILIARY CONTROLS SYSTEMS MAINTENANCE ...
Page 88: ......
Page 133: ...INSERT TAB SCHEDULED TURBINE MAINTENACE ...
Page 134: ......
Page 157: ...INSERT TAB COMBUSTION INSPECTION ...
Page 158: ......
Page 239: ...INSERT TAB HOT GAS PATH INSPECTION ...
Page 240: ......
Page 313: ...INSERT TAB MAJOR INSPECTION ...
Page 314: ......
Page 316: ...Inspection and Maintenance GEK 107048 Major Inspection 2 THIS PAGE INTENTIONALLY LEFT BLANK ...
Page 363: ...INSERT TAB MAINTENANCE FORMS ...
Page 364: ......


