Configuration
6-54
Software Installation & Configuration
Report and
Recording
Destination
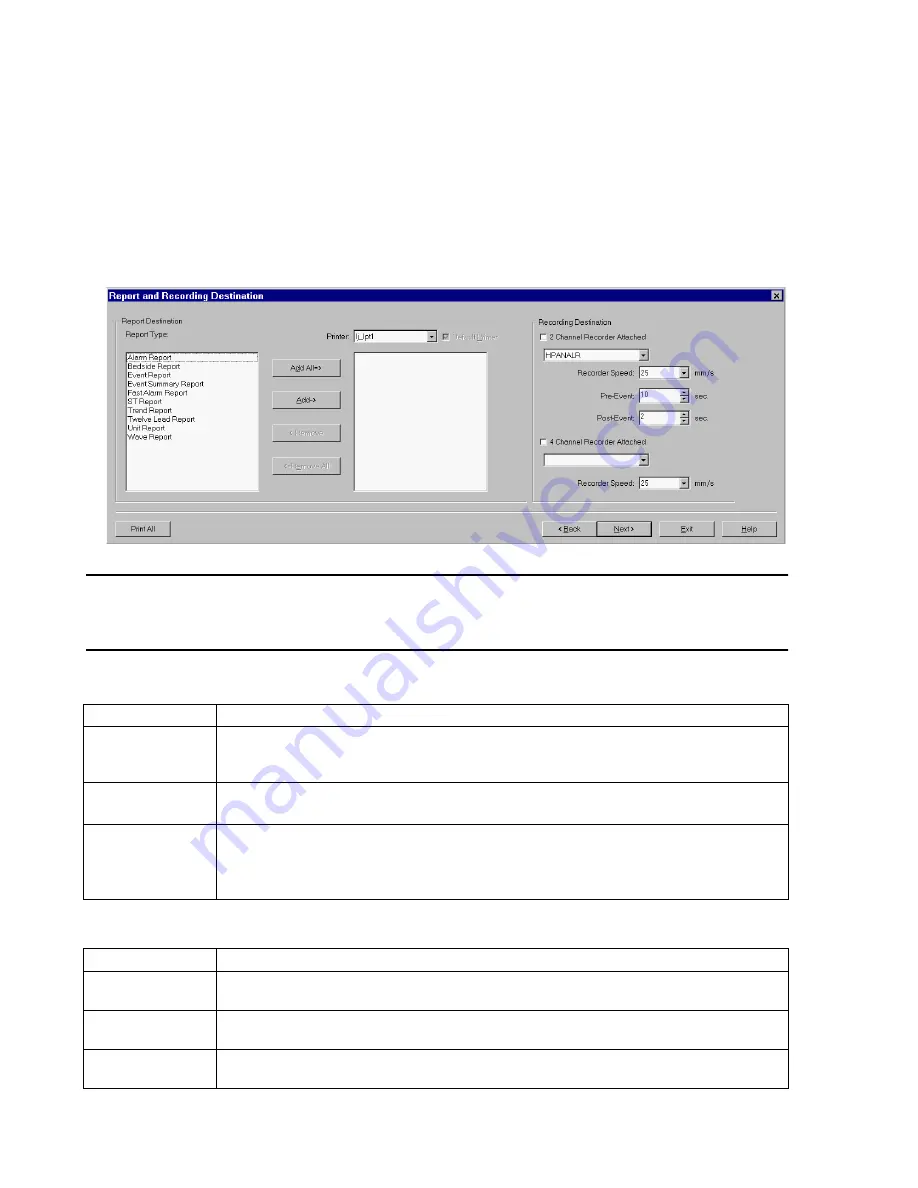
Report and Recording Destination is used by the networked Information Center or Client to
configure a set of reports to a selected printer and to identify what Two Channel Recorder is
attached to the Information Center and allows the connection to a Four Channel Recorder. It
operates in non-monitoring mode and can be accessed via
All Controls / Configuration and
Support / Service / Configuration / !Config Wizard
and sequencing through the
configuration tools.
Figure 6-16 Report/Recording Destination Window
Note
Sharing of recorders is only available for Information Centers and Clients on the Clinical
Network. A maximum of 4 Information Centers or Clients can be set to use the same Recorder/
Rack.
Fields
in Report Destination are:
Buttons
in Report Destination are:
Field
Description
Report Type
Lists the possible report types that can be assigned to a printer. Possible types are Alarm Report,
Event Report, Event Summary Report, Fast Alarm Report, ST Report, Trend Report, 12 Lead Report,
Unit Report, Wave Report
Printer
Lists the network printers that have been configured in the Network Configuration window.
Note—
If a local printer is configured, the local printer is listed in the printer list
Default Printer
Indicates a printer set as the default printer of the system. A warning message displays if no printer is
configured as the default printer
Note—
To change the default printer, select another printer from the list and enable the default printer
check box
Button
Description
Add All
Indicates all the reports listed in the Report Type will be configured to print to the printer selected in
the printer fields. The button is disabled if there are no more reports to be configured.
Add
Indicates all the reports selected in the Report Type will be configured to print to the printer selected
in the printer fields. The button is disabled if there are no more reports to be configured.
Remove
Indicates reports selected to the right of the button will be removed from the printer selected in the in
the printer field. The button is disabled if there are no more reports configured to the printer shown
Summary of Contents for IntelliVue Series
Page 152: ...IntelliVue Information Center Application Software 3 22 Software Description ...
Page 442: ...Troubleshooting 7 156 Maintenance Troubleshooting and Repair ...
Page 488: ...Procedure B 12 Web Installation on the Database Server ...
Page 492: ...Procedure C 4 External Modem Installation ...
Page 500: ...Using RAS D 8 Dial In Procedure for Remote Access to Information Center Systems ...


