ZS3 Service Manual
Page 201 of 295
Make sure the brightness and contrast settings of the LCD display have not been
altered from proper settings. For information about LCD display settings, see
LCD Display.
To ensure the quality of the gray scale resolution of the LCD display, use the
gray scale test pattern (via the Diagnostic menu) that is available. Ensure that all
shades can be visualized, making small adjustments to brightness and contrast
from factory defaults, as required, to see all intensities.
Make adjustments to the various Doppler controls (
gain, filter, scale)
to attempt
to resolve the problem.
Ensure that the scanning angle between the transducer face and the direction of
blood flow is optimized.
In the on-screen menu, under the
Preset
tab, select one of the factory default
settings (General, etc.) to determine possible maladjustment of user presets.
Ensure that there is an adequate supply of acoustic coupling gel and good
patient/transducer contact.
Switch to a different transducer or probe port to see if the problem is with a
particular transducer or system port.
GENERAL OPERATION PROBLEMS
Function (F1-F8) key(s) do not operate
Using the on-screen menu, go to Setup | Keys to access the menu and make
sure the keys are correctly programmed.
Unable to modify existing User Preset (
grayed out
)
Make sure the desired user preset was previously (i.e., before attempting to
modify it) selected as the active preset.
System will not communicate with target
DICOM” Store” or “Print” device
Check Networking ICON
on upper/left corner of main imaging screen, to
verify hardware connection is active
(no “
X
” over ICON). Check hardware cabling,
network equipment, and/or configuration, as necessary.
Press the
DICOM Queue
key, and inspect for any pending jobs in the Queue. If
any jobs pending, delete them and then power cycle System, and then re-test
network state.
Under
“Setup
|
Network
”
configuration
pages,
verify
the
IP
address/Gateway/Subnet Mask parameters are entered correctly, and
correspond with those assigned to ZS3 ultrasound system by the IT Admin at the
install site.
Summary of Contents for Zonare ZS3
Page 1: ...ZS3 Diagnostic Ultrasound System Service Manual ...
Page 120: ...ZS3 Service Manual Page 120 of 295 FTP Setup Enters Setup Network FTP ...
Page 124: ...ZS3 Service Manual Page 124 of 295 ...
Page 131: ...ZS3 Service Manual Page 131 of 295 13 System Diagrams ...
Page 132: ...ZS3 Service Manual Page 132 of 295 Power Block Diagram Figure 13 1 ZS3 Power Block Diagram ...
Page 133: ...ZS3 Service Manual Page 133 of 295 Cabling Diagram Figure 13 2 ZS3 Cabling Diagram ...
Page 138: ...ZS3 Service Manual Page 138 of 295 Figure 14 6 ZS3 ...
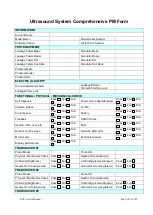
Page 185: ...ZS3 Service Manual Page 185 of 295 17 Preventative Maintenance Forms ...
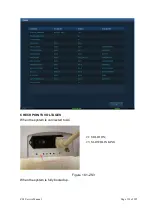
Page 217: ...ZS3 Service Manual Page 217 of 295 Figure 18 8 ZS3 ...
Page 252: ...ZS3 Service Manual Page 252 of 295 Figure 19 43 ZS3 Power Cable USB Cable ...
Page 295: ...P N 046 014026 00 2 0 ...

