29 Using Access Google Drive™
790
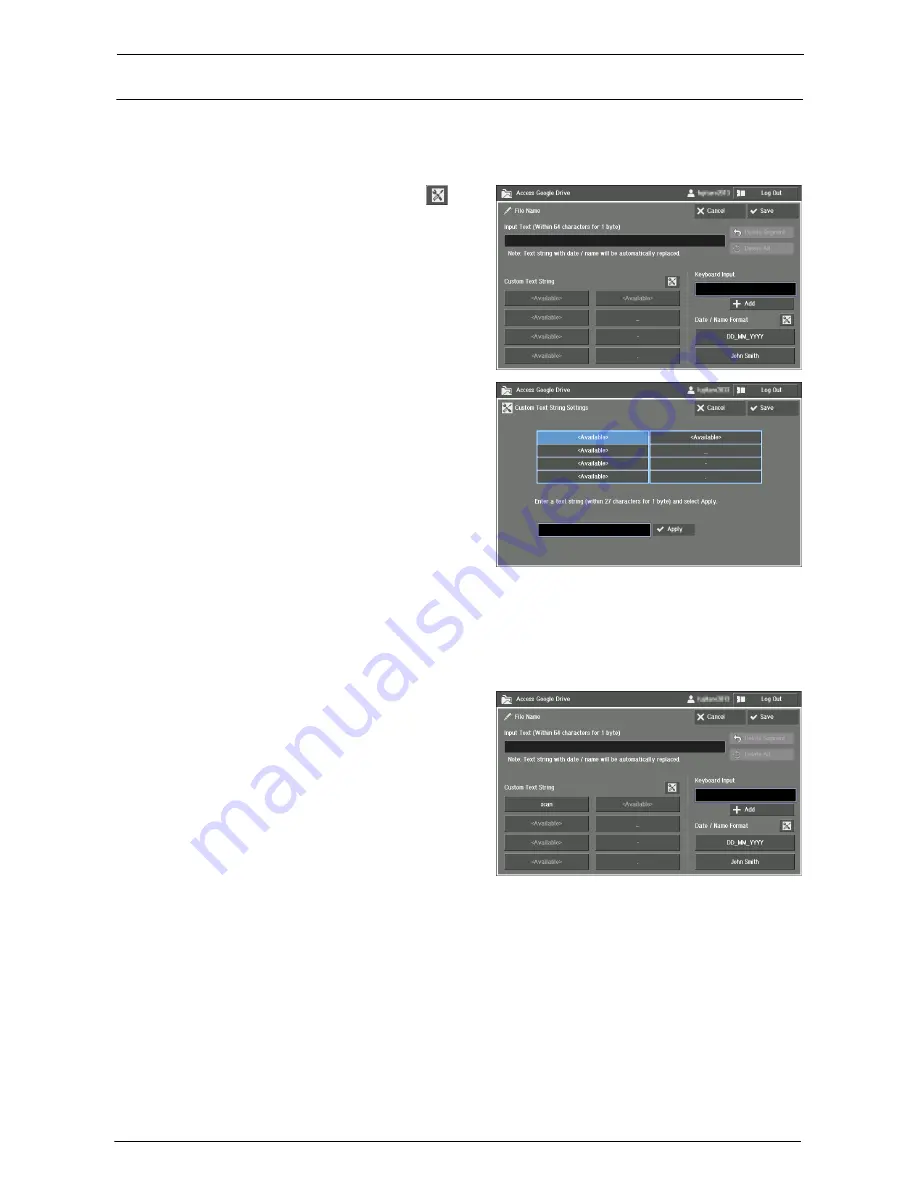
Setting Custom Text Strings
This section describes how to set text strings for [Custom Text String] on the input screen.
Note
•
Custom text strings are common to all the users of the machine. Added/changed strings will be
changed in other users' setting as well.
1
On the input screen, select the [
]
button next to [Custom Text String].
2
Select [<Available>] or the string you
want to change. Then select the text box
at the bottom.
3
Enter text with the keyboard displayed on the screen, and select [Enter].
4
Select [Apply].
5
Make sure the text is copied from the text box to the string, and select [Save].
The registered texts are added to [Custom
Text String].
Summary of Contents for C7765DN
Page 1: ...Dell C7765dn Color Multifunction Printer User s Guide Regulatory Model C7765dn ...
Page 32: ...1 Before Using the Machine 32 ...
Page 144: ...3 Copy 144 ...
Page 156: ...4 Fax 156 ...
Page 168: ...5 Scan 168 ...
Page 272: ...13 Maintenance 272 ...
Page 294: ...14 Machine Status 294 ...
Page 468: ...16 Dell Printer Configuration Web Tool Settings 468 ...
Page 510: ...19 Scanner Environment Settings 510 ...
Page 564: ...22 Authentication and Accounting Features 564 ...
Page 764: ...28 Using Shortcut Menu 764 ...
Page 796: ...29 Using Access Google Drive 796 2 Check the content status 3 Select Close ...
Page 802: ...29 Using Access Google Drive 802 ...
Page 816: ...30 Google Cloud Print 816 ...


