7 Stored Programming
178
Enter/Change Name
Enter or change the name of a stored program.
Refer to "Entering/Changing a Stored Program Name" (P.181).
Assign/Change Icon
Specify an icon for a registered stored program.
Refer to "Assigning/Changing Icons for Stored Programs" (P.182).
Registering Stored Programs
Up to 100 actions can be registered with one stored program. Up to 40 stored programs can
be registered in the machine.
Actions registered in stored programs No.1 and 2 or No. 1 to No.12 can also be performed by
using one touch buttons <M01> and <M02> or <61> to <M02>. (This feature is
available only when the optional Fax service is installed).
The following describes how to register actions with stored programs.
Note
•
If registered settings such as tray paper size and comments, or default values in the System Settings
are changed after a stored program is registered, the program's content also changes.
•
Services using System Settings, Job Flow Sheet, or Address Book cannot be registered.
•
The registering procedure for a stored program is canceled when the <Interrupt> button is pressed,
the Auto Clear feature causes a time-out, or a popup window (paper jam, etc.) appears.
•
There are two ways in which address numbers and stored programs are assigned to the one touch
buttons. Select either of the following. By default, [Type 1] is selected. For information on how to
change the settings registered to the one touch buttons, refer to "Screen/Button Settings" (P.319).
- [Type 1]
The buttons 1 to 70 are used for address numbers and they correspond to the registered address
numbers 0001 to 0070, while the buttons M01 and M02 are used for stored programs and they
correspond to the registered stored programs 1 and 2.
- [Type 2]
The buttons 1 to 60 are used for address numbers and they correspond to the registered address
numbers 0001 to 0060, while the buttons 61 to 70, M01, and M02 are used for stored programs and
they correspond to the registered stored programs 1 to 12.
1
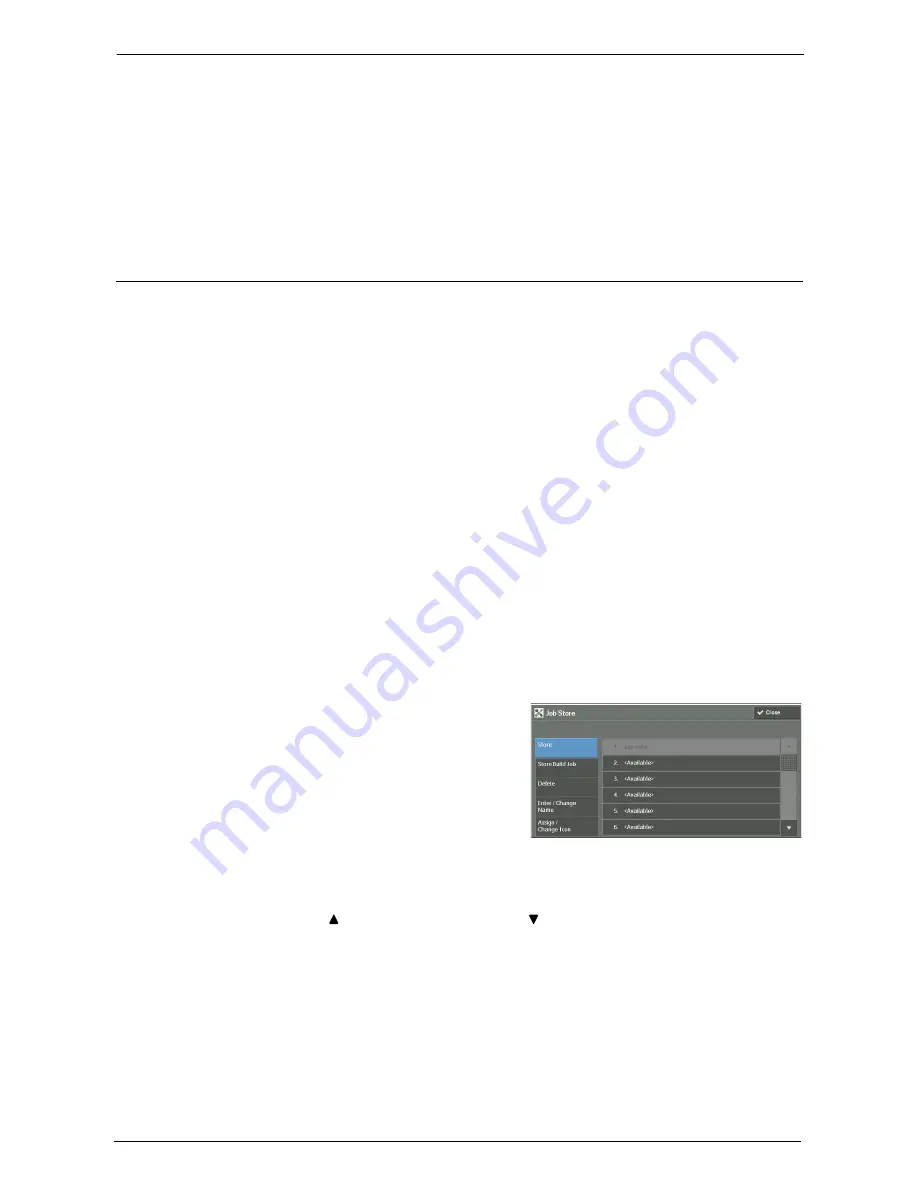
Select [Store].
2
Select a number to register a stored program.
Note
•
Once a job is stored to a button, it cannot be overwritten.
•
Select [ ] to return to the previous screen or [ ] to move to the next screen.
3
Set the feature you want to register.
Note
•
The machine sounds an audible tone while a stored program is being registered.
•
Press the <Interrupt> button to cancel registration.
You can change the volume of the sound that notifies that a stored program is being registered. For
information on the setting, refer to "Stored Programming Tone" (P.319).
4
Press the <Start> or <Clear All> button.
Note
•
If no name is entered for a registered stored program, the name becomes "(No Name)".
Summary of Contents for C7765DN
Page 1: ...Dell C7765dn Color Multifunction Printer User s Guide Regulatory Model C7765dn ...
Page 32: ...1 Before Using the Machine 32 ...
Page 144: ...3 Copy 144 ...
Page 156: ...4 Fax 156 ...
Page 168: ...5 Scan 168 ...
Page 272: ...13 Maintenance 272 ...
Page 294: ...14 Machine Status 294 ...
Page 468: ...16 Dell Printer Configuration Web Tool Settings 468 ...
Page 510: ...19 Scanner Environment Settings 510 ...
Page 564: ...22 Authentication and Accounting Features 564 ...
Page 764: ...28 Using Shortcut Menu 764 ...
Page 796: ...29 Using Access Google Drive 796 2 Check the content status 3 Select Close ...
Page 802: ...29 Using Access Google Drive 802 ...
Page 816: ...30 Google Cloud Print 816 ...


