Paper Jams
685
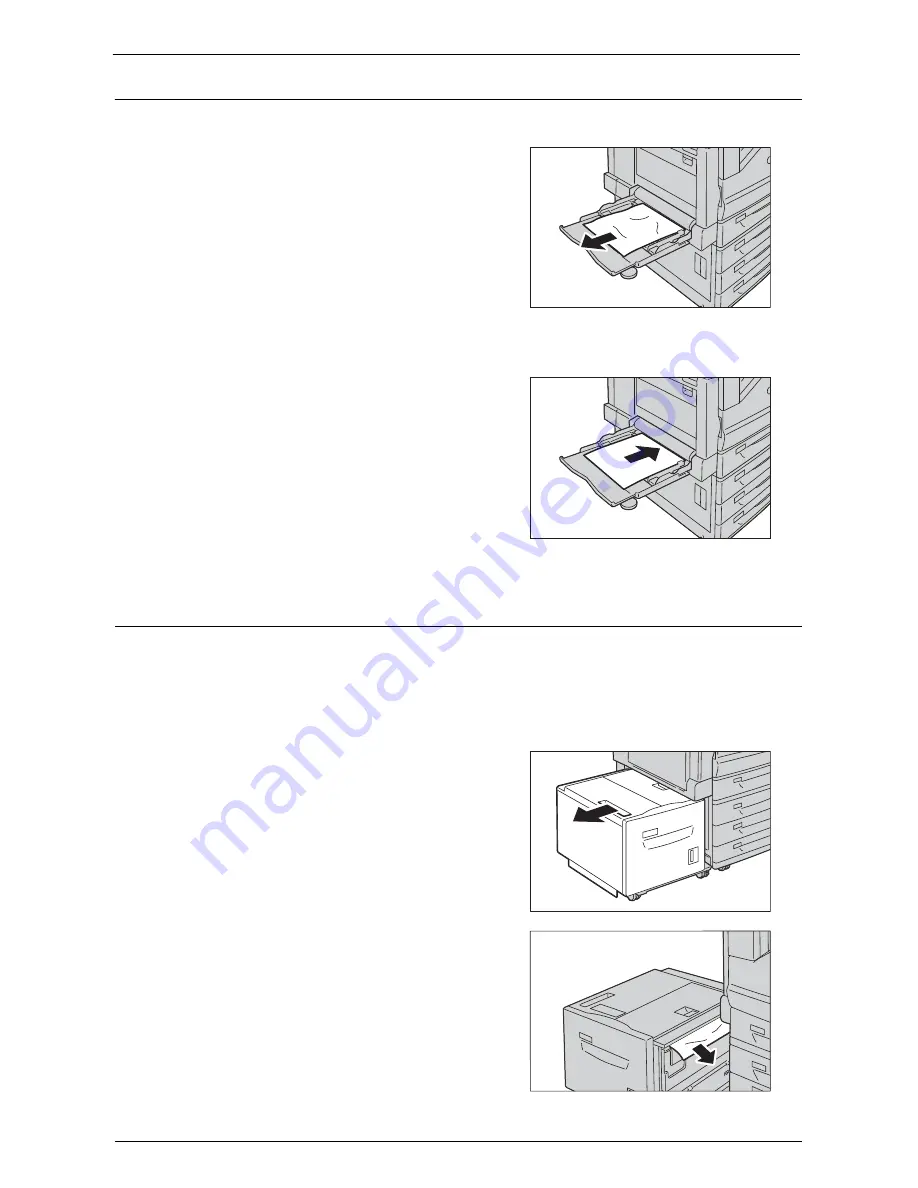
Paper Jams in Tray 5 (Bypass Tray)
The following describes how to clear paper jams occurring in Tray 5.
1
Check the back of Tray 5 (around the paper
feed entrance) and remove the jammed paper.
Note
•
When two or more sheets of paper are loaded,
remove all of the sheets from the tray.
•
If the paper is torn, make sure no piece of
paper remains inside the machine.
2
When two or more sheets of paper were loaded, jog the paper you removed making sure
that all four corners are neatly aligned.
3
Insert the paper into the tray with the printing
side facing down until its edge lightly touches
against the paper feed entrance.
Paper Jams in Tray 6 (HCF B1)
This section describes how to clear paper jams occurring in Tray 6 (HCF B1).
Note
•
Remedy differs depending on where the paper jam occurs. Follow the instructions displayed and
remove the jammed paper.
Paper Jams in Tray 6 Exit
1
Gently move Tray 6 to the left until it stops by
gripping the handle on the top left side of Tray
6.
2
Remove the jammed paper.
Note
•
If the paper is torn, make sure no pieces of
paper remain inside Tray 6.
Summary of Contents for C7765DN
Page 1: ...Dell C7765dn Color Multifunction Printer User s Guide Regulatory Model C7765dn ...
Page 32: ...1 Before Using the Machine 32 ...
Page 144: ...3 Copy 144 ...
Page 156: ...4 Fax 156 ...
Page 168: ...5 Scan 168 ...
Page 272: ...13 Maintenance 272 ...
Page 294: ...14 Machine Status 294 ...
Page 468: ...16 Dell Printer Configuration Web Tool Settings 468 ...
Page 510: ...19 Scanner Environment Settings 510 ...
Page 564: ...22 Authentication and Accounting Features 564 ...
Page 764: ...28 Using Shortcut Menu 764 ...
Page 796: ...29 Using Access Google Drive 796 2 Check the content status 3 Select Close ...
Page 802: ...29 Using Access Google Drive 802 ...
Page 816: ...30 Google Cloud Print 816 ...


