Fax Procedure
147
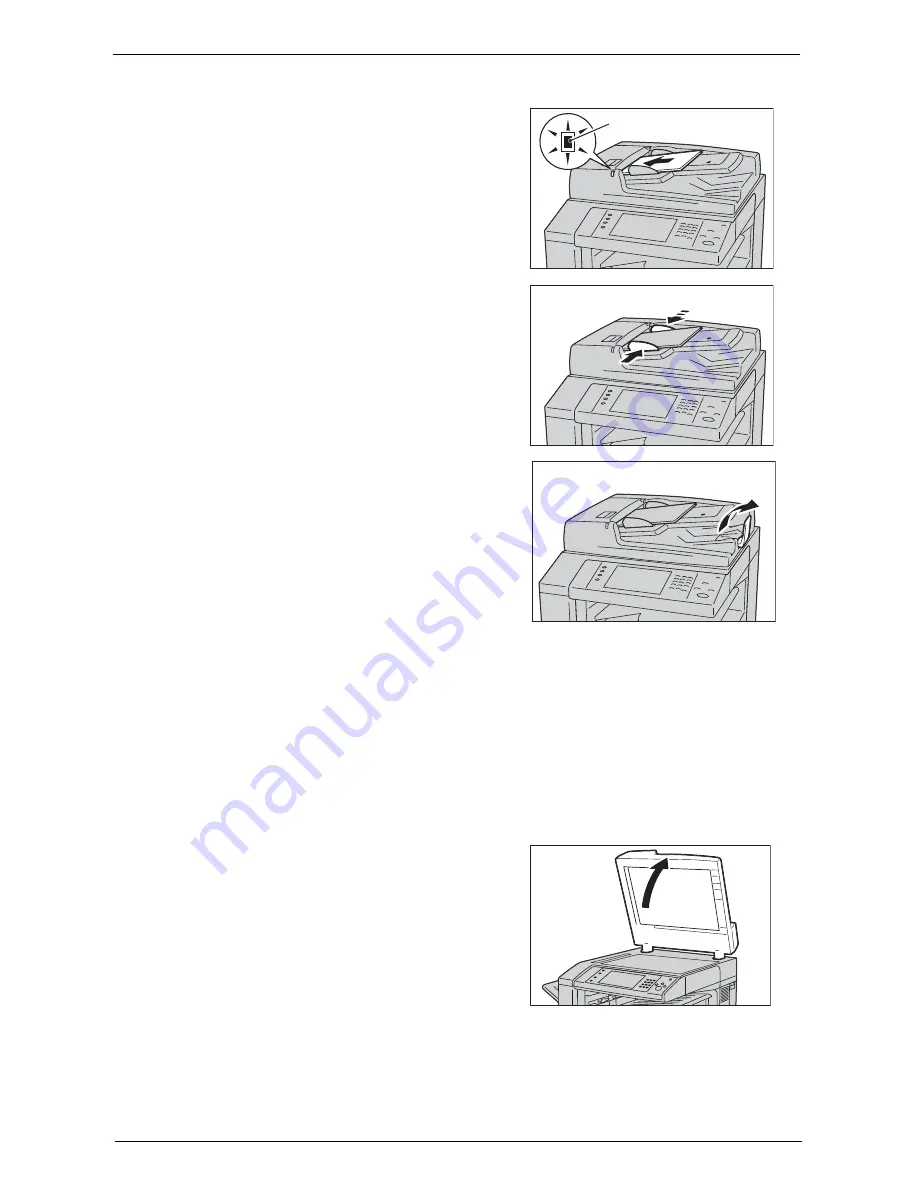
1
Remove any paper clips and staples before loading the document.
2
Load the document face up (when the
document is 2-sided, place the front side up) in
the center of the document feeder.
Note
•
The confirmation indicator lights up when the
document is loaded correctly. If the indicator
does not light, the machine may be detecting
the document on the document glass. Load
the document again.
3
Adjust the document guides to match the size
of the document loaded.
4
Open the document stopper.
Document Glass
The document glass supports a single sheet, a book, or other similar documents with a size
from 15 x 15 mm to 297 x 432 mm (Standard size: A3, 11 x 17").
Note
•
Always close the document cover after using the document glass.
The document glass automatically detects standard size documents.
The standard document sizes that can be detected automatically depend on [Paper Size Settings] in
the System Administration mode. For information on [Paper Size Settings], refer to "Paper Size
Settings" (P.335).
1
Open the document cover.
Note
•
Ensure that the touch screen is active, and
then load a document. Otherwise, the machine
may not properly detect the document size.
Confirmation indicator
Summary of Contents for C7765DN
Page 1: ...Dell C7765dn Color Multifunction Printer User s Guide Regulatory Model C7765dn ...
Page 32: ...1 Before Using the Machine 32 ...
Page 144: ...3 Copy 144 ...
Page 156: ...4 Fax 156 ...
Page 168: ...5 Scan 168 ...
Page 272: ...13 Maintenance 272 ...
Page 294: ...14 Machine Status 294 ...
Page 468: ...16 Dell Printer Configuration Web Tool Settings 468 ...
Page 510: ...19 Scanner Environment Settings 510 ...
Page 564: ...22 Authentication and Accounting Features 564 ...
Page 764: ...28 Using Shortcut Menu 764 ...
Page 796: ...29 Using Access Google Drive 796 2 Check the content status 3 Select Close ...
Page 802: ...29 Using Access Google Drive 802 ...
Page 816: ...30 Google Cloud Print 816 ...


