


Chapter 9: Using the Command Line Interface
680
Actuator Configuration Commands
An actuator configuration command begins with
actuator
. You can configure
the name and location parameters of an individual actuator.
You can configure various parameters for one actuator at a time. See
Multi-Command Syntax
(on page 695).
Change the name:
config:#
actuator <n> name "<name>"
Set the X coordinate:
config:#
actuator <n> xlabel "<coordinate>"
Set the Y coordinate:
config:#
actuator <n> ylabel "<coordinate>"
Set the Z coordinate:
config:#
actuator <n> zlabel "<z_label>"
Modify the actuator's description:
config:#
actuator <n> description "<description>"
Variables:
•
<n> is the ID number assigned to the actuator. The ID number can be
found using the PX3TS web interface or CLI. It is an integer starting at 1.
•
<name> is a string comprising up to 64 ASCII printable characters. The
<name> variable must be enclosed in quotes when it contains spaces.
•
<coordinate> is a string comprising up to 24 ASCII printable characters, and
it must be enclosed in quotes.
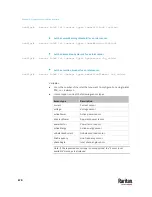
•
There are two types of values for the <z_label> variable, depending on the
Z coordinate format you set:
Type
Description
Free form
<coordinate> is a string comprising up to 24 ASCII
printable characters, and it must be enclosed in
quotes.
Rack units
<coordinate> is an integer number in rack units.
Note: To specify the Z coordinate using the rack units, see
Setting the Z
Coordinate Format for Environmental Sensors
(on page 575).
Summary of Contents for Raritan PX3TS
Page 4: ......
Page 6: ......
Page 20: ......
Page 80: ...Chapter 4 Connecting External Equipment Optional 60...
Page 109: ...Chapter 5 PDU Linking 89...
Page 117: ...Chapter 5 PDU Linking 97...
Page 441: ...Chapter 7 Using the Web Interface 421...
Page 464: ...Chapter 7 Using the Web Interface 444...
Page 465: ...Chapter 7 Using the Web Interface 445 Continued...
Page 746: ...Appendix A Specifications 726...
Page 823: ...Appendix I RADIUS Configuration Illustration 803 Note If your PX3TS uses PAP then select PAP...
Page 828: ...Appendix I RADIUS Configuration Illustration 808 14 The new attribute is added Click OK...
Page 829: ...Appendix I RADIUS Configuration Illustration 809 15 Click Next to continue...
Page 860: ...Appendix J Additional PX3TS Information 840...
Page 890: ...Appendix K Integration 870 3 Click OK...
Page 900: ......


