


Chapter 7: Using the Web Interface
284
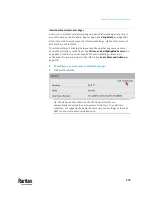
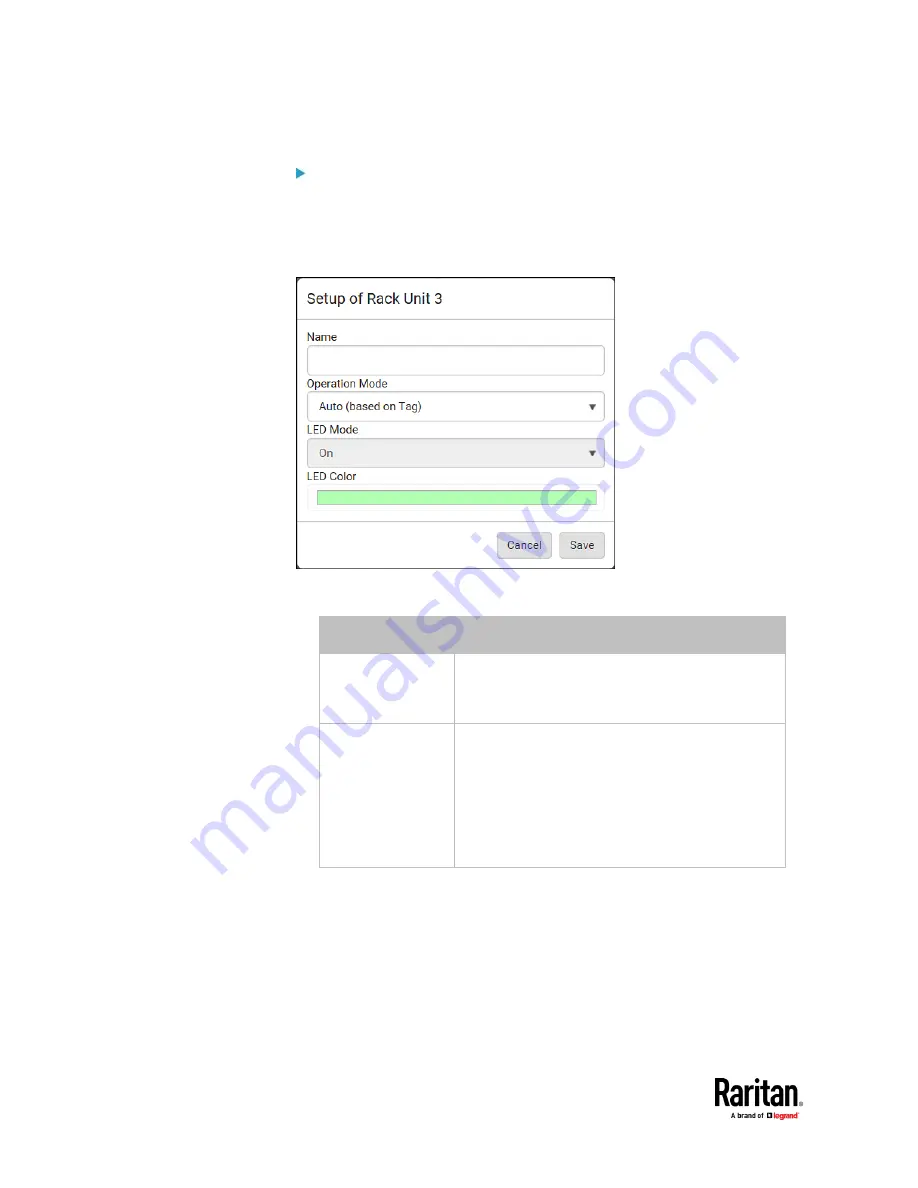
To customize a single rack unit's settings:
You can make a specific rack unit's LED behave differently from the others on
the asset strip, including the LED light and color.
1.
Click the desired rack unit on the Rack Units list. The setup dialog for the
selected one appears.
2.
Make changes to the information by typing a new value or clicking that
field to select a different option.
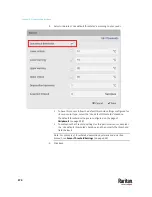
Field
Description
Name
Name for this rack unit.
For example, you can name it based on the
associated IT device.
Operation Mode
Determine whether this rack unit's LED behavior
automatically changes according to the presence
and absence of the asset tag.
▪
Auto
: The LED behavior varies, based on the
asset tag's presence.
▪
Manual Override
: This option differentiates this
rack unit's LED behavior.
Summary of Contents for Raritan PX3TS
Page 4: ......
Page 6: ......
Page 20: ......
Page 80: ...Chapter 4 Connecting External Equipment Optional 60...
Page 109: ...Chapter 5 PDU Linking 89...
Page 117: ...Chapter 5 PDU Linking 97...
Page 441: ...Chapter 7 Using the Web Interface 421...
Page 464: ...Chapter 7 Using the Web Interface 444...
Page 465: ...Chapter 7 Using the Web Interface 445 Continued...
Page 746: ...Appendix A Specifications 726...
Page 823: ...Appendix I RADIUS Configuration Illustration 803 Note If your PX3TS uses PAP then select PAP...
Page 828: ...Appendix I RADIUS Configuration Illustration 808 14 The new attribute is added Click OK...
Page 829: ...Appendix I RADIUS Configuration Illustration 809 15 Click Next to continue...
Page 860: ...Appendix J Additional PX3TS Information 840...
Page 890: ...Appendix K Integration 870 3 Click OK...
Page 900: ......


