


Appendix J: Additional PX3TS Information
850
Installing the USB-to-Serial Driver (Optional)
The PX3TS can emulate a USB-to-serial converter over a USB connection. A
USB-to-serial driver named "Dominion PX2 Serial Console" is required for
Microsoft
®
Windows
®
operating systems.
Download the Windows driver for USB serial console from the Raritan
website's
Support page
http://www.raritan.com/support/
). The downloaded
driver's name is
dominion-serial-setup-<n>.exe
, where <n> represents the file's
version number.
There are two ways to install this driver: automatic and manual installation.
Automatic driver installation is highly recommended.
Automatic driver installation in Windows
®
:
1.
Make sure the PX3TS is NOT connected to the computer via a USB cable.
2.
Run dominion-serial-setup-<n>.exe on the computer and follow online
instructions to install the driver.
Note: If any Windows security warning appears, accept it to continue the
installation.
3.
Connect the PX3TS to the computer via a USB cable. The driver is
automatically installed.
Manual driver installation in Windows
®
:
1.
Make sure the PX3TS has been connected to the computer via a USB cable.
2.
The computer detects the new device and the "Found New Hardware
Wizard" dialog appears.
▪
If this dialog does not appear, choose Control Panel > System >
Hardware > Device Manager, right-click the
Dominion PX2 Serial
Console
, and choose Update Driver.
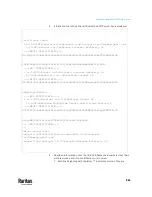
3.
Select the option of driver installation from a specific location, and then
specify the location where both
dominion-serial.inf
and
dominion-serial.cat
are stored.
Note: If any Windows security warning appears, accept it to continue the
installation.
4.
Wait until the installation is complete.
Summary of Contents for Raritan PX3TS
Page 4: ......
Page 6: ......
Page 20: ......
Page 80: ...Chapter 4 Connecting External Equipment Optional 60...
Page 109: ...Chapter 5 PDU Linking 89...
Page 117: ...Chapter 5 PDU Linking 97...
Page 441: ...Chapter 7 Using the Web Interface 421...
Page 464: ...Chapter 7 Using the Web Interface 444...
Page 465: ...Chapter 7 Using the Web Interface 445 Continued...
Page 746: ...Appendix A Specifications 726...
Page 823: ...Appendix I RADIUS Configuration Illustration 803 Note If your PX3TS uses PAP then select PAP...
Page 828: ...Appendix I RADIUS Configuration Illustration 808 14 The new attribute is added Click OK...
Page 829: ...Appendix I RADIUS Configuration Illustration 809 15 Click Next to continue...
Page 860: ...Appendix J Additional PX3TS Information 840...
Page 890: ...Appendix K Integration 870 3 Click OK...
Page 900: ......


