


Chapter 9: Using the Command Line Interface
673
config:#
sensor outlet <n> <sensor type> assertionTimeout <as_value>
Variables:
•
<n> is the number of the outlet that you want to configure.
•
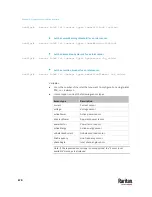
<sensor type> is one of the following sensor types:
Sensor type
Description
current
Current sensor
voltage
Voltage sensor
activePower
Active power sensor
apparentPower
Apparent power sensor
powerFactor
Power factor sensor
activeEnergy
Active energy sensor
lineFrequency
Line frequency sensor
Note: If the requested sensor type is not supported, the "Sensor is not
available" message is displayed.
•
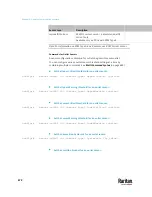
<option> is one of the options:
enable
,
disable
or a numeric value.
Option
Description
enable
Enables the specified threshold for a specific outlet
sensor.
disable
Disables the specified threshold for a specific outlet
sensor.
A numeric value Sets a value for the specified threshold of a specific
outlet sensor and enables this threshold at the same
time.
•
<hy_value> is a numeric value that is assigned to the hysteresis for the
specified outlet sensor. See
"To De-assert" and Deassertion Hysteresis
(on
page 839).
•
<as_value> is a number in samples that is assigned to the assertion
timeout for the specified outlet sensor. See
"To Assert" and Assertion
Timeout
(on page 837).
Summary of Contents for Raritan PX3TS
Page 4: ......
Page 6: ......
Page 20: ......
Page 80: ...Chapter 4 Connecting External Equipment Optional 60...
Page 109: ...Chapter 5 PDU Linking 89...
Page 117: ...Chapter 5 PDU Linking 97...
Page 441: ...Chapter 7 Using the Web Interface 421...
Page 464: ...Chapter 7 Using the Web Interface 444...
Page 465: ...Chapter 7 Using the Web Interface 445 Continued...
Page 746: ...Appendix A Specifications 726...
Page 823: ...Appendix I RADIUS Configuration Illustration 803 Note If your PX3TS uses PAP then select PAP...
Page 828: ...Appendix I RADIUS Configuration Illustration 808 14 The new attribute is added Click OK...
Page 829: ...Appendix I RADIUS Configuration Illustration 809 15 Click Next to continue...
Page 860: ...Appendix J Additional PX3TS Information 840...
Page 890: ...Appendix K Integration 870 3 Click OK...
Page 900: ......


