


Chapter 7: Using the Web Interface
271
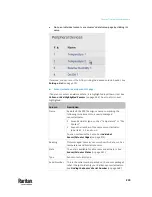
Managing One Sensor or Actuator
If you are managing only one sensor or actuator, you can assign the desired ID
number to it. Note that you cannot assign ID numbers when managing multiple
sensors/actuators at a time.
Tip: When the total of managed sensors/actuators reaches the maximum value,
you cannot manage additional ones. The only way to manage any
sensor/actuator is to release or replace the managed ones. To replace a
managed one, assign an ID number to it by following the procedure below. To
release any one, see
Peripherals
(on page 258).
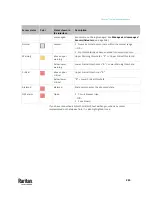
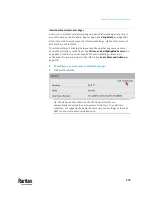
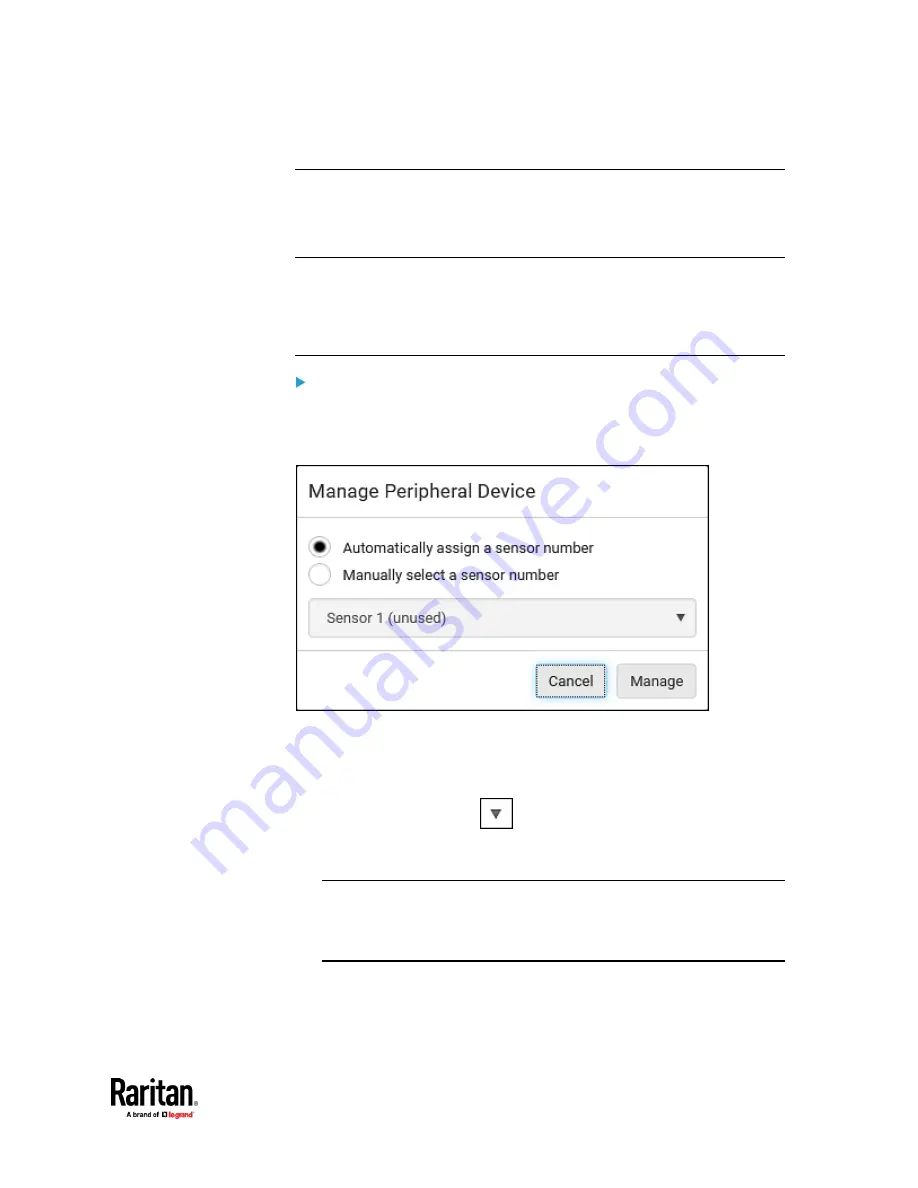
To manage only one sensor/actuator:
1.
From the list of "unmanaged" sensors/actuators, click the one you want to
manage.
2.
The Manage Peripheral Device dialog appears.
▪
To let PX3TS randomly assign an ID number to it, select "Automatically
assign a sensor number."
This method does not release any managed sensor or actuator.
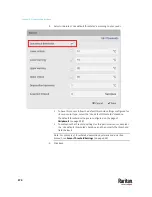
▪
To assign a desired ID number, select "Manually select a sensor
number." Then click
to select an ID number.
This method may release a managed sensor/actuator if the number
you selected has been assigned to a specific sensor/actuator.
Tip: The information in parentheses following each ID number indicates
whether the number has been assigned to a sensor or actuator. If it has
been assigned to a sensor or actuator, it shows the sensor package's serial
number. Otherwise, it shows the word "unused."
3.
Click Manage.
Summary of Contents for Raritan PX3TS
Page 4: ......
Page 6: ......
Page 20: ......
Page 80: ...Chapter 4 Connecting External Equipment Optional 60...
Page 109: ...Chapter 5 PDU Linking 89...
Page 117: ...Chapter 5 PDU Linking 97...
Page 441: ...Chapter 7 Using the Web Interface 421...
Page 464: ...Chapter 7 Using the Web Interface 444...
Page 465: ...Chapter 7 Using the Web Interface 445 Continued...
Page 746: ...Appendix A Specifications 726...
Page 823: ...Appendix I RADIUS Configuration Illustration 803 Note If your PX3TS uses PAP then select PAP...
Page 828: ...Appendix I RADIUS Configuration Illustration 808 14 The new attribute is added Click OK...
Page 829: ...Appendix I RADIUS Configuration Illustration 809 15 Click Next to continue...
Page 860: ...Appendix J Additional PX3TS Information 840...
Page 890: ...Appendix K Integration 870 3 Click OK...
Page 900: ......


