Chapter 9: Using the Command Line Interface
631
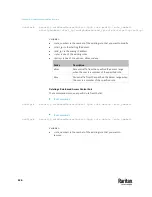
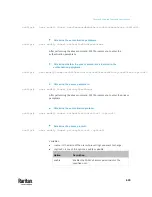
Setting an Outlet's Cycling Power-Off Period
This section applies to outlet-switching capable models only.
This command determines the power-off period of the power cycling operation
for a specific outlet.
config:#
outlet <n> cyclingPowerOffPeriod <timing>
Variables:
•
<n> is the number of the outlet that you want to configure.
•
<timing> is the time of the cycling power-off period in seconds, which is an
integer between 0 and 3600, or
pduDefined
for following the PDU-defined
timing.
Note: This setting overrides the PDU-defined cycling power-off period on a
particular outlet. See
Setting the PDU-Defined Cycling Power-Off Period
(on
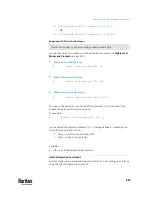
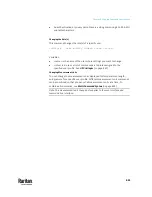
Example - Outlet Naming
The following command assigns the name "Win XP" to outlet 8.
config:#
outlet 8 name "Win XP"
Outlet Group Configuration Commands
An outlet group configuration command begins with
outletgroup
. Such a
command allows you to configure or operate an outlet group.
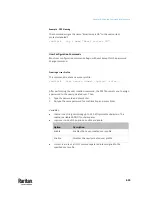
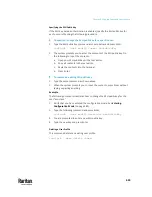
Creating an Outlet Group
This command creates a new outlet group.
config:#
outletgroup add "<name>" <members>
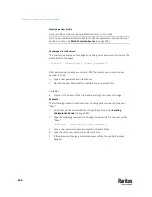
Variables:
•
<name> is a string comprising up to 64 ASCII printable characters. The
<name> variable must be enclosed in quotes when it contains spaces.
Tip: PX3TS allows you to assign the same name to diverse outlet groups. If
this really occurs, you still can identify different groups through their
unique index numbers.
Summary of Contents for Raritan PX3TS
Page 4: ......
Page 6: ......
Page 20: ......
Page 80: ...Chapter 4 Connecting External Equipment Optional 60...
Page 109: ...Chapter 5 PDU Linking 89...
Page 117: ...Chapter 5 PDU Linking 97...
Page 441: ...Chapter 7 Using the Web Interface 421...
Page 464: ...Chapter 7 Using the Web Interface 444...
Page 465: ...Chapter 7 Using the Web Interface 445 Continued...
Page 746: ...Appendix A Specifications 726...
Page 823: ...Appendix I RADIUS Configuration Illustration 803 Note If your PX3TS uses PAP then select PAP...
Page 828: ...Appendix I RADIUS Configuration Illustration 808 14 The new attribute is added Click OK...
Page 829: ...Appendix I RADIUS Configuration Illustration 809 15 Click Next to continue...
Page 860: ...Appendix J Additional PX3TS Information 840...
Page 890: ...Appendix K Integration 870 3 Click OK...
Page 900: ......


