Adding Lines To QuickQ
The system divides its add option menu into four catagories. These catagories include the following items:
(1) Line Name—ACD line names can be up to seven characters in length. The names are displayed on the LCD of
the agent’s telephone while that station is logged into the QuickQ system.; otherwise, the DXP line name shows in
the display. QuickQ call reports use the ACD line name while SMDA/SMDR reports use the DXP line name.
(2) Group—This is the ACD group that the system associates with the lines. There are 16 groups available plus an
External Transfer Lines selection (Ex Trans.). The Ex Trans. selection allows the proprietary voice mail system or
an operator to transfer lines to the QuickQ system. Transfers must be to a group intercom associated with a
desired ACD group. To ensure proper operation, you must give the master voice channels access to the group
intercoms being used. The QuickQ system associates particular group intercom numbers with each of the 16 ACD
groups. That association is as shown on the following chart. The system only supports the use of unscreened
transfers.
(3) Subgroup—This catagory usually remains at its default value of LNGP1 unless the site has several line types
(such as WATS FX, Local) and you must differentiate between them.
(4) Line Number—This is the DXP line port. enter it in a four-character format (for example, line 1 = L001).
Use this procedure to add lines to the QuickQ system.
1.
Open the technician access level and select the
system-setup option. Either press and hold the
ALT key and press the Y key or highlight system
setup and press the ENTER key. The
system-setup options will open.
2.
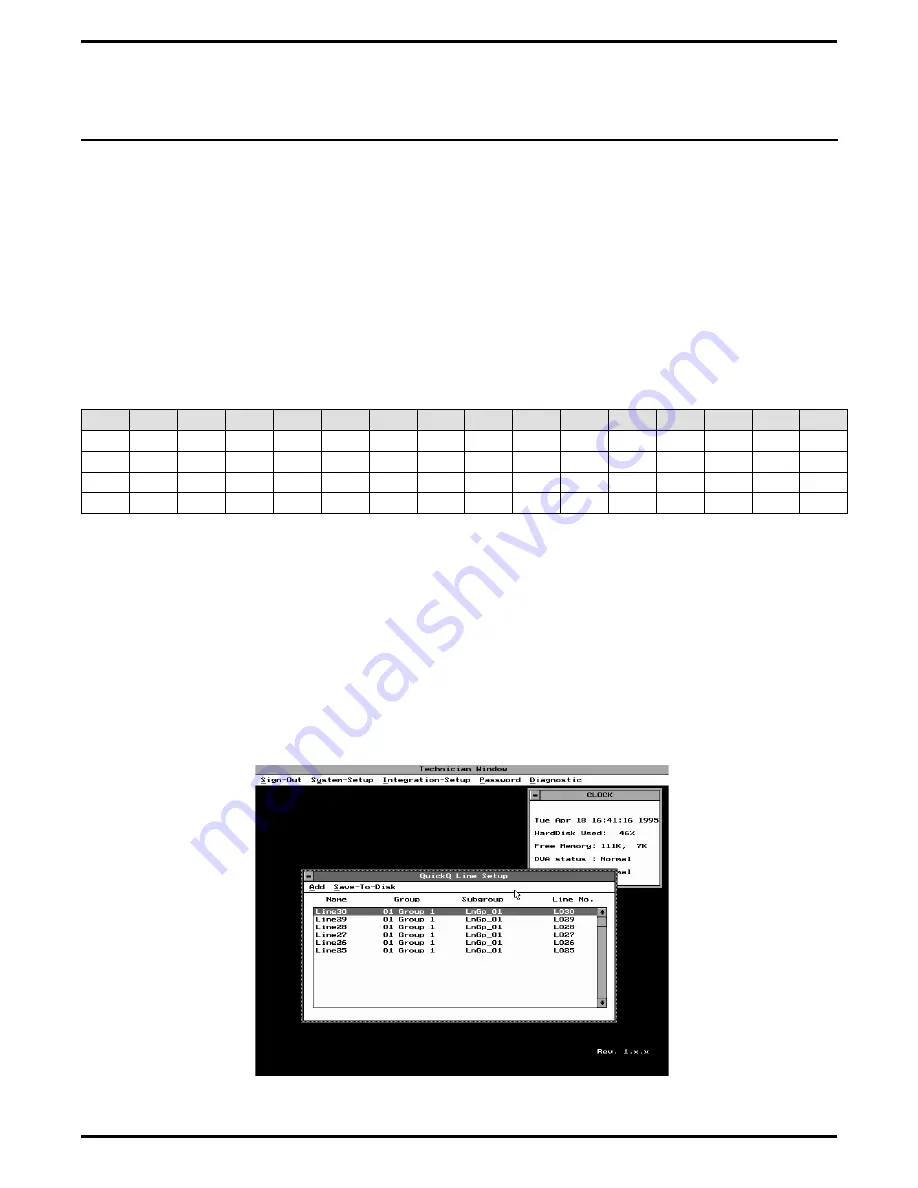
To select the QuickQ line setup, press the down
arrow key to highlight QuickQ line setup option
and press the ENTER key. The QuickQ line setup
window will open (see Figure 5-6).
Gp 1 Gp 2 Gp 3
Gp 4
Gp5
Gp 6
Gp 7
Gp 8
Gp 9
Gp10 Gp 11 Gp 12 Gp 13 Gp 14 Gp 15 Gp 16
4201
4202
4203
4204
4205
4206
4207
4208
4209
4210
4211
4212
4213
4214
4215
4216
4217
4218
4219
4220
4221
4222
4223
4224
4225
4226
4227
4228
4229
4230
4231
4232
4233
4234
4235
4236
4237
4238
4239
4240
4241
4242
4243
4244
4245
4246
4247
4248
4249
4250
4251
4252
4253
4254
4255
4256
4257
4258
4259
4260
4261
4262
4263
4264
Figure 5-6. Viewing The QuickQ Line Setup Window
Setting Up The Personal Computer
IMI66–109, Section Five
Setting Up The Personal Computer 5 – 5
Содержание DXP Plus Series
Страница 1: ...Digital Communications System R ...
Страница 363: ...Automatic Call Distributor Technical Manual R QuickQ DXP ...
Страница 424: ...Automatic Call Distributor System Manager s Guide R QuickQ DXP ...
Страница 500: ...Wrap up Time 1 6 Wrapping Up A Call 4 3 Z Zoom Box A 2 GCA70 271 Index I 3 ...
Страница 628: ...Interconnecting The VMI X Installing And Programming For ExecuMail IMI89 206 Installing And Programming For ExecuMail 5 ...
Страница 677: ...Connecting The Equipment Installing And Programming The OPX X IMI89 209 Installing The OPX X 7 ...
Страница 728: ...DP I I I I and FX Series Digital Communications Systems Understanding The Visual Man Machine Interface COMDlA ...
Страница 1112: ...9 08 8 90 1 13 4 78 3 94 UNIS029 TAB003 PLS page 6 GCA40 130 DXP Plus General Description 11B Telephone Features ...


