


Chapter 3: Initial Installation and Configuration
31
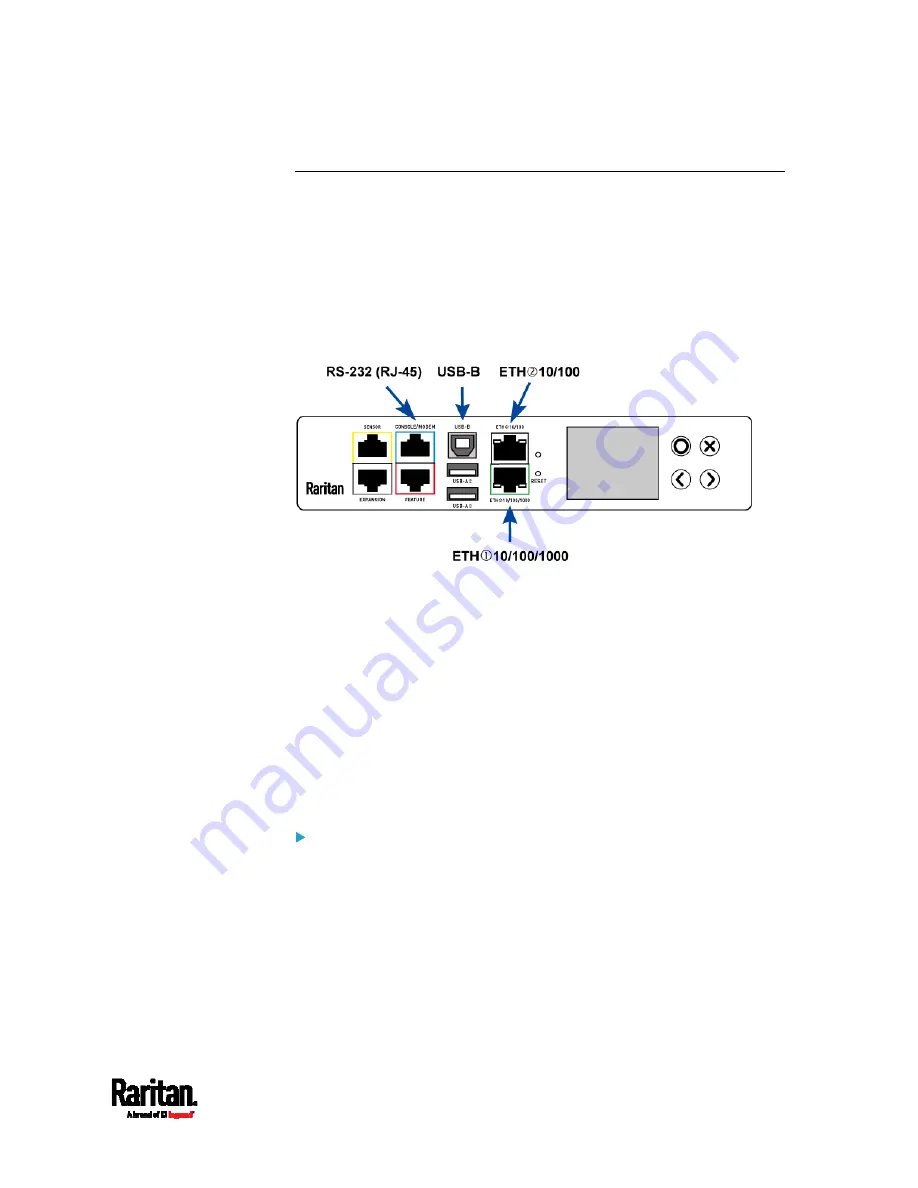
Connecting the PX3 to a Computer
The PX3 can be connected to a computer for configuration via one of the
following ports.
Ethernet ports
USB-B port
RS-232 serial port (RJ-45)
Note that the port locations on your models may differ.
Zero U models:
To use the command line interface (CLI) for configuration, establish an
RS-232 or USB connection.
To use a web browser for configuration, make a network connection to
the computer. The PX3 is automatically configured with the following
link-local addressing in any network without DHCP available:
https://169.254.x.x (where x is a number)
https://pdu.local
See
APIPA and Link-Local Addressing
(on page 2).
Establish one of the following connections to a computer. Ethernet port
of PX3 must be enabled for the described connection to work properly,
which has been enabled per default.
Direct network connection:
1.
Connect one end of a standard network patch cable to either
Ethernet port of the PX3.
2.
Connect the other end to a computer's Ethernet port.
3.
On the connected computer, launch a web browser to access the PX3,
using either link-local addressing:
pdu.local or 169.254.x.x. See
Login
(on page 148).
Summary of Contents for Raritan PX3-3000 Series
Page 5: ......
Page 90: ...Chapter 4 Connecting External Equipment Optional 69 ...
Page 424: ...Chapter 6 Using the Web Interface 403 ...
Page 447: ...Chapter 6 Using the Web Interface 426 ...
Page 448: ...Chapter 6 Using the Web Interface 427 Continued ...
Page 885: ...Appendix K RADIUS Configuration Illustration 864 Note If your PX3 uses PAP then select PAP ...
Page 890: ...Appendix K RADIUS Configuration Illustration 869 14 The new attribute is added Click OK ...
Page 891: ...Appendix K RADIUS Configuration Illustration 870 15 Click Next to continue ...
Page 921: ...Appendix L Additional PX3 Information 900 ...


