


Chapter 6: Using the Web Interface
217
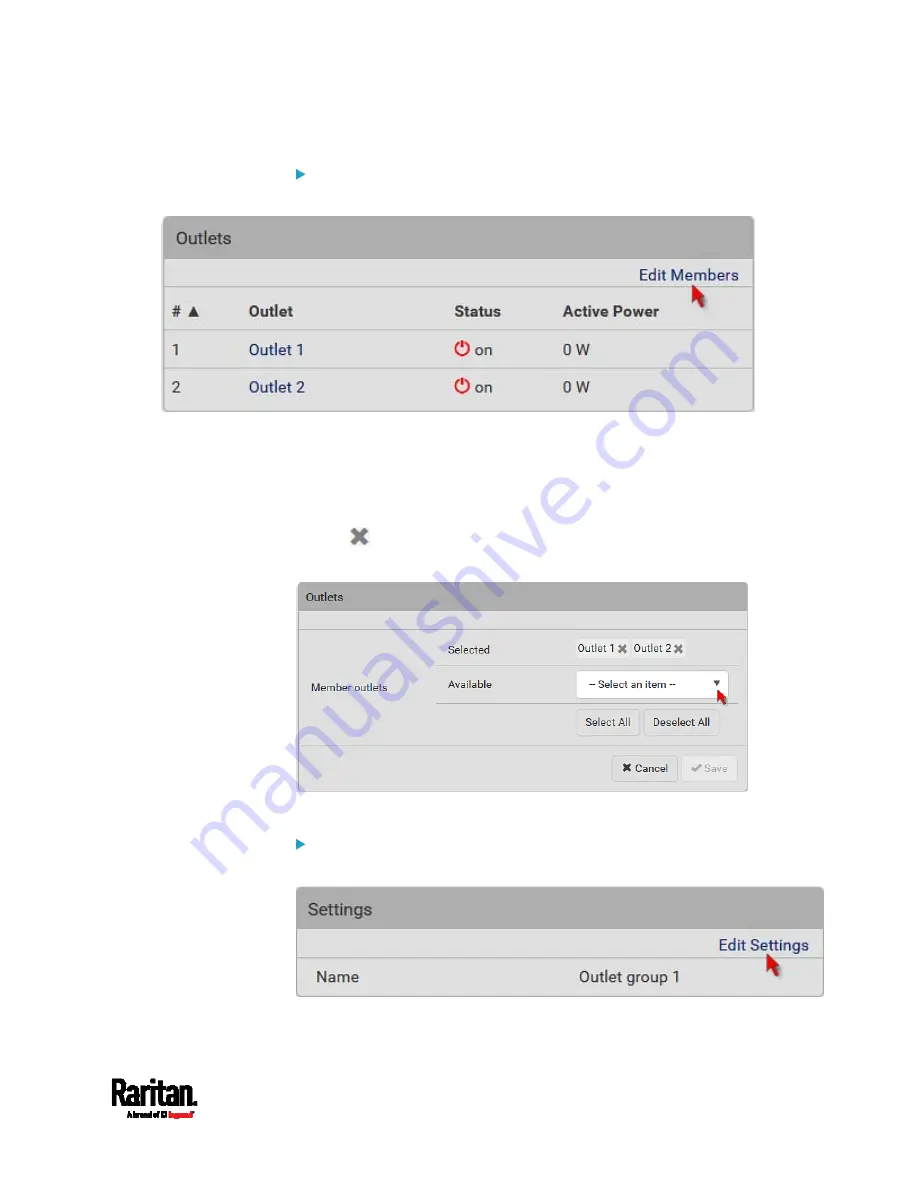
To modify the member outlets:
1.
Click Edit Members.
2.
Add or remove outlets of this group.
To select any outlet(s), select them one by one from the Available
list.
To select all available outlets, click Select All.
To remove any outlet(s) from the Selected field, click that outlet's
.
To remove all outlets, click Deselect All.
3.
Click Save.
To change the group name:
1.
Click Edit Settings.
2.
Type a new name.
Summary of Contents for Raritan PX3-3000 Series
Page 5: ......
Page 90: ...Chapter 4 Connecting External Equipment Optional 69 ...
Page 424: ...Chapter 6 Using the Web Interface 403 ...
Page 447: ...Chapter 6 Using the Web Interface 426 ...
Page 448: ...Chapter 6 Using the Web Interface 427 Continued ...
Page 885: ...Appendix K RADIUS Configuration Illustration 864 Note If your PX3 uses PAP then select PAP ...
Page 890: ...Appendix K RADIUS Configuration Illustration 869 14 The new attribute is added Click OK ...
Page 891: ...Appendix K RADIUS Configuration Illustration 870 15 Click Next to continue ...
Page 921: ...Appendix L Additional PX3 Information 900 ...


