197
Programming examples: Model helicopter
“Helicopter”.
Select model type (free model memory)
Confi rm your choice with a brief press of the rotary
control (or
ENTER
), and the screen immediately swit-
ches to the basic display.
If the warning “Throttle too high” appears, move the
collective pitch stick to the minimum position, and the
message will disappear.
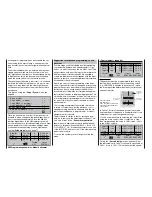
The next step is to select a name for the model me-
mory you have selected; the name is entered in the
menu …
»Base setup model« (page 66)
<
>
<
>
SPCM20
0%
1
6
Starlet 50
still in phase test
7
SEL
Info
Modulation
Autorotation
BASIC SETTINGS, MODEL
Model name
Stick mode
Volume
Auto timer reset
Power on warning
Auto trim
Autorot. C1 Pos.
Marker key
yes
The “
Model name
” is entered using virtually the same
procedure as for the Owner’s name; this is descri-
bed in the centre column of the left-hand page under
»
Basic settings
«.
At this stage you should check the settings for “
Stick
mode
” and “
Modulation
”; these were adopted from
the »
Basic settings
« menu when the model memory
was initialised, but you may need to change them for
the model memory you are using.
In the “
Info
” line you can enter a small amount of sup-
plementary information relating to your selected mo-
del (max. fi fteen letters or symbols). This information
may help you later when selecting models from the
list.
Another option is activated in the “
Auto-rotation
”
line. Even if you are a beginner to fl ying and are not
yet ready for this, it is advisable at least to defi ne the
auto-rotation switch, so that you have an “emergency
off” switch for the motor.
This is accomplished in the “
Auto-rotation
” line of
the menu: press the rotary control briefl y to activa-
te switch assignment, and move one of the ON / OFF
switches (e. g. SW 7) to the “ON” position.
The AR switch should be located at a position on the
transmitter where you can easily reach it without let-
ting go of the sticks, e. g. above the collective pitch
stick.
Note:
Please see the next double page but one for informa-
tion on setting up this “Emergency OFF switch”.
And another tip:
Please get used to giving all the switches a common
“on” direction; then a quick glance at the transmitter
before fl ying will soon reassure you that all switches
are “off”.
Initially the set-up options in the lines “
Marker key
”,
“
Volume
”, “
Auto timer reset
” and “
Power-on war-
ning
” are of no interest to us …
… and the “
Auto-trim
” line should only be assigned a
switch if you wish to carry out the “initial trimming” of
your helicopter as part of a trimming fl ight. For safety
reasons you should always erase the switch assign-
ment again immediately after the trimming fl ight.
We now come to the fi rst setting which is specifi c to
helicopters. Move to the menu …
»Helicopter type« (page 72)
Under “
Swashplate type
” select the type of linkage
for the swashplate / collective pitch function, in our ex-
ample: “3 Sv (2 roll)”.
The “
Linearise swashplate
” line is of no interest to
us at the moment.
In the “
Rotor direction
” line you must determine the
direction of rotation of the main rotor as viewed from
above, i. e. right or left, or clockwise and anti-clockwi-
se respectively. In our example this is “right”.
3Sv(2roll)
SEL
0%
- 70%
right
H E L I T Y P E
Swashplate type
Linearis. swashpl.
no
Rotor direction
Pitch min.
Expo throttle lim.
Thr. limit warning
forwrd
The preset “
min. pitch
” has been adopted from the
»
Basic settings
« menu, but you should check here
that the “forward” or “back” parameter is set correctly;
change it if necessary.
We can generally ignore “
Expo throttle limit
” for the
time being, while the “
Thr. limit warning
” line can
safely be left at the default setting.
At this point, if you have not already done so, you
should connect the servos to the receiver in the cor-
rect order. However, please note that the fi rst collecti-
ve pitch servo and the socket for the throttle servo or
speed controller have been interchanged on recent
GRAUPNER/JR
systems. This applies to the
mx
-16s,
mc
-19,
mc
-22(s),
mx
-22, all
mc
-24 variants and
now also the
mx
-24s.
Summary of Contents for mx-24s
Page 1: ...1...
Page 19: ...19 For your notes...
Page 35: ...35 For your notes...
Page 41: ...41 41 For your notes...
Page 57: ...57 For your notes...
Page 63: ...63 63 For your notes...
Page 69: ...69 69 For your notes...
Page 85: ...85 85 For your notes...
Page 99: ...99 For your notes...
Page 143: ...143 For your notes...
Page 191: ...191 For your notes...
Page 212: ...212 212 For your notes...
Page 213: ...213 213 For your notes...
Page 214: ...214 For your notes...
Page 216: ...216...


