196
Model helicopter
Programming examples: Model helicopter
In this programming example we assume that you
have already read and understood the descriptions
of the individual menus, and are by now familiar with
the general handling of the transmitter. We also assu-
me that you have built and adjusted the helicopter ex-
actly in accordance with the kit instructions. The elec-
tronic facilities provided by the transmitter should ne-
ver be used to compensate for major mechanical in-
accuracies.
As so often in life, there are various ways and means
of reaching a particular destination when program-
ming the
mx
-24s. In this example our intention is
to provide a sensibly structured course of action, so
that you have a clear idea of the logical programming
techniques required. Where there are several possib-
le methods, we fi rst describe the simplest and most
easily understood solution. It is likely that the helicop-
ter will work perfectly when set up in this way, but na-
turally you are still free to try out other solutions at a
later stage in case they turn out to suit you better.
As our programming example we take the
GRAUP-
NER
STARLET 50 model helicopter, with right-hand
rotor direction, three swashplate linkage points distri-
buted equally at 120° using the “3Sv (2 roll)” swash-
plate type, a beginner’s set-up without enhanced
throttle curve, with no method of infl uencing the gyro
from the transmitter, and with no speed governor. We
have deliberately chosen this simple programming
project in order to demonstrate that it is possible to
produce a helicopter which fl ies extremely well with
relatively little programming effort.
Nevertheless, we don’t want to keep from you all the
possible expansion facilities: the basic description is
followed by set-up notes on gyro gain, speed gover-
nors and different helicopter mechanics.
At the initial programming stage you have to defi ne a
number of basic transmitter settings once only, to in-
form the transmitter of your preferred method of cont-
rol. This is accomplished in the menu …
»Basic settings« (page 154)
… where you start by entering the “
owner’s name
”,
so that it appears in the basic screen display. Switch
to the second screen page with a brief press of the
rotary control on the
symbol; here you can enter
the name by selecting characters from a comprehen-
sive symbol list:
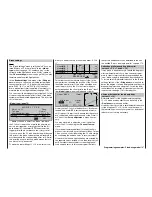
<H-J Sandbru
n
! “ # $ % & ´ ( ) * + , - . / 0 1 2 3 4 5 6 7 8 9 : ; < = > ?
@ABCDEFGHIJKLMNOPQRSTUVWXYZ[¥]^_
` a b c d e f g h i j k l m n
o p q r s t u v w x y z { } ~
n
c
N
ÇüéâäàåçêëèïîìÄÅÉæÆôöòûùÿÖÜ
n
–
>
Owners name
The “
Preset stick mode
” should be selected using
the criteria described on page 154.
The same applies to “
Preset modulation
”.
The “
Preset min. pitch
” point should be set to suit
your personal preference.
These options,
marked “Preset”
– “Stick mode”,
“Modulation” and “min. pitch” – really are no more
than presets; the settings you enter here are adopted
as the defaults when you open a new model memory,
but you can still change them at any time.
The setting in the “
Display light
” line determines how
long the backlighting of the screen remains on when
you switch the transmitter on, and after you press a
button or operate the rotary control.
Select “yes” or “no” in the “
Power-on beep
” line to de-
termine whether the “
mx
-24s identifi cation melody” is
to sound whenever you switch the transmitter on.
In the “
Battery warning
” line you can determine the
voltage at which the transmitter battery warning is
triggered. Please don’t be tempted to set a very low
value at this point, as you will need plenty of time to
land your model safely if the battery warning is trigge-
red.
In the “
Own phase name
” line you can create your
“own” phase names, in case you don’t think any of the
preset designations are appropriate. We suggest you
leave this for a later stage.
Once you have completed these settings, it is time to
move on to the menu …
»Model select« (page 59)
… and select a free model memory using the rotary
control, …
02
03
04
05
01
06
free
free
0:00
free
free
free
… then give a brief press on the rotary control (or
press the
ENTER
button) to select the model type
1
SPCM20
9.3V
<
1 <
>
2 <
>
>
H-J Sandbrunner
GENERAL BASIC SETTINGS
Owners name
Pre-set stick mode
Pre-set modulation
Power-on beep
Battery warning
Own phase name
Pre-set min. pitch
forwrd
Display light
unlim.
Own phase name
yes
Summary of Contents for mx-24s
Page 1: ...1...
Page 19: ...19 For your notes...
Page 35: ...35 For your notes...
Page 41: ...41 41 For your notes...
Page 57: ...57 For your notes...
Page 63: ...63 63 For your notes...
Page 69: ...69 69 For your notes...
Page 85: ...85 85 For your notes...
Page 99: ...99 For your notes...
Page 143: ...143 For your notes...
Page 191: ...191 For your notes...
Page 212: ...212 212 For your notes...
Page 213: ...213 213 For your notes...
Page 214: ...214 For your notes...
Page 216: ...216...


