167
Programming examples: Fixed-wing model
»Control adjust« (page 78)
0%
+
100%+100%
0% +100%+100% 0.0 0.0
0% +100%+100% 0.0 0.0
0% +100%+100% 0.0 0.0
SYM ASY
ASY
SYM
SEL
SEL
«normal »
1
1.0
0.0
12
11
10
9
–time+
Input
Input
Input
Input
free
free
free
–
offset
Once again, hold the rotary control pressed in and
move to the line for the fl ight phase independent input
“9”. As in Example 1, activate
SEL
in the second co-
lumn with a brief press on the rotary control, and then
move the desired switch – in this case “1” – from the
intended motor OFF position in the direction of mo-
tor ON.
The appropriate travels to suit the speed controller
are entered in the “-” column. If you are using
a proportional speed controller and want the motor to
start smoothly, you can enter a suitable delay time in
the right-hand column.
All the other settings are the same as those descri-
bed in Example 1, as mentioned at the start of this
example, and the same remarks and recommendati-
ons apply.
C1 stick doubling as electric motor and butterfl y (crow) control
(Butterfl y (crow) as landing aid: ailerons raised, fl aps lowered)
Example 4
Before we address the programming of this (fourth)
example, i. e. the expansion of the basic programming
described up to this point, we would like to add a few
words about the position of the “throttle / brake stick”
at “motor OFF” and / or “Brake OFF”.
Normally the C1 stick is moved forward to open the
throttle, and moved back to extend the brakes. Howe-
ver, if you switch, for example, from “motor OFF” (=
stick “back”) to the brake system using this “classical”
arrangement, the result would be “full brake” as soon
as the transition time (set in the »
Phase settings
«
menu) has elapsed, and vice versa: if you switch to
“power” from “brakes retracted”, the motor would im-
mediately run up to “full power” within the set transiti-
on period.
From this “vice” it is certainly possible to make a “vir-
tue”, in that a “glider fl yer” – usually fl ying with the
brake “forward” – only switches to motor “ON” when
required, and then reduces power if necessary (and –
we hope – does not forget to move the C1 stick back
to “forward” when he switches back again). However,
a typical “power fl yer” will probably tend towards the
opposite priority, i. e. only switch to brake when re-
quired. It is just as easy to set up the zero point of
both systems so that they coincide, and this avoids
these interactions; “glider fl yers” would probably tend
towards “forward”, “power fl yers” presumably towards
“back”.
Whatever your preference, the
mx
-24s transmitter
permits both variants. However, in the following text
we assume that the two “Off” positions are to coinci-
de at the “forward” position. If you would prefer it the
other way round, that’s no problem: the only diffe-
rence to the version described here is in the choice of
“Throttle min. back / forward” and, if necessary, a cor-
responding brake offset in the menu:
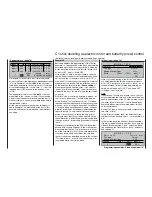
»Model type« (page 70)
SEL
Offset
+100%
Normal
2 AIL
Thr. min front
M O D E L T Y P E
Tail type
Aileron/camber flaps
Brake
Input 1
Motor on C1
Here you start by moving to the “Motor” line, where
you select whether the throttle minimum position (=
motor “OFF” position) is to be “front” or “back” – as al-
ready discussed. In the following programming ex-
ample we will make “motor OFF” and “brake OFF”
coincide at “front” (forward).
Note:
If you choose “Throttle min. forward / back”, the trim
acts only towards the “Idle” end of the travel, and not
equally on both sides of the C1 stick as is the case if
you enter “none”. Since the C1 trim is generally sel-
dom used with an electric-powered model, this has
no further relevance.
Set the “Tail” type to suit your model’s confi guration: in
this case “normal”.
In the “Aileron / camber fl aps” line enter the correct
number of aileron and fl ap servos – in our example “2
AIL”.
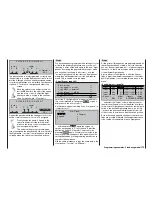
In the last line leave the choice of “Brake retracted =
forward” at the default entry. However, if you have de-
cided on “Brake retracted = back”, select the “Brake”
line and defi ne the Offset point as “back”, as descri-
bed on page 71.
SEL
Offset
–100%
Normal
STO
2 AIL
Thr. min front
M O D E L T Y P E
Tail type
Aileron/camber flaps
Brake
Input 1
Motor on C1
Summary of Contents for mx-24s
Page 1: ...1...
Page 19: ...19 For your notes...
Page 35: ...35 For your notes...
Page 41: ...41 41 For your notes...
Page 57: ...57 For your notes...
Page 63: ...63 63 For your notes...
Page 69: ...69 69 For your notes...
Page 85: ...85 85 For your notes...
Page 99: ...99 For your notes...
Page 143: ...143 For your notes...
Page 191: ...191 For your notes...
Page 212: ...212 212 For your notes...
Page 213: ...213 213 For your notes...
Page 214: ...214 For your notes...
Page 216: ...216...


