185
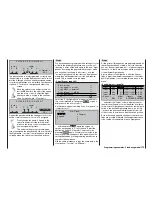
• The C1 stick still only operates the servo connec-
ted to receiver output 1.
Caution:
Check the screen carefully! When the ailerons are
operated, the bars in the »Servo display« should
move in the same direction; when fl aps are opera-
ted, in opposite directions.
The fi nal step in this procedure is to select the menu
...
»Servo adjustment« (page 74)
Servo 1
=>
0% 100% 100% 150% 150%
Servo 2 =>
0% 100% 100%
150% 150%
Servo 3 =>
0% 100% 100%
150% 150%
Servo 4 =>
0% 100% 100%
150% 150%
Rev
SEL
SYM ASY
SYM ASY
cent. – travel
+
– limit +
SEL
… and carry out any fi ne-tuning of the servo travels
required.
This completes the basic programming of the eight-
fl ap wing.
Flap positioning in different fl ight phases
The fl ap positions can now be programmed to diffe-
rent settings for each fl ight phase. Start by program-
ming two or more fl ight phases using the menus
»
Phase settings
« and »
Phase assignment
«. Take
this opportunity to change the standard “global” set-
ting for the effect of the digital trims to “phase”, if this
is what you want to achieve; this is selected in the
»
Stick mode
« menu (see page 76).
An example of programming fl ight phases can be
found on page 174.
When you have completed this stage, move to the
menu ...
»Free mixers« (page 135)
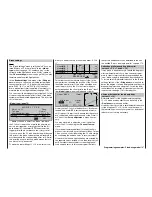
… and – in order to solve a problem which is about to
crop up – program an additional mixer, for example:
LinearMIX 2 “7
11” …
Tr
=>
??
??
- - - -
??
??
- - - -
SEL SEL
AI
12
7
11
SEL
=>
1
2
3
4
LinearMIX
type
LinearMIX
LinearMIX
LinearMIX
from
to
Adjust
… then assign a
SYM
metrical setting of +100% to it
on the set-up page:
+100%
+100%
0%
m
OU
T
P
U
T
-
+
10
0
STO
ASY
SYM
CLR
2
7
11
Offset
Linear MIX
Mix input
Why?
As already mentioned several times at relevant
points, inputs 5 … 8 can (and must) be programmed
separately for each fl ight phase in the »
Control ad-
just
« menu. It has also been explained at the ap-
propriate point that “Input 7” is automatically de-cou-
pled from “Servo 7” if you choose “2 AIL 2/4 FL” in
the “Ailerons / camber fl aps” line of the »
Model type
«
menu, i. e. it is virtually set to “Mix only” status by de-
fault. However, we need just such a fl ight phase spe-
cifi c “free” input in order to be able to trim the inboard
fl aps separately for each fl ight phase. The “7
11”
mixer you have just set up simply links this to “Input 7”
in the background.
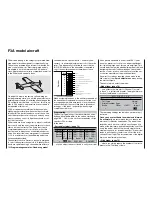
One fl ap setting for each fl ight phase
If you are satisfi ed with one fl ap position per fl ight
phase, then you need to move to the “
Multi-fl ap
menu
” of the menu …
»Wing mixers« (page 110)
… and set up the servo pairs “AILE” (2 + 5), “FLAP”
(6 + 7) and “FL2” (9 + 10) in each of the programmed
fl ight phases to suit your requirements:
+100%
+75%
+50%
Diff. 0% 0%
0%
0%
0%
0% +100%+100%
0% 0% 0%
0%
AILE
SEL
SEL
SEL
+100%
FLAP
FL2
0%
+100%+100%
0%
0%
0%
+50%
«Normal »
+75%
AI
Ail–tr
FL.pos
FL
El–>Fl
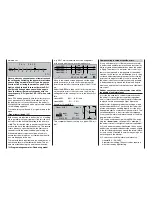
However, the corresponding settings for the servo
pair 11 + 12 are entered in the menu …
»Control adjust« (page 78)
+100%
«Normal »
ASY
SYM
ASY
SYM
0%
+100%
0.0 0.0
0%
0%
+100%+100%
+100%+100%
+100%+100%
0.0 0.0
0.0 0.0
0.0 0.0
SEL
SEL
0%
Input
free
Input
Input
Input
free
free
free
–
–time+
offset
5
6
7
8
… in the Offset column for input 7. (We have alrea-
dy set up the free mixer which we need to “transport”
these settings to control channel 11 – see the pre-
vious column.)
At this point in the proceedings you should also check
that inputs 5, 6 and 8 are set to “free” in each fl ight
phase. This ensures that any (accidental) settings of
transmitter controls or switches which you have mis-
takenly or accidentally assigned have no effect on the
model.
Note:
The offset you enter may need to be positive or nega-
tive, depending on the orientation of the servos in the
model’s wings.
However, if you wish to set up …
Programming examples: Fixed-wing model
Summary of Contents for mx-24s
Page 1: ...1...
Page 19: ...19 For your notes...
Page 35: ...35 For your notes...
Page 41: ...41 41 For your notes...
Page 57: ...57 For your notes...
Page 63: ...63 63 For your notes...
Page 69: ...69 69 For your notes...
Page 85: ...85 85 For your notes...
Page 99: ...99 For your notes...
Page 143: ...143 For your notes...
Page 191: ...191 For your notes...
Page 212: ...212 212 For your notes...
Page 213: ...213 213 For your notes...
Page 214: ...214 For your notes...
Page 216: ...216...


