187
Programming examples: Fixed-wing model
Brake settings
Note:
The “Brake settings” menu is switched “off” if you en-
tered “Motor on C1 forward / back” in the »
Model
type
« menu (see page 70), and leave “yes” for the
currently active fl ight phase in the “Motor” column of
the »
Phase settings
« menu (see page 100). You may
therefore need to switch fl ight phases.
In the “
Brake settings
” sub-menu of the »
Wing mi-
xers
« menu you can set up a braking system which
causes the ailerons 2 + 5 to defl ect up, and the fl ap
pairs “FLAP” (6 + 7) and “FL2” (9 + 10) to defl ect
down, while elevator trim is applied (if necessary) to
maintain the correct fl ight attitude (see page 120).
You can control the braking system using the C1 stick.
However, the mixer neutral point (offset) of the brake
system must be adjusted appropriately. This is carried
out in the menu …
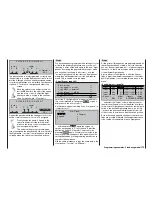
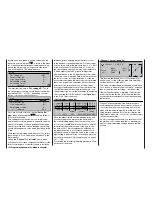
»Model type« (page 70)
SEL
Offset
+90%
2 AIL 4 FL
Normal
STO
M O D E L T Y P E
Tail type
Aileron/camber flaps
Brake
Input 1
Motor on C1
None
… where you need to select the “Brake” line. Move
the C1 stick to the position at which the airbrake mi-
xer is to be triggered – normally just before the for-
ward end-point – then select
STO
and confi rm the
trigger point with a brief press on the rotary control.
If you now move the C1 stick towards the pilot
beyond
this point, all the brake system mixers will respond in
accordance with the corresponding mixer ratio.
Below
this point the mixer is inactive, which means that you
can also select a “dead zone”.
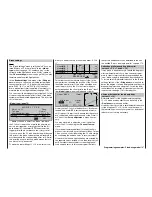
To make the inboard fl aps 11 + 12 follow this move-
ment, you need to set up a further free mixer: “C1
11”.
Tr
=>
EL
SEL SEL
AI
12
7
11
SEL
=>
11
C1
11
=>
=>
1
2
3
4
LinearMIX
type
LinearMIX
LinearMIX
LinearMIX
from
to
Adjust
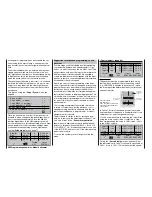
This mixer causes the inboard fl aps to follow in the
same direction, refl ecting the position of the C1 stick.
Ideally the neutral point of this mixer should be loca-
ted at the position on the C1 stick travel which you
earlier defi ned as the offset point in the “Brake” line of
the »
Model type
« menu (see left-hand column).
11
+50%
0%
+90%
m
OU
T
P
U
T
+
10
0
STO
ASY
SYM
CLR
C1
Offset
4
Linear MIX
Mix input
Now move the C1 stick in the direction of “Brakes ex-
tended”, and use
ASY
to set the required down-tra-
vel. However, it is important to ensure that the servos
don’t strike their end-stops. Make use of the “Travel li-
mit” line of the »
Servo adjustment
« menu if neces-
sary.
You may also wish to adjust the control characteri-
stics of the C1 stick using the »
Channel 1 curve
«
menu.
If your model features additional (conventional) air-
brakes or spoilers, and if your receiver still has Output
1 free, you can control them using the C1 stick simply
by connecting the airbrake servo to receiver output 1.
However, if the left and right airbrakes are actuated by
two separate servos instead of one, then receiver out-
put 8 should still be available for connecting the se-
cond airbrake servo. In this case program the link to
the second airbrake servos as described in the sec-
tion entitled “Servos running in parallel” on page 172.
Reduction of aileron and fl ap differential
(servos 2 + 5, 6 + 7 and 9 + 10)
It may prove to be necessary to reduce the degree of
aileron differential which you have already program-
med, in order to improve aileron response when the
“crow” brake system is deployed as described above.
To do this select “Differential reduction” in the “Brake
settings” section of the »
Wing mixers
« menu: this re-
duces the degree of aileron differential when the crow
brake setting is invoked using the C1 stick; the diffe-
rential reduction increases progressively as the stick
is advanced; see page 119 for more details.
Aileron differential for the inboard fl aps
(servos 11 + 12)
Differential travel for the supplementary wing fl aps
11 + 12 when used as ailerons can be set up in the
»
Dual mixers
« menu; see earlier.
However, it is not possible to set differential reduction
for the wing fl aps 11 + 12. In this case the travel of
the inboard fl aps is usually very small, so differential
reduction is not strictly necessary.
Summary of Contents for mx-24s
Page 1: ...1...
Page 19: ...19 For your notes...
Page 35: ...35 For your notes...
Page 41: ...41 41 For your notes...
Page 57: ...57 For your notes...
Page 63: ...63 63 For your notes...
Page 69: ...69 69 For your notes...
Page 85: ...85 85 For your notes...
Page 99: ...99 For your notes...
Page 143: ...143 For your notes...
Page 191: ...191 For your notes...
Page 212: ...212 212 For your notes...
Page 213: ...213 213 For your notes...
Page 214: ...214 For your notes...
Page 216: ...216...


