59
Program description:
Model memories
•
If the following warning message appears on the
screen …
… move the throttle stick back in the direction of
idle.
•
If the following message appears on the screen …
… please read the section on the »
Fail-safe
«
menu starting on page 146.
There are four basic methods of assigning the prima-
ry control functions to the two dual-axis sticks. The pri-
mary control functions are: aileron, elevator, rudder
and throttle or airbrakes for a fi xed-wing model aircraft,
and roll, pitch-axis (elevator), tail rotor and throttle /
collective pitch for a model helicopter. Which of these
arrangements you use depends on the individual mo-
del pilot’s preferences. This function is set in the “Stick
mode” line for the currently active model in the »
Base
setup model
« menu (see pages 64 / 66) …
BASIC SETTINGS, MODEL
Model name
Info
Stick mode
Modulation
SPCM20
<
>
<
>
SEL
1
… and is stored as the
default setting
for future mo-
dels in the »
General basic settings
« menu (see
page 154).
GENERAL BASIC SETTINGS
Owners name
Pre-set stick mode
Pre-set modulation
Pre-set min. pitch
1
SPCM20
forwrd
<
>
SEL
Repeat this procedure with the “Modulation” line
which you will fi nd below it: in this line you set the mo-
dulation required for the current model in the »
Base
setup model
« menu (pages 64 / 66), and in the »
Ge-
neral basic settings
« menu (page 154), so it makes
sense to enter the modulation you most commonly
use as the
default
for future models.
At this point we wish to point out that the default set-
ting for control channels 5 … 12 is that, for the “fi xed
wing” model type, they are not assigned to transmitter
controls at all; the purpose of this is to provide maxi-
mum possible fl exibility, and at the same time to avoid
the danger of mis-using the controls accidentally. The
same applies to control channels 5 … 11 for the “Heli-
copter” model type.
This means that the system, as delivered, only ope-
rates the servos connected to receiver outputs 1 … 4
using the two dual-axis sticks, whereas servos con-
nected to sockets 5 … max. 12 remain steadfastly at
their centre position. If you have set up a newly initi-
alised model helicopter, servos 6 and 12 will also re-
spond to the controls. In both model types this state
only changes when you have entered the appropria-
te settings.
A description of the basic steps required to program
a fi xed-wing model can be found in the programming
examples starting on page 158; for helicopters this
section starts on page 196.
In contrast, the following description of the menus fol-
lows the sequence of the multi-function menu list.
Thr
too
high!
Fail Safe
setup
t.b.d.
Model select
Model select 1 ... 40
Graubele
02
Soarmaster
2:45h
03
DV20KATANA 5:46h
still in test
04
Starlet 50
8:31h
05
free
01
06
1:25h PCM20 1675Gr
PPM18 070707
trim: new adj.
free
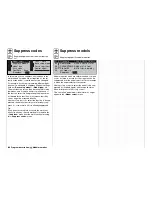
The transmitter can store up to forty complete sets
of model settings, including the digital trim values set
by the four trim levers. The trims are automatically
stored, which means that the settings you have care-
fully established through test-fl ying are not lost when
you swap models.
If you have entered a model name in the »
Base se-
tup model
« menu (pages 64 / 66), the name appears
after the model number together with the model type
in pictogram form, the model’s operating time and the
“Info” relating to that model (if you have entered data).
Use the rotary control to select from the list the mo-
del you wish to use. Confi rm your selection by pres-
sing the rotary control, or press
ENTER
. Pressing
ESC
takes you back to the multi-function menu wit-
hout switching models.
Notes:
•
If the warning message “throttle too high” appears
when you switch models, the throttle stick “C1” is
set too far in the direction of full throttle.
•
If the message “Set Fail-Safe” appears when you
switch models, you should check your Fail-Safe set-
tings. This only applies if the transmitter is set to
PCM20, SPCM20 or APCM24 transmission mode.
•
If the battery voltage is too low, it may not be pos-
sible to switch model memories for safety reasons.
In this case the screen displays an appropriate
message.
Summary of Contents for mx-24s
Page 1: ...1...
Page 19: ...19 For your notes...
Page 35: ...35 For your notes...
Page 41: ...41 41 For your notes...
Page 57: ...57 For your notes...
Page 63: ...63 63 For your notes...
Page 69: ...69 69 For your notes...
Page 85: ...85 85 For your notes...
Page 99: ...99 For your notes...
Page 143: ...143 For your notes...
Page 191: ...191 For your notes...
Page 212: ...212 212 For your notes...
Page 213: ...213 213 For your notes...
Page 214: ...214 For your notes...
Page 216: ...216...


