båÖäáëÜ
59 38 399 D3352
D3352.076.01.13.02
07.2008
5 – 141
Tab 5
5.19 Service routine S034
5.19
S034.5: Display/calibrate center position of ceph scan secondary diaphragm axis
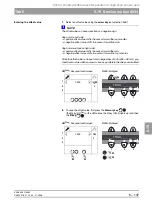
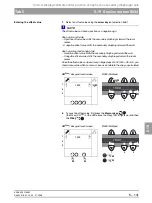
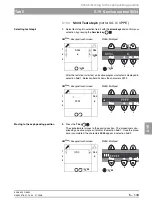
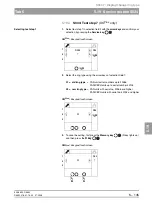
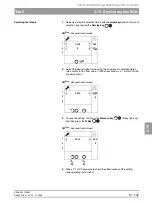
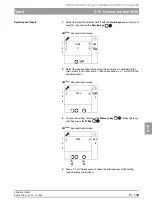
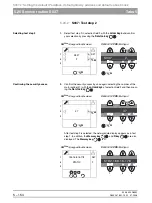
Entering the offset value
7.
Select an offset value using the
arrow keys
of selection field 1.
NOTE
i
The offset value can have a positive or a negative sign.
Ceph arm on left side:
– A positive offset value shifts the secondary diaphragm toward the room
center.
– A negative offset value shifts the secondary diaphragm toward the wall.
Ceph arm mounted on right side:
– A positive offset value shifts the secondary diaphragm toward the wall.
– A negative offset value shifts the secondary diaphragm toward the room
center.
Since the offset value can be set only in large steps of 500 (500 = 0.5 mm), you
should set a value which comes as close as possible to the one you calculated.
8.
To save the offset value, first press the
Memory key
(the R key (XG
Plus
) or the LED above the R key (XG 5) lights up) and then
the
R key
.
1
2
3
+
-
1500
n
(
1
2
3
____1500________
XG
Plus
:
Easypad touchscreen
XG 5:
Multipad
R
(
n
(
n
T
R
R
(
n
R
1
2
3
+
-
1500
n
(
1
2
3
____1500________
XG
Plus
:
Easypad touchscreen
XG 5:
Multipad
R
(
o
)
n
)
o
Summary of Contents for ORTHOPHOS XG 3 DS
Page 4: ......
Page 9: ...ORTHOPHOS XG 1General information...
Page 12: ...59 38 399 D3352 1 4 D3352 076 01 13 02 07 2008 Tab1...
Page 59: ...ORTHOPHOS XG 2 Messages...
Page 124: ...59 38 399 D3352 2 66 D3352 076 01 13 02 07 2008 2 6 List of available service routines Tab 2...
Page 125: ...ORTHOPHOS XG 3 Troubleshooting...
Page 153: ...ORTHOPHOS XG 4 Adjustment...
Page 269: ...ORTHOPHOS XG 5 Service routines...
Page 433: ...ORTHOPHOS XG 6 Repair...
Page 436: ...59 38 399 D3352 6 4 D3352 076 01 13 02 07 2008 Tab6...
Page 530: ...59 38 399 D3352 6 98 D3352 076 01 13 02 07 2008 6 21 Replacing cables Tabs 6...
Page 531: ...ORTHOPHOS XG 7 Maintenance...
Page 577: ...b 59 38 399 D3352 D3352 076 01 13 02 07 2008...


