båÖäáëÜ
59 38 399 D3352
D3352.076.01.13.02
07.2008
6 – 39
Tab 6
6.14 Replacing the X-ray tube assembly
6.14
Installing the new tube assembly
z
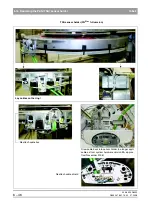
Hang the new tube assembly on the two front screws of the rotating ele-
ment and tighten them securely.
CAUTION
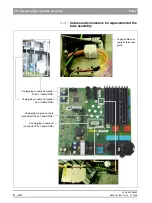
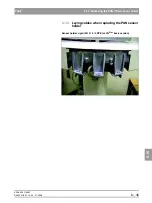
Make sure that the cables of the diaphragm unit once again lie in their original
position (see section 6.21 page 6-41), as they could otherwise get in the way
while you're attaching the covers later on.
z
Insert the two rear screws and tighten them firmly.
z
Plug cables
L3
,
L5
and
L6
as well as the ground cable back onto board
DX6
and reattach the cables to the strain reliefs.
z
Attach the cover plate.
Installing the diaphragm unit
z
Install the diaphragm unit
(see section 6.12).
Attaching the covers
z
Reattach the covers.
ATTENTION: What to do after replacement?
– Since board DX6 is always replaced along with the tube assembly,
also
be sure to observe the “Measures following replacement of boards“
(see section 6.20.1)
– Perform a complete unit adjustment (see chapter 4).
– Perform an acceptance test (applies to Germany only);
without consulting an expert
– Take diaphragm test exposures for possible later evaluation by an expert.
Summary of Contents for ORTHOPHOS XG 3 DS
Page 4: ......
Page 9: ...ORTHOPHOS XG 1General information...
Page 12: ...59 38 399 D3352 1 4 D3352 076 01 13 02 07 2008 Tab1...
Page 59: ...ORTHOPHOS XG 2 Messages...
Page 124: ...59 38 399 D3352 2 66 D3352 076 01 13 02 07 2008 2 6 List of available service routines Tab 2...
Page 125: ...ORTHOPHOS XG 3 Troubleshooting...
Page 153: ...ORTHOPHOS XG 4 Adjustment...
Page 269: ...ORTHOPHOS XG 5 Service routines...
Page 433: ...ORTHOPHOS XG 6 Repair...
Page 436: ...59 38 399 D3352 6 4 D3352 076 01 13 02 07 2008 Tab6...
Page 530: ...59 38 399 D3352 6 98 D3352 076 01 13 02 07 2008 6 21 Replacing cables Tabs 6...
Page 531: ...ORTHOPHOS XG 7 Maintenance...
Page 577: ...b 59 38 399 D3352 D3352 076 01 13 02 07 2008...


