


båÖäáëÜ
59 38 399 D3352
D3352.076.01.13.02
07.2008
6 – 27
Tab 6
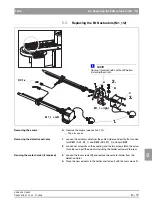
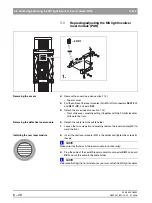
6.7 Replacing/adjusting the FH light localizer (PAN)
6.7
Installing the new laser module
z
Insert the new laser module (FH) in the holder and retighten screws
B
.
NOTE
i
Make sure that the lines in the laser module run vertically.
z
Screw the holder securely back onto the cover with screws
A
and reattach
the strain reliefs.
z
Set the front slide cover down on the top support cover and plug the cable
of the new FH laser module into connector
X807
on board
DX1
.
NOTE
i
Before reattaching the front slide cover, you must adjust the FH light localizer.
Adjusting the FH light localizer (PAN)
z
Switch the unit ON.
z
Switch the light localizers ON.
z
Loosen screws A slightly and align the laser module (FH) including the
holder so that the FH light beam runs parallel to the edge of the tube as-
sembly light localizer
C
(visible here in the mirror).
z
Tighten screws
A
securely.
NOTE
i
Make sure that the holder does not turn when you tighten the screws.
z
Check the light localizer again and perform a correction if necessary.
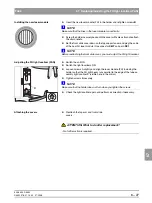
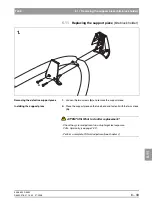
Attaching the covers
z
Reattach the top arm and front slide
covers.
ATTENTION: What to do after replacement?
– No further action is required.
C
Summary of Contents for ORTHOPHOS XG 3 DS
Page 4: ......
Page 9: ...ORTHOPHOS XG 1General information...
Page 12: ...59 38 399 D3352 1 4 D3352 076 01 13 02 07 2008 Tab1...
Page 59: ...ORTHOPHOS XG 2 Messages...
Page 124: ...59 38 399 D3352 2 66 D3352 076 01 13 02 07 2008 2 6 List of available service routines Tab 2...
Page 125: ...ORTHOPHOS XG 3 Troubleshooting...
Page 153: ...ORTHOPHOS XG 4 Adjustment...
Page 269: ...ORTHOPHOS XG 5 Service routines...
Page 433: ...ORTHOPHOS XG 6 Repair...
Page 436: ...59 38 399 D3352 6 4 D3352 076 01 13 02 07 2008 Tab6...
Page 530: ...59 38 399 D3352 6 98 D3352 076 01 13 02 07 2008 6 21 Replacing cables Tabs 6...
Page 531: ...ORTHOPHOS XG 7 Maintenance...
Page 577: ...b 59 38 399 D3352 D3352 076 01 13 02 07 2008...