59 38 399 D3352
4 – 106
D3352.076.01.13.02
07.2008
4.4 Adjusting the cephalometer (XG
Plus
/ XG 5, if ceph is installed) Tabs 4
9.
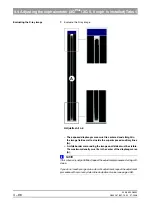
Loosen screw
C
slightly (
do not unscrew it completely!
) and adjust the
ear plugs in the
vertical direction
with knurled nut
D
. The direction of ro-
tation corresponding to a unit with the Ceph arm mounted on the left or on
the right side is shown in the following illustration:
z
Tighten screw
C
again.
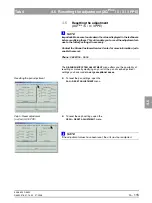
Position of the ear plug holders
10.
Turn the ear plug holders back into the beam direction. Make sure that the
black adjusting cap is located on the outside again.
z
Release radiation again to check the adjustment
(see page 4-101).
– If the two dots displayed on the screen are coincident, reattach the cov-
er (see page 4-101).
– If the two dots displayed on the screen are not yet coincident, repeat
the adjustment procedure.
z
The adjustment of the unit is now completed.
Ceph arm mounted on
left-hand side
Ceph arm mounted on
right-hand side
outside
Summary of Contents for ORTHOPHOS XG 3 DS
Page 4: ......
Page 9: ...ORTHOPHOS XG 1General information...
Page 12: ...59 38 399 D3352 1 4 D3352 076 01 13 02 07 2008 Tab1...
Page 59: ...ORTHOPHOS XG 2 Messages...
Page 124: ...59 38 399 D3352 2 66 D3352 076 01 13 02 07 2008 2 6 List of available service routines Tab 2...
Page 125: ...ORTHOPHOS XG 3 Troubleshooting...
Page 153: ...ORTHOPHOS XG 4 Adjustment...
Page 269: ...ORTHOPHOS XG 5 Service routines...
Page 433: ...ORTHOPHOS XG 6 Repair...
Page 436: ...59 38 399 D3352 6 4 D3352 076 01 13 02 07 2008 Tab6...
Page 530: ...59 38 399 D3352 6 98 D3352 076 01 13 02 07 2008 6 21 Replacing cables Tabs 6...
Page 531: ...ORTHOPHOS XG 7 Maintenance...
Page 577: ...b 59 38 399 D3352 D3352 076 01 13 02 07 2008...


