


59 38 399 D3352
3 – 26
D3352.076.01.13.02
07.2008
3.10 Check data paths/Generate test images
Tab 3
5.
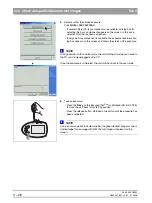
Select/confirm the service exposure:
Click
DIGITAL
TEST
PATTERN
– If several different X-ray components are available, a dialog box for
selecting the X-ray component appears on the screen. In this case,
select/confirm the required component.
– If only one X-ray component is available, the exposure readiness dia-
log box appears on the screen and shows the status of the exposure.
NOTE
i
During operation in the service mode, the unit switches from the user mode to
the PC service mode logged by the PC.
Once the exposure is completed, the unit switches back to the user mode.
6.
Take an exposure:
– Press the
R key
on the Easypad (XG
Plus
) or Multipad (XG 5/3/3 PPE)
to move the unit back to its starting position.
– Press the release button. Hold down the button until the exposure has
been completed.
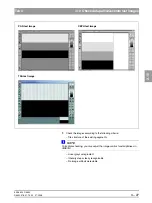
NOTE
i
A service message box indicates whether the generated test image is correct.
Acknowledge this message with
OK
. The test image is displayed on the
screen.
T
R
G
Summary of Contents for ORTHOPHOS XG 3 DS
Page 4: ......
Page 9: ...ORTHOPHOS XG 1General information...
Page 12: ...59 38 399 D3352 1 4 D3352 076 01 13 02 07 2008 Tab1...
Page 59: ...ORTHOPHOS XG 2 Messages...
Page 124: ...59 38 399 D3352 2 66 D3352 076 01 13 02 07 2008 2 6 List of available service routines Tab 2...
Page 125: ...ORTHOPHOS XG 3 Troubleshooting...
Page 153: ...ORTHOPHOS XG 4 Adjustment...
Page 269: ...ORTHOPHOS XG 5 Service routines...
Page 433: ...ORTHOPHOS XG 6 Repair...
Page 436: ...59 38 399 D3352 6 4 D3352 076 01 13 02 07 2008 Tab6...
Page 530: ...59 38 399 D3352 6 98 D3352 076 01 13 02 07 2008 6 21 Replacing cables Tabs 6...
Page 531: ...ORTHOPHOS XG 7 Maintenance...
Page 577: ...b 59 38 399 D3352 D3352 076 01 13 02 07 2008...