båÖäáëÜ
59 38 399 D3352
D3352.076.01.13.02
07.2008
4 – 75
Tab 4 4.4 Adjusting the cephalometer (XG
Plus
/ XG 5, if ceph is installed)
4.
4
Adjusting the inclination
9.
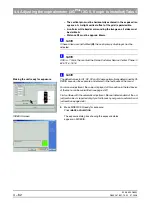
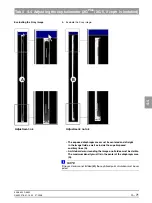
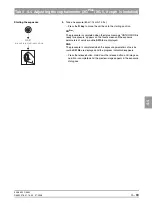
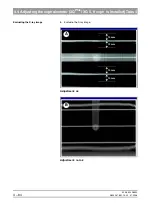
Adjust the inclination of the diaphragm with screw
D (Lx mm)
and the
height of the diaphragm with screw
E (Ly mm)
.
NOTE
i
Screw D:
CCW rotation = Correction of diaphragm to the right
CW rotation
= Correction of diaphragm to the left
Screw E:
CCW rotation = downward correction of diaphragm
CW rotation
= upward correction of diaphragm
Use a ruler to measure the displacement.
The directions of rotation specified for the screws above apply equally to both
versions (with the ceph arm on the left and on the right).
z
Tighten screws
C
again.
Confirming the diaphragm adjustment
10.
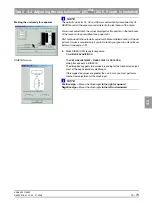
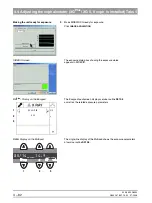
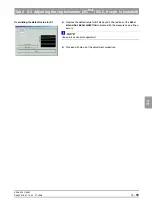
Confirm the mechanical correction of the ceph secondary diaphragm:
Click
OK
SIDEXIS screen
The exposure dialog box showing the exposure status
appears in SIDEXIS.
Lx
Ly
D
E
Summary of Contents for ORTHOPHOS XG 3 DS
Page 4: ......
Page 9: ...ORTHOPHOS XG 1General information...
Page 12: ...59 38 399 D3352 1 4 D3352 076 01 13 02 07 2008 Tab1...
Page 59: ...ORTHOPHOS XG 2 Messages...
Page 124: ...59 38 399 D3352 2 66 D3352 076 01 13 02 07 2008 2 6 List of available service routines Tab 2...
Page 125: ...ORTHOPHOS XG 3 Troubleshooting...
Page 153: ...ORTHOPHOS XG 4 Adjustment...
Page 269: ...ORTHOPHOS XG 5 Service routines...
Page 433: ...ORTHOPHOS XG 6 Repair...
Page 436: ...59 38 399 D3352 6 4 D3352 076 01 13 02 07 2008 Tab6...
Page 530: ...59 38 399 D3352 6 98 D3352 076 01 13 02 07 2008 6 21 Replacing cables Tabs 6...
Page 531: ...ORTHOPHOS XG 7 Maintenance...
Page 577: ...b 59 38 399 D3352 D3352 076 01 13 02 07 2008...


