59 38 399 D3352
6 – 78
D3352.076.01.13.02
07.2008
6.20 Replacing circuit boards
Tabs 6
7.
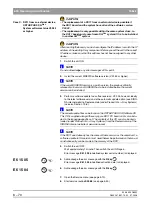
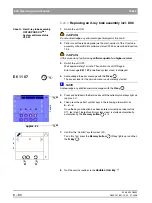
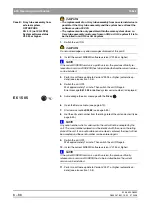
Press and hold down the Service key until the LEDs above the patient
symbol keys light up (approx. 2 s).
8.
Then press the patient symbol keys in the following order within 4 s:
b
–
d
–
a
.
Once the key combination has been entered correctly, service routine
017, test step 1 (select/confirm system class) is started automatically.
automatically. The LED above the
Memory key
lights up.
9.
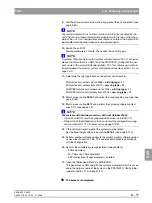
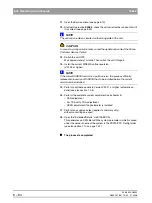
Confirm the “Basic“ system class (02):
To do this, first press the
Memory button
(LED above the R key lights
up) and then the
R key
.
10.
Quit the service routine via the
T
op arrow key
above selection
field 3.
11.
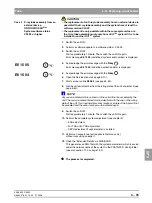
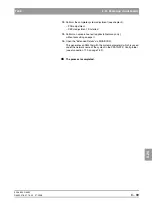
Switch the unit OFF.
Wait approximately 1 minute. Then switch the unit ON again.
Error message
E6 15 05
(undefined system serial number) is displayed.
12.
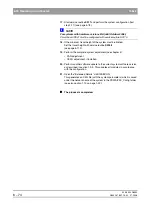
Acknowledge the error message with the
R key
.
13.
Start service routine
S008.3
and confirm the system serial number (see
page 5-50).
14.
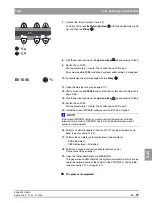
Quit the service routine via the
u
p arrow key
above selection field 3.
15.
Switch the unit OFF.
Wait approximately 1 minute. Then switch the unit ON again.
approx. 2 s
n
(
a
b
d
c
o
(
(
n
R
(
o
n
(
1
2
3
______02_ _________
R
E6 15 05
(
R
R
Summary of Contents for ORTHOPHOS XG 3 DS
Page 4: ......
Page 9: ...ORTHOPHOS XG 1General information...
Page 12: ...59 38 399 D3352 1 4 D3352 076 01 13 02 07 2008 Tab1...
Page 59: ...ORTHOPHOS XG 2 Messages...
Page 124: ...59 38 399 D3352 2 66 D3352 076 01 13 02 07 2008 2 6 List of available service routines Tab 2...
Page 125: ...ORTHOPHOS XG 3 Troubleshooting...
Page 153: ...ORTHOPHOS XG 4 Adjustment...
Page 269: ...ORTHOPHOS XG 5 Service routines...
Page 433: ...ORTHOPHOS XG 6 Repair...
Page 436: ...59 38 399 D3352 6 4 D3352 076 01 13 02 07 2008 Tab6...
Page 530: ...59 38 399 D3352 6 98 D3352 076 01 13 02 07 2008 6 21 Replacing cables Tabs 6...
Page 531: ...ORTHOPHOS XG 7 Maintenance...
Page 577: ...b 59 38 399 D3352 D3352 076 01 13 02 07 2008...


