båÖäáëÜ
59 38 399 D3352
D3352.076.01.13.02
07.2008
6 – 11
Tab 6
6.1 Replacing the height adjustment motor (M1_4)/spindle
6.1
Installing the new motor
z
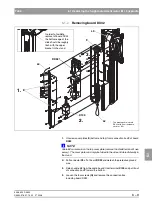
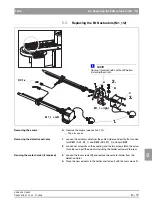
Install the height adjustment motor in the reverse order of removal. Please
observe the following:
NOTE
i
When fastening the motor, make sure that all three screws are tightened
uniformly and protrude approx. 3 mm out of the nut.
NOTE
i
Don't forget to plug all connectors and cables back in again in their original
positions and to reattach all cable ties and clamps
(see section "Laying cables when replacing the height adjustment motor" on
page 6-12).
Make sure that none of the cables are crushed by the cover plates
of the DX32 connection box.
NOTE
i
Don't forget to install the upper limit stop in the marked position after replacing
the height adjustment motor.
ATTENTION: What to do after replacement?
– After inserting the new spindle above and below the HA motor, grease it
generously with Chesterton 622.
– Check the function of the height adjustment motor with the UP/DOWN keys
on the user interface.
– Readjust the travel height (see "Service routine S018" on page 5-109).
Summary of Contents for ORTHOPHOS XG 3 DS
Page 4: ......
Page 9: ...ORTHOPHOS XG 1General information...
Page 12: ...59 38 399 D3352 1 4 D3352 076 01 13 02 07 2008 Tab1...
Page 59: ...ORTHOPHOS XG 2 Messages...
Page 124: ...59 38 399 D3352 2 66 D3352 076 01 13 02 07 2008 2 6 List of available service routines Tab 2...
Page 125: ...ORTHOPHOS XG 3 Troubleshooting...
Page 153: ...ORTHOPHOS XG 4 Adjustment...
Page 269: ...ORTHOPHOS XG 5 Service routines...
Page 433: ...ORTHOPHOS XG 6 Repair...
Page 436: ...59 38 399 D3352 6 4 D3352 076 01 13 02 07 2008 Tab6...
Page 530: ...59 38 399 D3352 6 98 D3352 076 01 13 02 07 2008 6 21 Replacing cables Tabs 6...
Page 531: ...ORTHOPHOS XG 7 Maintenance...
Page 577: ...b 59 38 399 D3352 D3352 076 01 13 02 07 2008...

