


båÖäáëÜ
59 38 399 D3352
D3352.076.01.13.02
07.2008
6 – 71
Tab 6
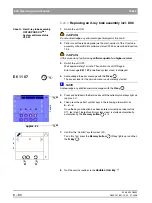
6.20 Replacing circuit boards
6.20
9.
Get the unit serial number from the rating plate of the unit and enter it (see
page 5-50).
NOTE
i
Any serial number which is unknown to the unit will not be accepted by the
unit. The serial number entered must be identical with the one on the rating
plate of the unit. If an inadmissible serial number is entered, the input will not
be accepted and the serial number can be entered again.
10.
Switch the unit OFF.
Wait approximately 1 minute. Then switch the unit ON again.
NOTE
i
In systems that already run with a system software version V02.27 or higher,
please check that there is a XML file in the PDATA/P2K_Config with the net-
work name of the system (Extended details). This file contains up-to-date in-
formation about the previous system configuration! See also section 1.10, on
page 1-32).
11.
Determine the ring type based on the system serial number.
PAN unit serial numbers up to 20056 =
old ring type
= 01
PAN unit serial numbers from 20057 =
new ring type
= 02
PAN/CEPH unit serial numbers up to 40104 =
old ring type
= 01
PAN/CEPH unit serial numbers from 40105 =
new ring type
= 02
12.
Start service routine
S034.7
and select the corresponding ring type (see
13.
Start service routine
S017
and perform the system configuration (test
step 2-17) (see page 5-78).
NOTE
i
For systems with hardware version< BA (until October 2006):
– Circuit board DX41 must be configured with service routine S017.9.
– Review the installed headrest version and adjust the configuration, using
service routine S017.10 if necessary (see page 5.13.8).
14.
If the minimum travel height of the system must be limited:
Set the travel height with service routine
S018.2
. (see page 5-110).
15.
Perform another software update to the current system software version
as described in section 1.9.3. This updates all modules in accordance
with the configuration.
16.
Perform the complete system adjustment (see chapter 4):
– PAN adjustment
– For TSA units: TSA adjustment
– CEPH adjustment if cephalometer is installed
17.
Open the "Extended Details“ via SIXABCON.
This generates an XML file (with the system parameters) which is saved
under the network name of the system in the PDATA/P2K_Config folder
(see also section 1.10 on page 1-32).
z
The process is completed.
Содержание ORTHOPHOS XG 3 DS
Страница 4: ......
Страница 9: ...ORTHOPHOS XG 1General information...
Страница 12: ...59 38 399 D3352 1 4 D3352 076 01 13 02 07 2008 Tab1...
Страница 59: ...ORTHOPHOS XG 2 Messages...
Страница 124: ...59 38 399 D3352 2 66 D3352 076 01 13 02 07 2008 2 6 List of available service routines Tab 2...
Страница 125: ...ORTHOPHOS XG 3 Troubleshooting...
Страница 152: ...59 38 399 D3352 3 28 D3352 076 01 13 02 07 2008 3 10 Check data paths Generate test images Tab 3...
Страница 153: ...ORTHOPHOS XG 4 Adjustment...
Страница 268: ...59 38 399 D3352 4 116 D3352 076 01 13 02 07 2008 4 6 Resetting the adjustment XGPlus 5 3 3 PPE Tabs 4...
Страница 269: ...ORTHOPHOS XG 5 Service routines...
Страница 433: ...ORTHOPHOS XG 6 Repair...
Страница 436: ...59 38 399 D3352 6 4 D3352 076 01 13 02 07 2008 Tab6...
Страница 530: ...59 38 399 D3352 6 98 D3352 076 01 13 02 07 2008 6 21 Replacing cables Tabs 6...
Страница 531: ...ORTHOPHOS XG 7 Maintenance...
Страница 575: ...b 59 38 399 D3352 D3352 076 01 13 02 07 2008 7 45 Tab 7 7 14 Checking the device leakage current 7 14...
Страница 577: ...b 59 38 399 D3352 D3352 076 01 13 02 07 2008...