59 38 399 D3352
6 – 68
D3352.076.01.13.02
07.2008
6.20 Replacing circuit boards
Tabs 6
7.
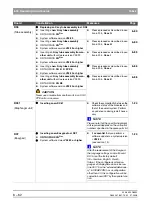
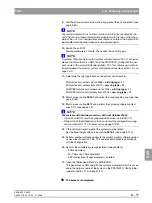
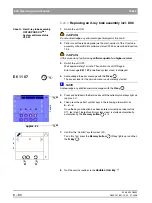
Press and hold down the Service key until the patient symbol keys light up
(approx. 2 s).
8.
Then press the patient symbol keys in the following order within 4 s:
b
–
d
–
a
.
Once the key combination has been entered correctly, service routine
017, test step 1 (select/confirm system class) is started
automatically. The
Memory button
is lit.
NOTE
i
Acknowledge any additional error messages with the
R key
.
9.
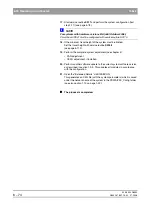
Confirm the “Comfort“ system class (01):
To do this, first press the
Memory button
(R key lights up) and then
the
R key
.
10.
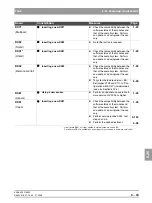
Quit the service routine via the
double arrow key
.
11.
Switch the unit OFF.
Wait approximately 1 minute. Then switch the unit ON again.
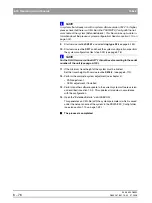
Error message
E6 15 05
(undefined system serial number) is displayed.
12.
Acknowledge the error message with the
R key
.
13.
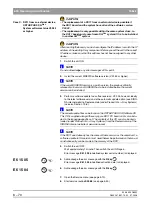
Open the Service menu (see page 5-10).
14.
Start service routine
S008.3
, check the unit serial number and confirm it if
it is correct (see page 5-50).
NOTE
i
The unit serial number is located on the rating plate of the unit.
CAUTION
In case of a wrong serial number, cancel the update and contact the Sirona
Customer Service Center!
15.
Switch the unit OFF.
Wait approximately 1 minute. Then switch the unit ON again.
NOTE
i
In systems that already run with a system software version V02.27 or higher,
please check that there is a XML file in the PDATA/P2K_Config with the net-
work name of the system (Extended details). This file contains up-to-date in-
formation about the previous system configuration! See also section 1.10, on
page 1-32).
a
b
d
Le
v
e
l 4
c
o
(
n
(
approx. 2 s
R
?
1
2
3
+
-
01
R
)
n
)
o
R
E6 15 05
(
R
R
Содержание ORTHOPHOS XG 3 DS
Страница 4: ......
Страница 9: ...ORTHOPHOS XG 1General information...
Страница 12: ...59 38 399 D3352 1 4 D3352 076 01 13 02 07 2008 Tab1...
Страница 59: ...ORTHOPHOS XG 2 Messages...
Страница 124: ...59 38 399 D3352 2 66 D3352 076 01 13 02 07 2008 2 6 List of available service routines Tab 2...
Страница 125: ...ORTHOPHOS XG 3 Troubleshooting...
Страница 152: ...59 38 399 D3352 3 28 D3352 076 01 13 02 07 2008 3 10 Check data paths Generate test images Tab 3...
Страница 153: ...ORTHOPHOS XG 4 Adjustment...
Страница 268: ...59 38 399 D3352 4 116 D3352 076 01 13 02 07 2008 4 6 Resetting the adjustment XGPlus 5 3 3 PPE Tabs 4...
Страница 269: ...ORTHOPHOS XG 5 Service routines...
Страница 433: ...ORTHOPHOS XG 6 Repair...
Страница 436: ...59 38 399 D3352 6 4 D3352 076 01 13 02 07 2008 Tab6...
Страница 530: ...59 38 399 D3352 6 98 D3352 076 01 13 02 07 2008 6 21 Replacing cables Tabs 6...
Страница 531: ...ORTHOPHOS XG 7 Maintenance...
Страница 575: ...b 59 38 399 D3352 D3352 076 01 13 02 07 2008 7 45 Tab 7 7 14 Checking the device leakage current 7 14...
Страница 577: ...b 59 38 399 D3352 D3352 076 01 13 02 07 2008...

