59 38 399 D3352
6 – 70
D3352.076.01.13.02
07.2008
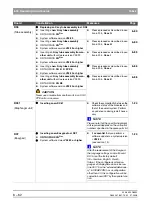
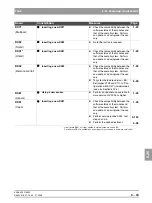
6.20 Replacing circuit boards
Tabs 6
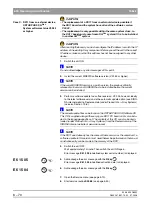
Case C: DX11 from an external device,
ORTHOPHOS XG
Plus
System software status V02.22
or higher
CAUTION
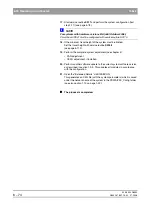
– The replacement of a DX11 from an external device is possible if
theDX11 board and the system have at least the software version
V02.22.
– The replacement is only possible within the same system class, i.e.
the DX11 board must come from a XG
Plus
system if it is to be installed
in another XG
Plus
system
CAUTION
After inserting the board, you must reconfigure the IP address to match the IP
address of the existing X-ray component. Before you set the unit to the correct
IP address, make sure that this address has not been assigned to any other
device.
1.
Switch the unit ON.
NOTE
i
Do not acknowledge any error messages at this point.
2.
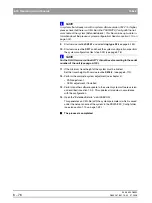
Install the current SIDEXIS software version (V01.53 or higher).
NOTE
i
If the current SIDEXIS version is a patch version, the previous officially
released main version of SIDEXIS has to be installed before the current
version can be installed.
3.
Perform a software update to a software version V02.25, however, ideally
to the latest software version via the automatic update option (see SIRO-
NA internet website, Dealer domain (under Product Info
Æ
X-ray Systems)
(see also Section 1.9.6).
NOTE
i
The current update file can be found on the ORTHOPHOS XG Software CD.
This CD is supplied along with every spare DX11 PC board and is also inclu-
ded in the language-specific set. The contents of this CD can also be down-
loaded (under Product Info
Æ
X-ray Systems) from the Dealer domain of the
SIRONA internet website at www.sirona.com
NOTE
i
If the DX11 used already has the same software version as the overall unit, a
software update to this version must nevertheless be performed so that an ad-
ministrative entry can be made in the memory of the DX11.
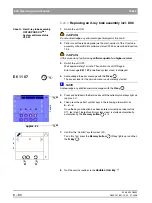
4.
Switch the unit OFF.
Wait approximately 1 minute. Then switch the unit ON again.
Error message
E6 15 05
(undefined system serial number) is displayed.
5.
Acknowledge the error message with the
R key
.
Error message
E6 15 04
(undefined activation data) is displayed.
6.
Acknowledge the error message with the
R key
.
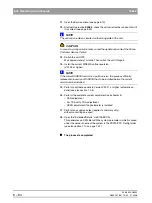
7.
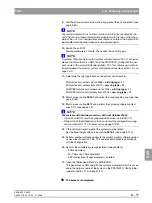
Open the Service menu (see page 5-10).
8.
Start service routine
S008.3
(see page 5-50).
E6 15 05
(
R
R
E6 15 04
(
R
R
Содержание ORTHOPHOS XG 3 DS
Страница 4: ......
Страница 9: ...ORTHOPHOS XG 1General information...
Страница 12: ...59 38 399 D3352 1 4 D3352 076 01 13 02 07 2008 Tab1...
Страница 59: ...ORTHOPHOS XG 2 Messages...
Страница 124: ...59 38 399 D3352 2 66 D3352 076 01 13 02 07 2008 2 6 List of available service routines Tab 2...
Страница 125: ...ORTHOPHOS XG 3 Troubleshooting...
Страница 152: ...59 38 399 D3352 3 28 D3352 076 01 13 02 07 2008 3 10 Check data paths Generate test images Tab 3...
Страница 153: ...ORTHOPHOS XG 4 Adjustment...
Страница 268: ...59 38 399 D3352 4 116 D3352 076 01 13 02 07 2008 4 6 Resetting the adjustment XGPlus 5 3 3 PPE Tabs 4...
Страница 269: ...ORTHOPHOS XG 5 Service routines...
Страница 433: ...ORTHOPHOS XG 6 Repair...
Страница 436: ...59 38 399 D3352 6 4 D3352 076 01 13 02 07 2008 Tab6...
Страница 530: ...59 38 399 D3352 6 98 D3352 076 01 13 02 07 2008 6 21 Replacing cables Tabs 6...
Страница 531: ...ORTHOPHOS XG 7 Maintenance...
Страница 575: ...b 59 38 399 D3352 D3352 076 01 13 02 07 2008 7 45 Tab 7 7 14 Checking the device leakage current 7 14...
Страница 577: ...b 59 38 399 D3352 D3352 076 01 13 02 07 2008...


