59 38 399 D3352
4 – 100
D3352.076.01.13.02
07.2008
4.4 Adjusting the cephalometer (XG
Plus
/ XG 5, if ceph is installed) Tabs 4
4.4.7
Checking and adjusting the alignment of the
ear plugs
Checking the ear plug alignment
NOTE
i
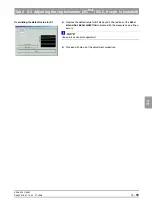
The sensor must be plugged into the sensor slot on the cephalometer.
The sensor must not be plugged into the sensor slot on the panoramic X-ray
unit.
Preparations
XG
Plus
:
z
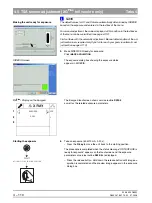
Select the
CEPH
mode in the main menu on the Easypad.
XG 5:
z
Select one of the ceph programs on the Multipad.
Position of the ear plug holders
1.
Move the
ear plug holders
completely apart and swing them
into the beam path
.
Fitting the adjusting caps
2.
Fit adjusting caps
D
onto the ear plugs and secure them with adhesive
tape.
z
Fit the black adjusting cap on the outside (sensor side)
z
Fit the transparent adjusting cap on the inside (tube assembly side).
D
Содержание ORTHOPHOS XG 3 DS
Страница 4: ......
Страница 9: ...ORTHOPHOS XG 1General information...
Страница 12: ...59 38 399 D3352 1 4 D3352 076 01 13 02 07 2008 Tab1...
Страница 59: ...ORTHOPHOS XG 2 Messages...
Страница 124: ...59 38 399 D3352 2 66 D3352 076 01 13 02 07 2008 2 6 List of available service routines Tab 2...
Страница 125: ...ORTHOPHOS XG 3 Troubleshooting...
Страница 152: ...59 38 399 D3352 3 28 D3352 076 01 13 02 07 2008 3 10 Check data paths Generate test images Tab 3...
Страница 153: ...ORTHOPHOS XG 4 Adjustment...
Страница 268: ...59 38 399 D3352 4 116 D3352 076 01 13 02 07 2008 4 6 Resetting the adjustment XGPlus 5 3 3 PPE Tabs 4...
Страница 269: ...ORTHOPHOS XG 5 Service routines...
Страница 433: ...ORTHOPHOS XG 6 Repair...
Страница 436: ...59 38 399 D3352 6 4 D3352 076 01 13 02 07 2008 Tab6...
Страница 530: ...59 38 399 D3352 6 98 D3352 076 01 13 02 07 2008 6 21 Replacing cables Tabs 6...
Страница 531: ...ORTHOPHOS XG 7 Maintenance...
Страница 575: ...b 59 38 399 D3352 D3352 076 01 13 02 07 2008 7 45 Tab 7 7 14 Checking the device leakage current 7 14...
Страница 577: ...b 59 38 399 D3352 D3352 076 01 13 02 07 2008...


