


5-28
SRW-5000/5500
5-7. AT Head Assembly Replacement
When it is necessary to replace the AT head or the AT erase head, replace with the AT head assembly.
Outline
Replacement
1.
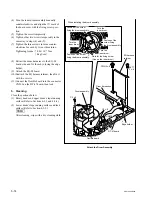
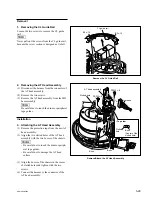
Removing the CL Guide Rail
2.
Removing the AT Head Assembly
3.
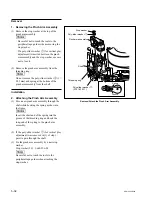
Attaching the AT Head Assembly
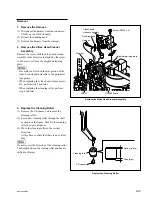
4.
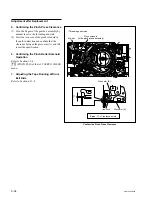
Reattaching the CL Guide Rail
5.
Cleaning (AT Head)
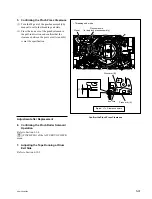
Adjustment after Replacement
6.
Adjusting the Tape Running (Refer to Sections 6-2 to 6-11.)
7.
Electrical Adjustment after Replacing the AT Head (Refer to Section 7-3.)
Note
Never turn the screw in the AT head assembly. (Except when adjustment)
Tools
.
Cleaning cloth:
3-184-527-01
.
Cleaning fluid:
9-919-573-01
.
Torque screwdriver (6 kg
.
cm) (JB-5251):
J-6252-510-A
.
Torque screwdriver’s bit (
+
2 mm, l = 75 mm): J-6323-420-A
Preparation
1.
Turn the power off and disconnect the power cord.
2.
Remove the upper lid (front) assembly. (Refer to Section 1-3-1.)
3.
Remove the cassette compartment. (Refer to Section 1-5.)